> ## Documentation Index
> Fetch the complete documentation index at: https://translations.mintlify.site/llms.txt
> Use this file to discover all available pages before exploring further.
# Universal Portals Quickstart
> Learn how to set up your first portal using the Auth0 CLI, Auth0 Agent Skills, or the Dashboard.
export const ReleaseStageNotice = ({feature, stage, plans, contact, terms}) => {
const stageTextMap = {
"beta": "Beta",
"ea": "Early Access"
};
const stageText = stageTextMap[stage] || "a product release stage";
const prsLink = "/docs/troubleshoot/product-lifecycle/product-release-stages";
const linkify = (text, url) => {
return {text};
};
const includeDetails = (plans, contact, terms) => {
const hasDetails = terms || plans || contact;
if (!hasDetails) return null;
return
{plans && <>This feature is available for {linkify(`${plans} plans`, "https://auth0.com/pricing")}. }
{contact && "To participate, contact " + contact + ". "}
{terms && <>By using this feature, you agree to the applicable Free Trial terms in Okta's {linkify("Master Subscription Agreement", "https://www.okta.com/legal")}.}
;
};
return
The {feature} feature is in {linkify(stageText, prsLink)}.
{includeDetails(plans, contact, terms)}
;
};
You can create a portal using:
* [Auth0 CLI](/docs/deploy-monitor/auth0-cli#auth0-cli) to provision and configure an application and a portal using a single command.
* [Auth0 Agent Skills](https://github.com/auth0/agent-skills) to ask your favorite AI assistant to provision and configure an application and a portal.
* The [Auth0 Dashboard](/docs/get-started/auth0-overview/dashboard#auth0-dashboard) using step-by-step instructions to build an application and a portal.
## Prerequisites
* A [Development](/docs/get-started/tenant-settings#environment-tag) Auth0 tenant provisioned with Universal Portals beta access.
## Step 1: Install the Auth0 CLI Beta
Follow the [installation instructions](https://github.com/auth0/auth0-cli/#linux-and-macos-1) for your platform, then authenticate with your tenant:
```bash theme={null}
auth0-beta login
```
## Step 2: Run the setup command
```bash theme={null}
auth0-beta universal-portals setup
```
You can also use the alias `auth0-beta up setup`. The Auth0 CLI command creates:
* **My Account API**: resource server for user account operations
* **My Organization API**: resource server for organization management operations
* **A Regular Web App**: the application linked to your portal
* **Three client grants**: scoped access for My Account, My Organization, and Management API operations
* **A portal**: pre-configured with a default template so you can start testing immediately
When the command completes, it outputs your portal URL. Open it in the browser to test the portal.
## Step 1: Install Auth0 Agent Skills
```bash theme={null}
npx skills add auth0/agent-skills
```
## Step 2: Ask your AI agent to configure Universal Portals
```bash theme={null}
configure universal portals on my auth0 tenant
```
The AI agent creates:
* **My Account API**: resource server for user account operations
* **My Organization API**: resource server for organization management operations
* **A Regular Web App**: the application linked to your portal
* **Three client grants**: scoped access for My Account, My Organization, and Management API operations
* **A portal**: pre-configured with a default template so you can start testing immediately
When the command completes, it outputs your portal URL. Open it in the browser to test the portal.
To learn more, read [Auth0 Agent Skills](https://github.com/auth0/agent-skills).
## Step 1: Create a Regular Web Application
1. Navigate to [**Auth0 Dashboard > Applications > Applications**](https://manage.auth0.com/#/applications) and select **Create Application**.
2. Choose **Regular Web Applications** and give it a name.
3. Select **Create**.
## Step 2: Configure the application
In the application **Settings** tab:
1. Set **Allowed Callback URLs** to `https://YOUR_AUTH0_DOMAIN/portals/auth/callback` and **Allowed Logout URLs** to `https://YOUR_AUTH0_DOMAIN/portals/YOUR_PORTAL_SLUG`.
2. Scroll to **Advanced Settings > Grant Types** and enable:
* Authorization Code
* Refresh Token
* Client Credentials
* MFA
3. Select **Save Changes**.
## Step 3: Configure API access
In the application **API Access** tab, enable the following APIs and their scopes:
**My Account API** (`https://YOUR_AUTH0_DOMAIN/me/`) User-Delegated Access:
| **Scope** | **Description** |
| ---------------------------------- | ----------------------------- |
| `create:me:authentication_methods` | Enroll authentication methods |
| `read:me:authentication_methods` | List authentication methods |
| `update:me:authentication_methods` | Update authentication methods |
| `delete:me:authentication_methods` | Remove authentication methods |
| `read:me:factors` | Read available MFA factors |
**My Organization API** (`https://YOUR_AUTH0_DOMAIN/my-org/`) User-Delegated Access:
| **Scope** | **Description** |
| --------------------------- | ------------------------------- |
| `read:my_org:configuration` | Read organization configuration |
| `read:my_org:details` | Read organization details |
| `update:my_org:details` | Update organization details |
**Auth0 Management API** Client Access:
| **Scope** | **Description** |
| -------------------- | ---------------------------------------- |
| `read:branding` | Read tenant branding settings and themes |
| `read:organizations` | Read organization branding settings |
Select **Save** after enabling each API.
## Step 4: Enable Multi-Resource Refresh Token
Back in the **Settings** tab, scroll to **Multi-Resource Refresh Token** and enable it for the same user-delegated APIs and scopes configured in Step 3, My Account API and My Organization API.
Select **Save Changes**.
## Step 5: Create a portal
1. Select **Portals** from the Dashboard sidebar.
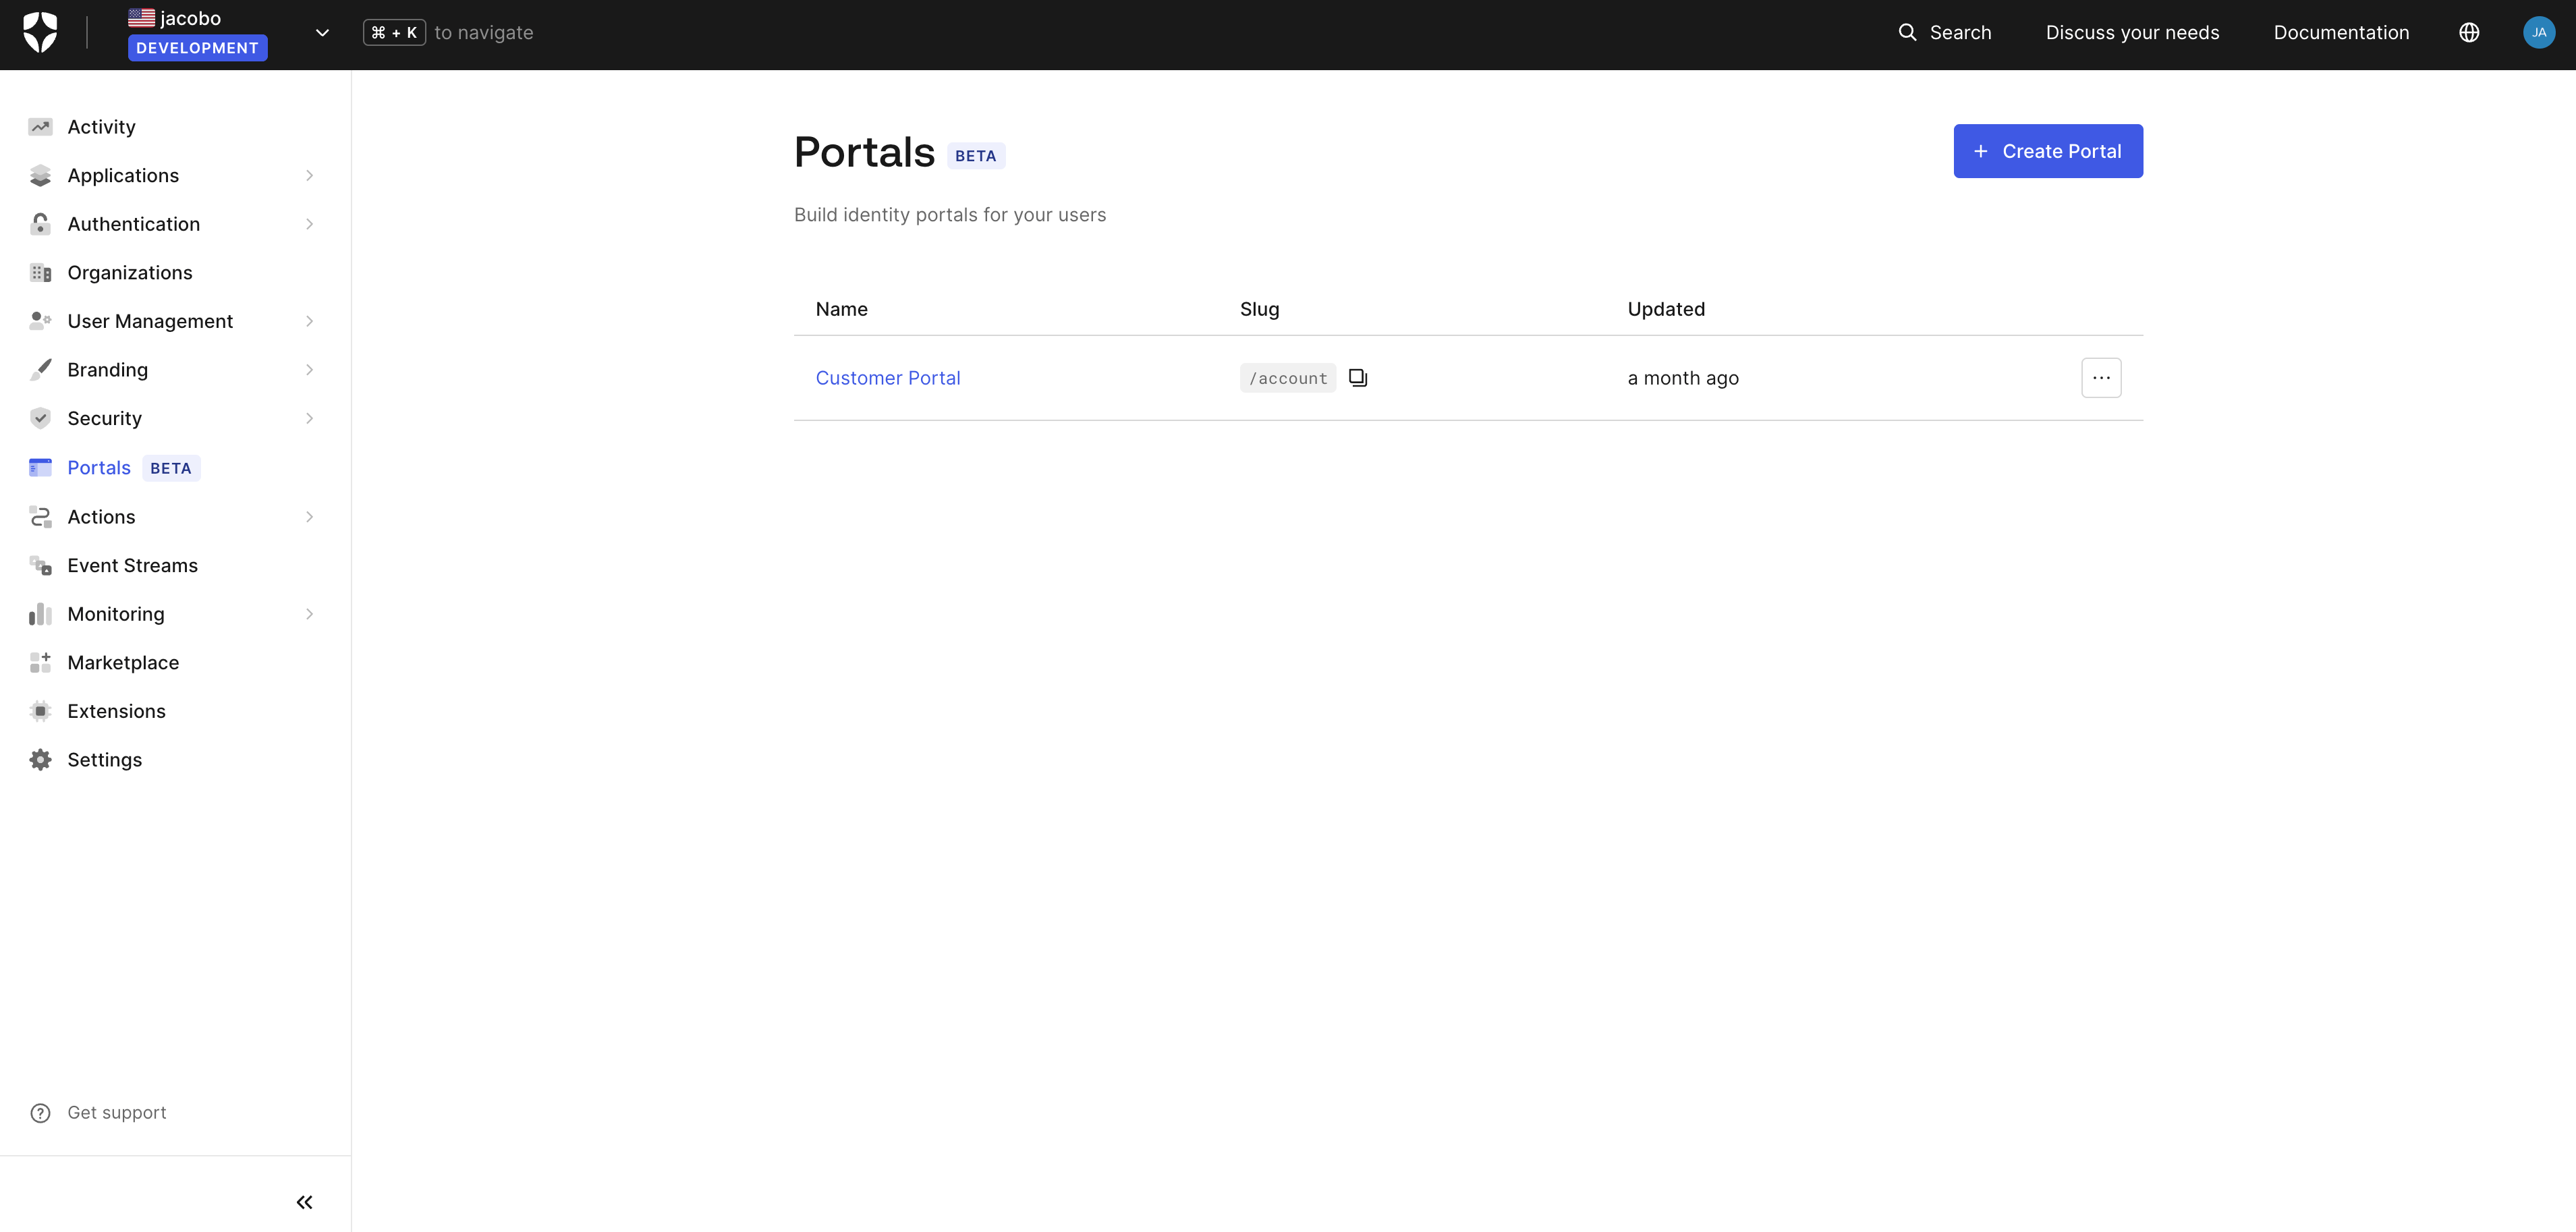 2. Select **Create Portal**.
3. Enter a **Name** and a **Slug** for your portal. The slug becomes part of the portal URL.
2. Select **Create Portal**.
3. Enter a **Name** and a **Slug** for your portal. The slug becomes part of the portal URL.
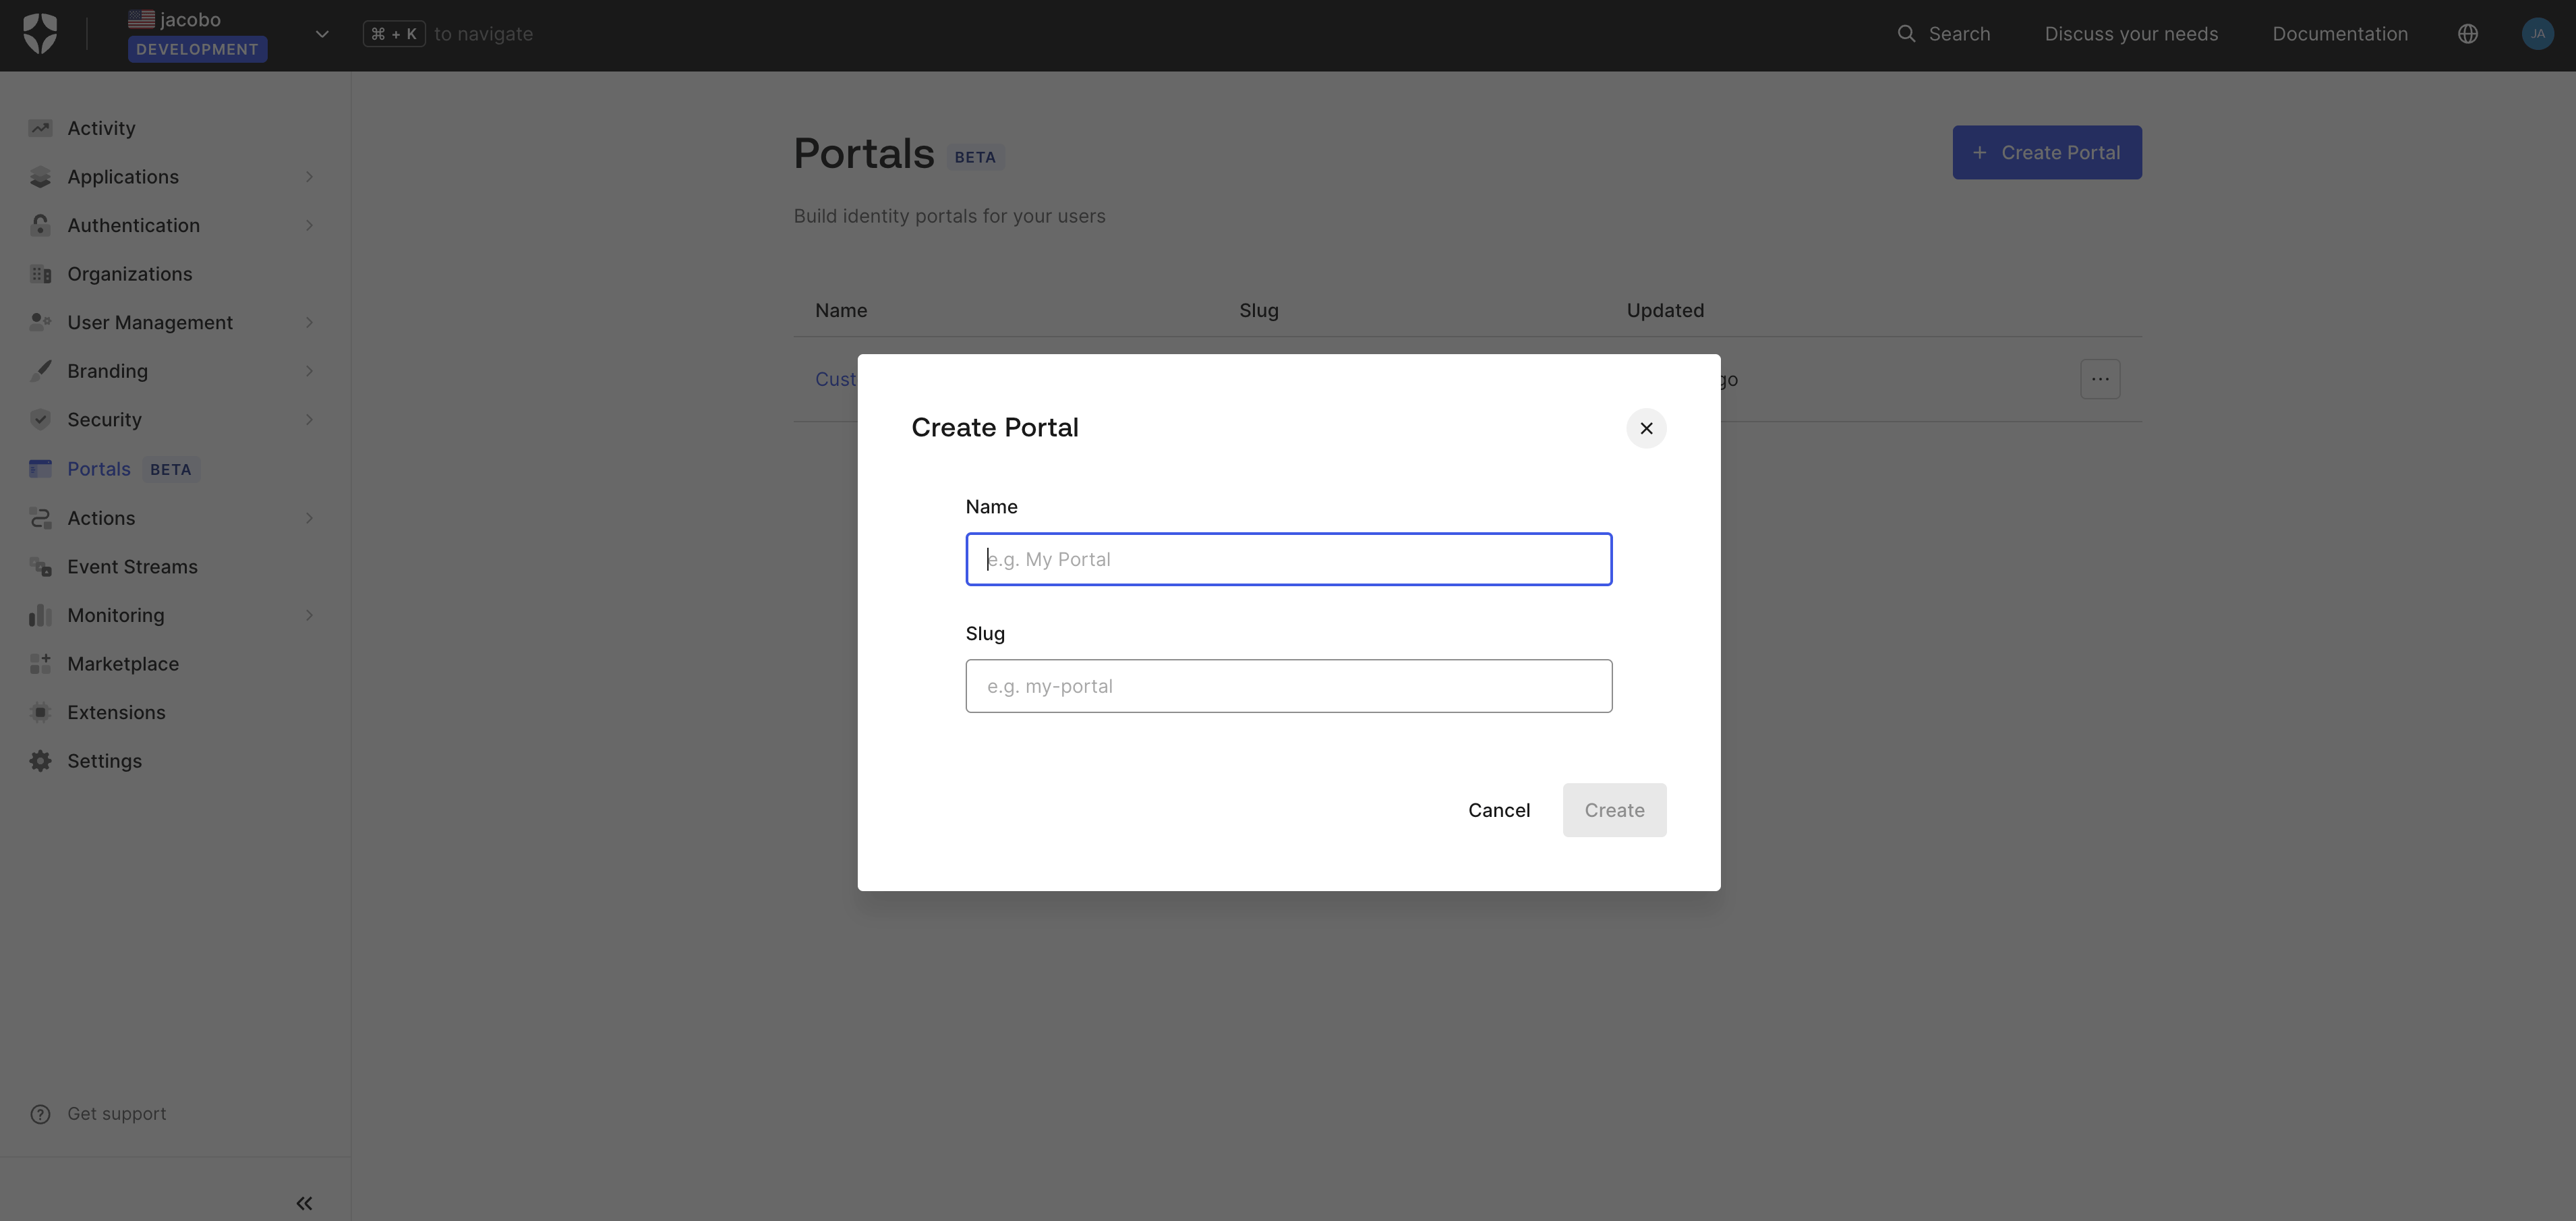 4. Select **Create**.
5. In the portal settings, link the application you created in Step 1.
If you have not yet set the callback and logout URLs in Step 2, copy them from the portal settings now and update the application.
## Step 6: Build a page
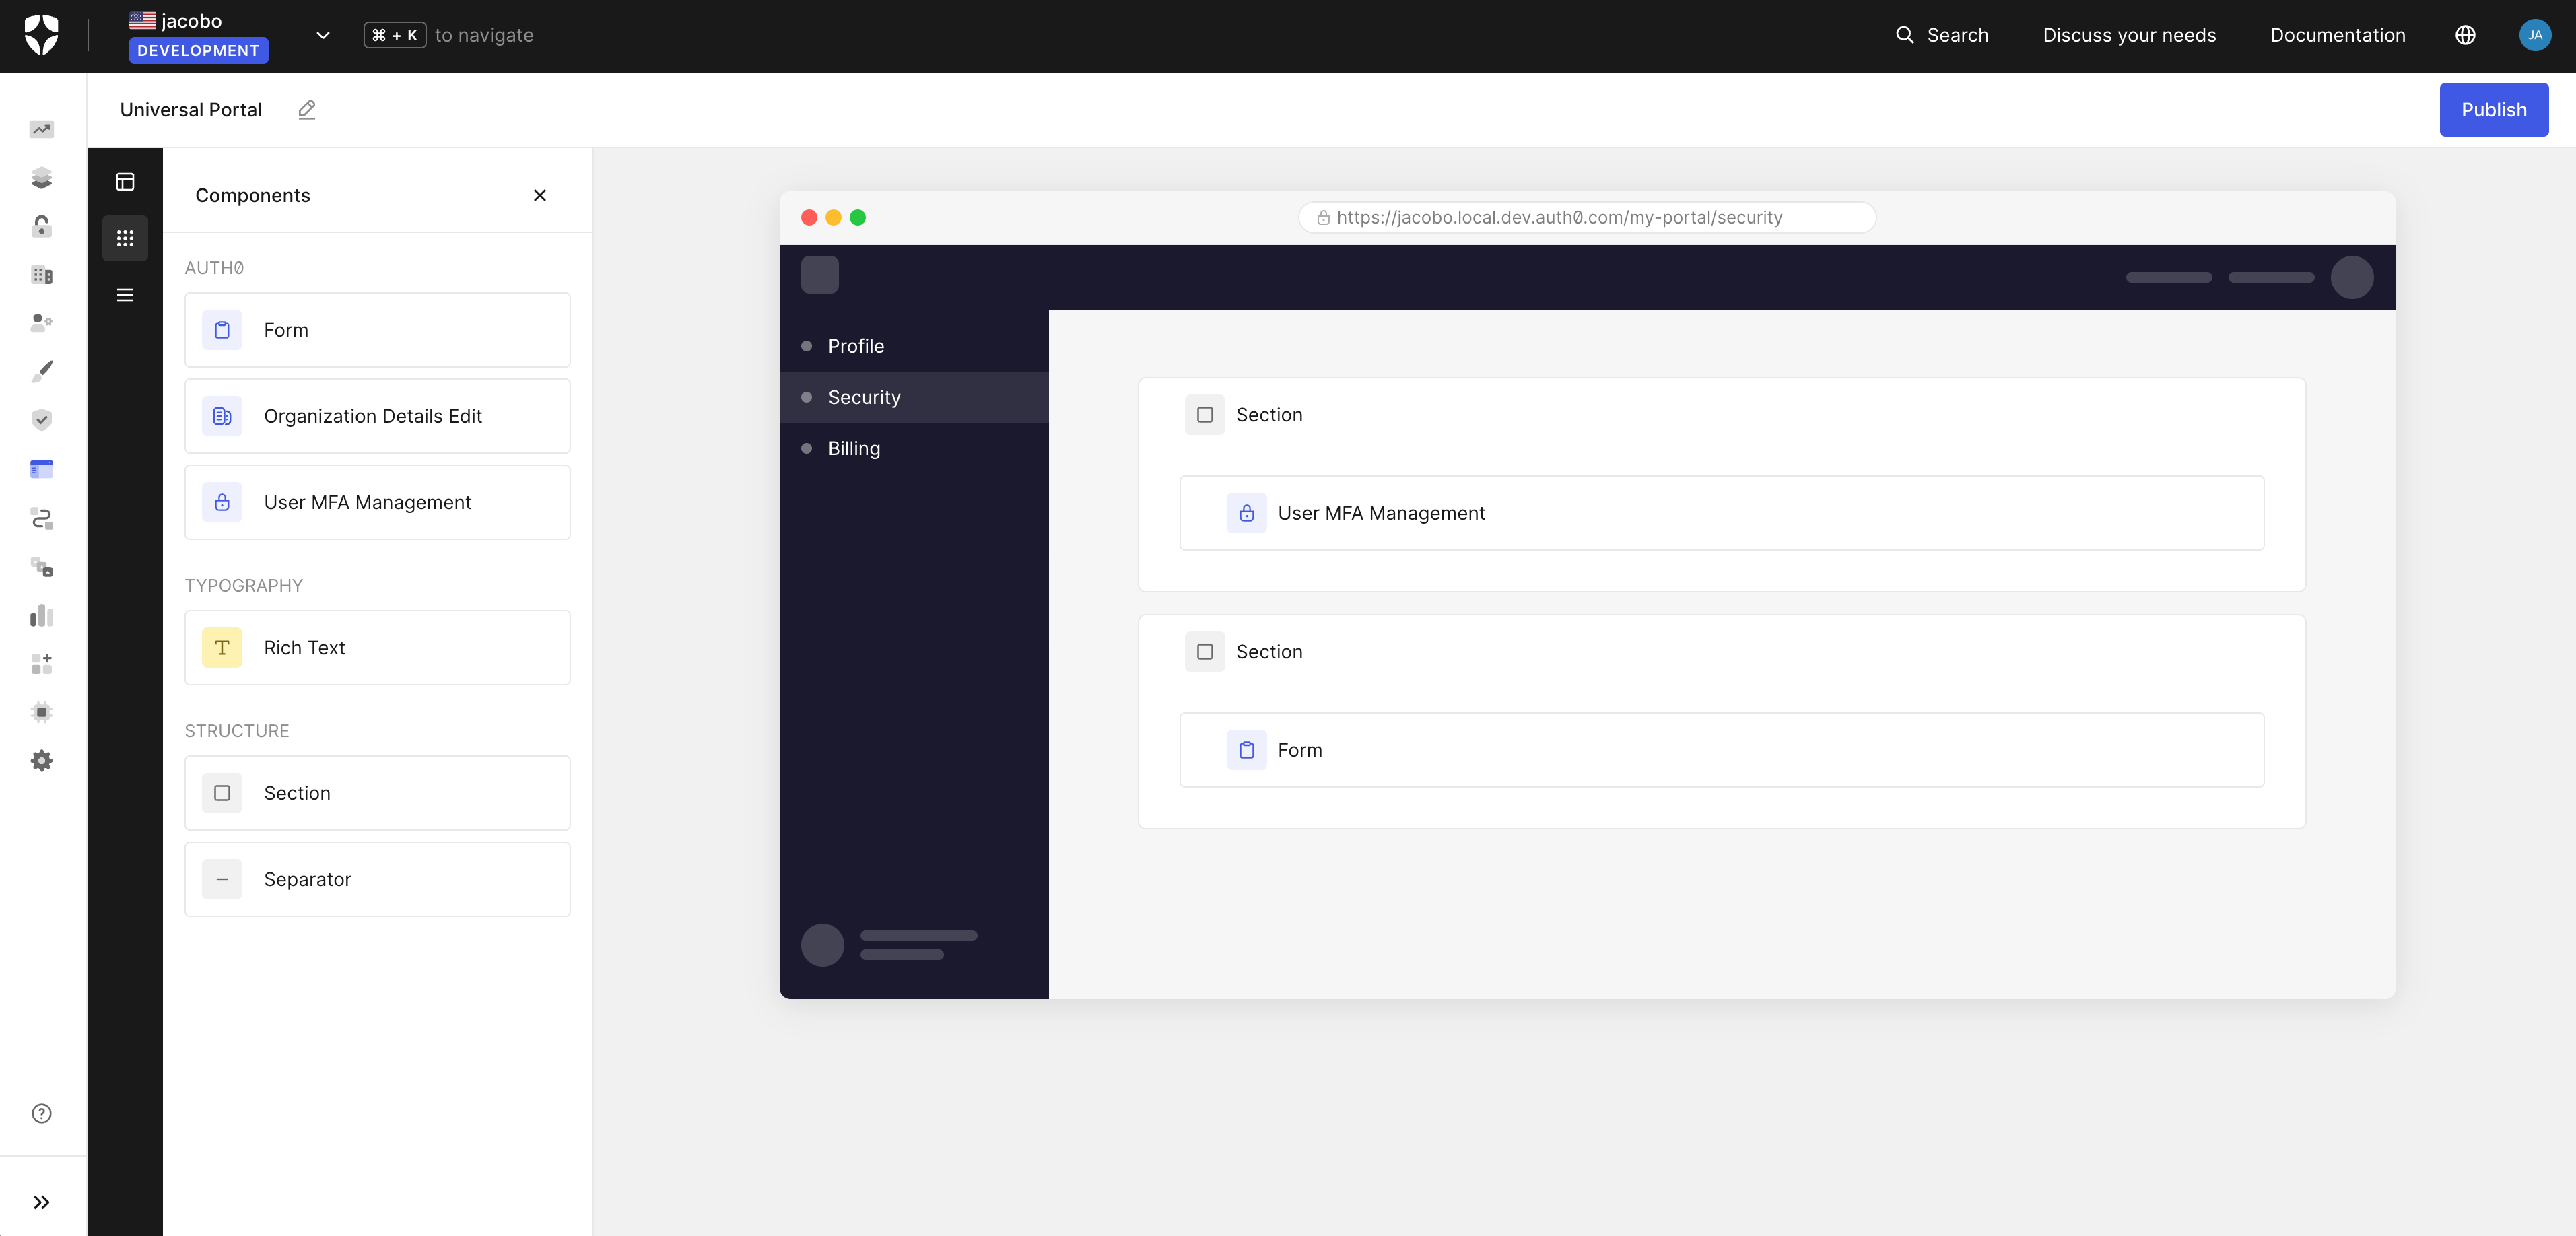
The visual editor opens after the portal is created. Drag components from the left panel onto the canvas to compose pages.
4. Select **Create**.
5. In the portal settings, link the application you created in Step 1.
If you have not yet set the callback and logout URLs in Step 2, copy them from the portal settings now and update the application.
## Step 6: Build a page
The visual editor opens after the portal is created. Drag components from the left panel onto the canvas to compose pages.
 ## Step 7: Preview and publish
Select **Preview** to open the portal in a new tab. When ready, select **Publish**.
## Learn more
Learn about Universal Portals, use cases, how it works, and key features.
Learn about Universal Components library used in portals.
Learn about Forms to collect information from end-users, such as profile updates, policy acceptance, and marketing communication preferences in portals.
## Step 7: Preview and publish
Select **Preview** to open the portal in a new tab. When ready, select **Publish**.
## Learn more
Learn about Universal Portals, use cases, how it works, and key features.
Learn about Universal Components library used in portals.
Learn about Forms to collect information from end-users, such as profile updates, policy acceptance, and marketing communication preferences in portals.