> ## Documentation Index
> Fetch the complete documentation index at: https://translations.mintlify.site/llms.txt
> Use this file to discover all available pages before exploring further.
> Auth0 Dashboard で最初の Auth0 Action Module を作成し、シークレットと NPM 依存関係を追加してバージョンを公開し、外部サービスにログを送信する方法を説明します。
# はじめてのAction Moduleを作成する
export const AuthCodeGroup = ({children, dropdown}) => {
const [processedChildren, setProcessedChildren] = useState(children);
useEffect(() => {
let unsubscribe = null;
function init() {
unsubscribe = window.autorun(() => {
const processChildren = node => {
if (typeof node === "string") {
let processedNode = node;
for (const [key, value] of window.rootStore.variableStore.values.entries()) {
const escapedKey = key.replaceAll(/[.*+?^${}()|[\]\\]/g, (String.raw)`\$&`);
processedNode = processedNode.replaceAll(new RegExp(escapedKey, "g"), value);
}
return processedNode;
} else if (Array.isArray(node)) {
return node.map(processChildren);
} else if (node && node.props && node.props.children) {
return {
...node,
props: {
...node.props,
children: processChildren(node.props.children)
}
};
}
return node;
};
setProcessedChildren(processChildren(children));
});
}
if (window.rootStore) {
init();
} else {
window.addEventListener("adu:storeReady", init);
}
return () => {
window.removeEventListener("adu:storeReady", init);
unsubscribe?.();
};
}, [children]);
return {processedChildren};
};
## はじめに
Quickstartを使ってAction Moduleを作成し、Actionからそれを利用してログを外部サービスに送信します。
特定のActionからAction Moduleを使用するには、まずAction Moduleを作成し、その後Actionに追加して使用する必要があります。
1. [Auth0 Dashboard > Actions > Library](https://manage.auth0.com/#/actions/library) に移動し、**Modules** を選択します。
2. **Create Module** を選択します。
3. **Name** を入力します。
4. **Create** を選択します。
Auth0 にコードエディターが表示されます。
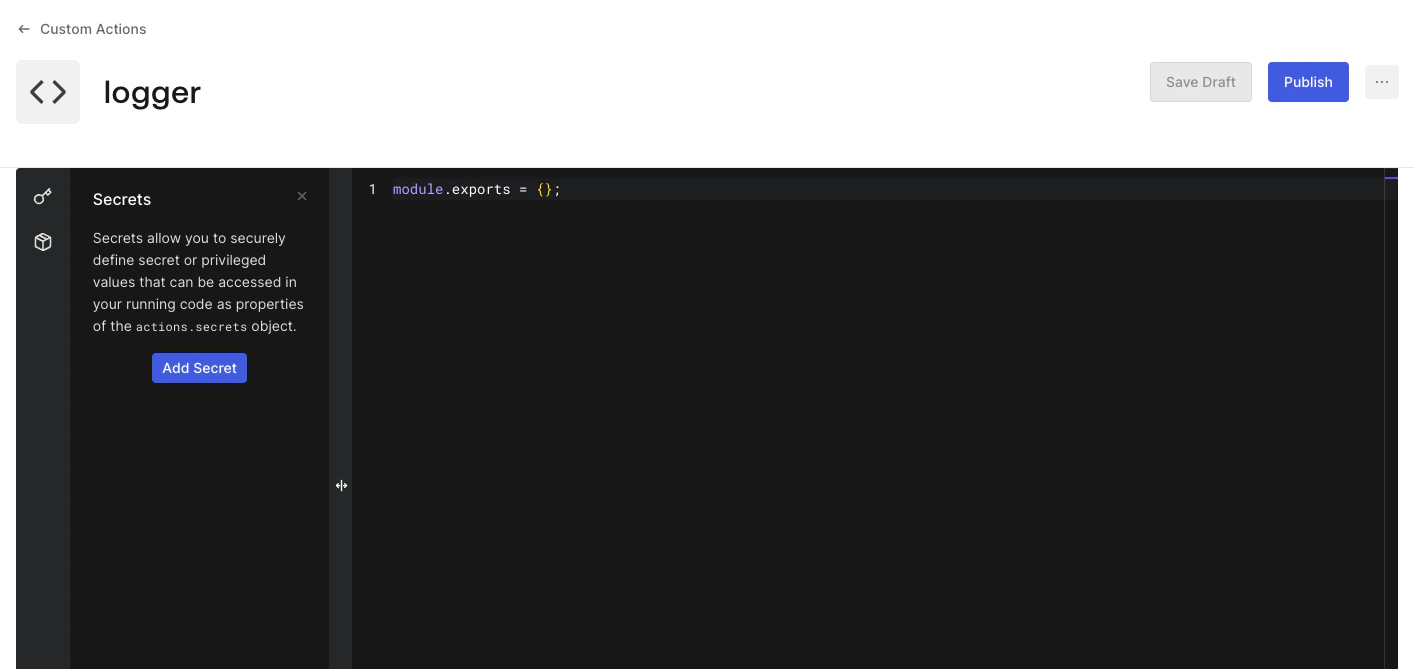 各 Action Module には、シークレットのキーと値のペアを含めることができます。これらを使って、API キーや証明書、環境ごとに変わる可能性のある値などの機密情報を保持します。
外部サービスの URL を Secret として保存しましょう。
1. コードエディターの左側のサイドバーにある **** アイコンを選択します。
2. **Add Secret** を選択します。
3. **Name** に `SERVICE_URL` と入力します。
4. **Value** フィールドに外部サービスの URL を入力します。
5. **Create** を選択します。
各 Action Module には、シークレットのキーと値のペアを含めることができます。これらを使って、API キーや証明書、環境ごとに変わる可能性のある値などの機密情報を保持します。
外部サービスの URL を Secret として保存しましょう。
1. コードエディターの左側のサイドバーにある **** アイコンを選択します。
2. **Add Secret** を選択します。
3. **Name** に `SERVICE_URL` と入力します。
4. **Value** フィールドに外部サービスの URL を入力します。
5. **Create** を選択します。
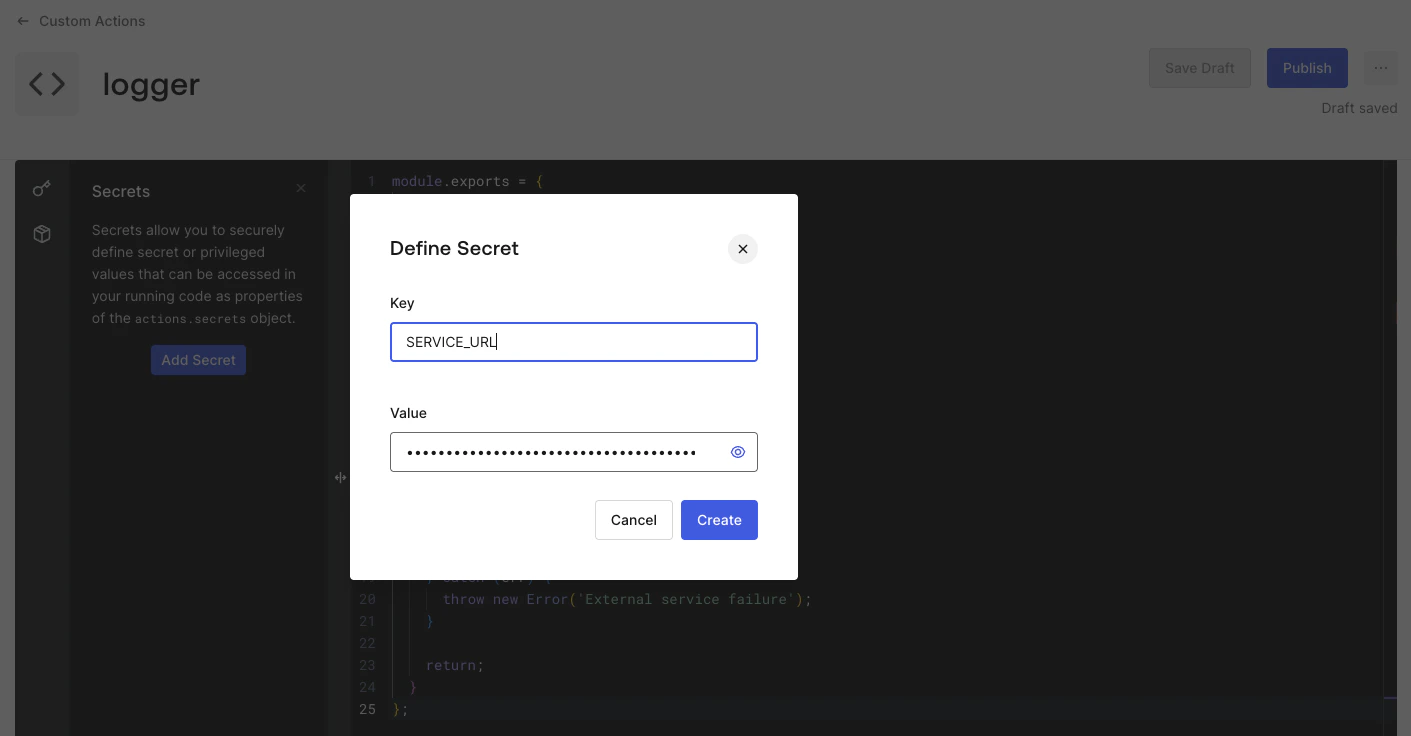 Secret が Action Module の Secret 一覧に追加されます。
**追加の手順:** 同じ手順で `API_KEY` も Secret として保存します。これは、各リクエストで外部サービスに送信するヘッダーに含めるためのものです。
Secret は一度作成すると、その値が Auth0 から再表示されることはありません。Auth0 はすべての Secrets を暗号化して安全に保存します。
各 **Action Module Secret** は、ほかの **Actions Modules** や **Actions Secrets** とは独立しています。
Action Module で **Secrets** を使用するには、`actions.secrets.[secret_key]` と入力します。
次に、Action Module に以下のコードを追加します。
Action Module に以下のコードを追加します。
```javascript lines theme={null}
module.exports = {
sendLog: async (code, message) => {
try {
await fetch(actions.secrets.SERVICE_URL, {
method: 'POST',
headers: {
'X-API-Key': actions.secrets.API_KEY,
},
body: JSON.stringify({
code,
message
}),
});
console.log({
code,
message
});
} catch (err) {
throw new Error('External service failure');
}
return;
}
};
```
以下の点に注意してください。
* [コーディングガイドライン](/docs/ja-jp/customize/actions/action-coding-guidelines#actions-modules)
* [制限事項](/docs/ja-jp/customize/actions/limitations#actions-modules)
Action Module のドラフトを保存できます。
1. **下書きとして保存** を選択します。
Secret が Action Module の Secret 一覧に追加されます。
**追加の手順:** 同じ手順で `API_KEY` も Secret として保存します。これは、各リクエストで外部サービスに送信するヘッダーに含めるためのものです。
Secret は一度作成すると、その値が Auth0 から再表示されることはありません。Auth0 はすべての Secrets を暗号化して安全に保存します。
各 **Action Module Secret** は、ほかの **Actions Modules** や **Actions Secrets** とは独立しています。
Action Module で **Secrets** を使用するには、`actions.secrets.[secret_key]` と入力します。
次に、Action Module に以下のコードを追加します。
Action Module に以下のコードを追加します。
```javascript lines theme={null}
module.exports = {
sendLog: async (code, message) => {
try {
await fetch(actions.secrets.SERVICE_URL, {
method: 'POST',
headers: {
'X-API-Key': actions.secrets.API_KEY,
},
body: JSON.stringify({
code,
message
}),
});
console.log({
code,
message
});
} catch (err) {
throw new Error('External service failure');
}
return;
}
};
```
以下の点に注意してください。
* [コーディングガイドライン](/docs/ja-jp/customize/actions/action-coding-guidelines#actions-modules)
* [制限事項](/docs/ja-jp/customize/actions/limitations#actions-modules)
Action Module のドラフトを保存できます。
1. **下書きとして保存** を選択します。
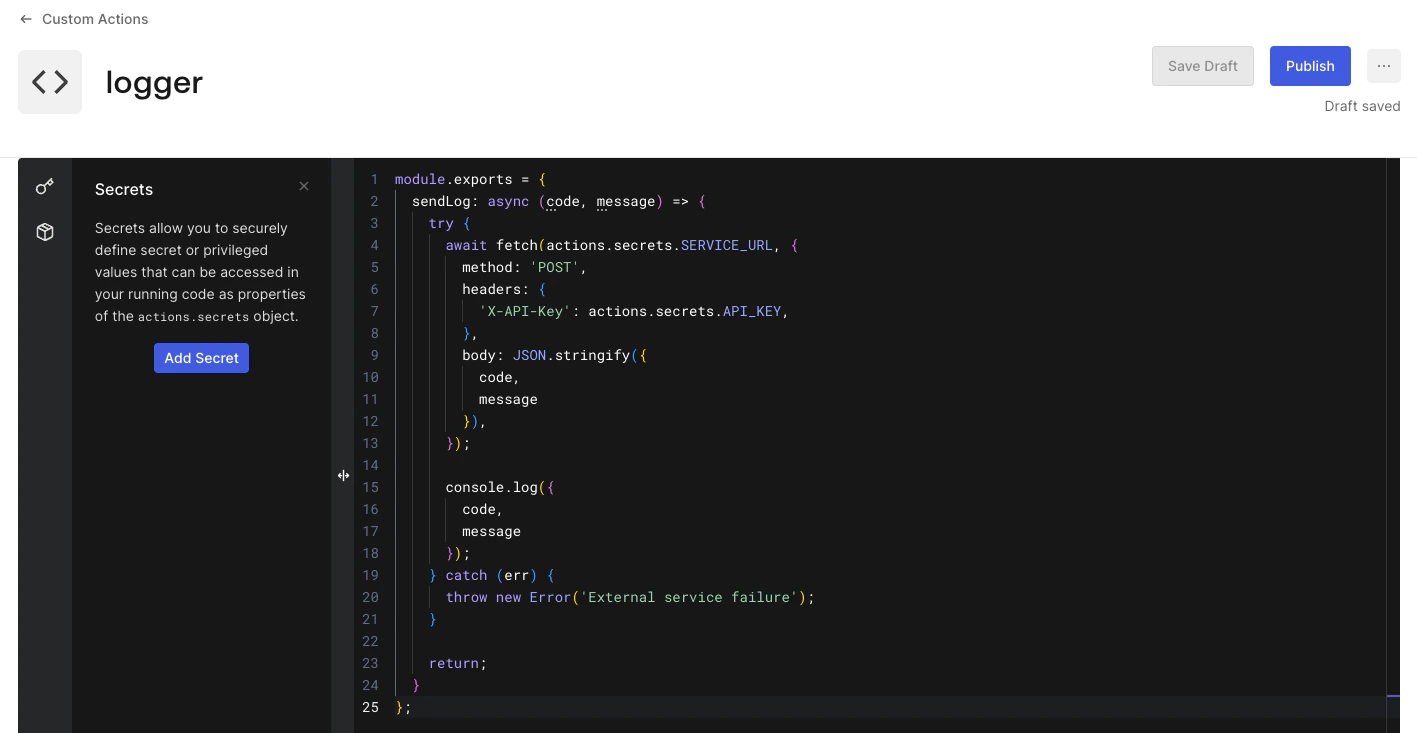 これにより、新しいバージョンを公開せずに Action Module が保存されるため、それを使用している Actions には影響しません。
Action Module のコードに問題がなければ、**公開**します。
1. **公開**を選択します。
Action Module を公開すると、その時点のスナップショットが取得され、**Action Module Version** として記録されます。
2. **バージョン履歴を表示**を選択します。
これにより、新しいバージョンを公開せずに Action Module が保存されるため、それを使用している Actions には影響しません。
Action Module のコードに問題がなければ、**公開**します。
1. **公開**を選択します。
Action Module を公開すると、その時点のスナップショットが取得され、**Action Module Version** として記録されます。
2. **バージョン履歴を表示**を選択します。
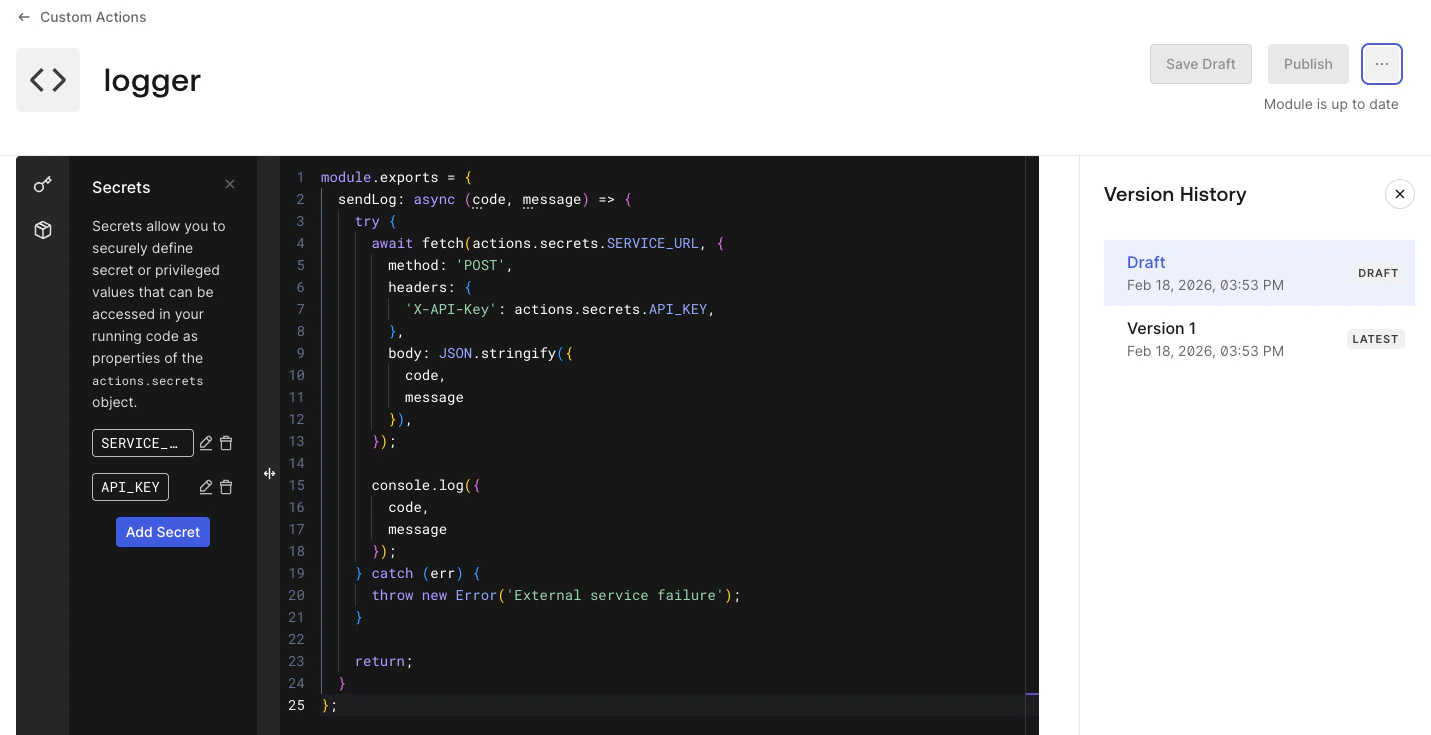 下書きを含む Action Module Version の一覧が表示されます。
これで、Action で Action Module を使えるようになります。
各 **Action** では、**Action Module Version** を明示的に参照する必要があります。これにより、予期しないエラーにつながる自動アップグレードを防げます。
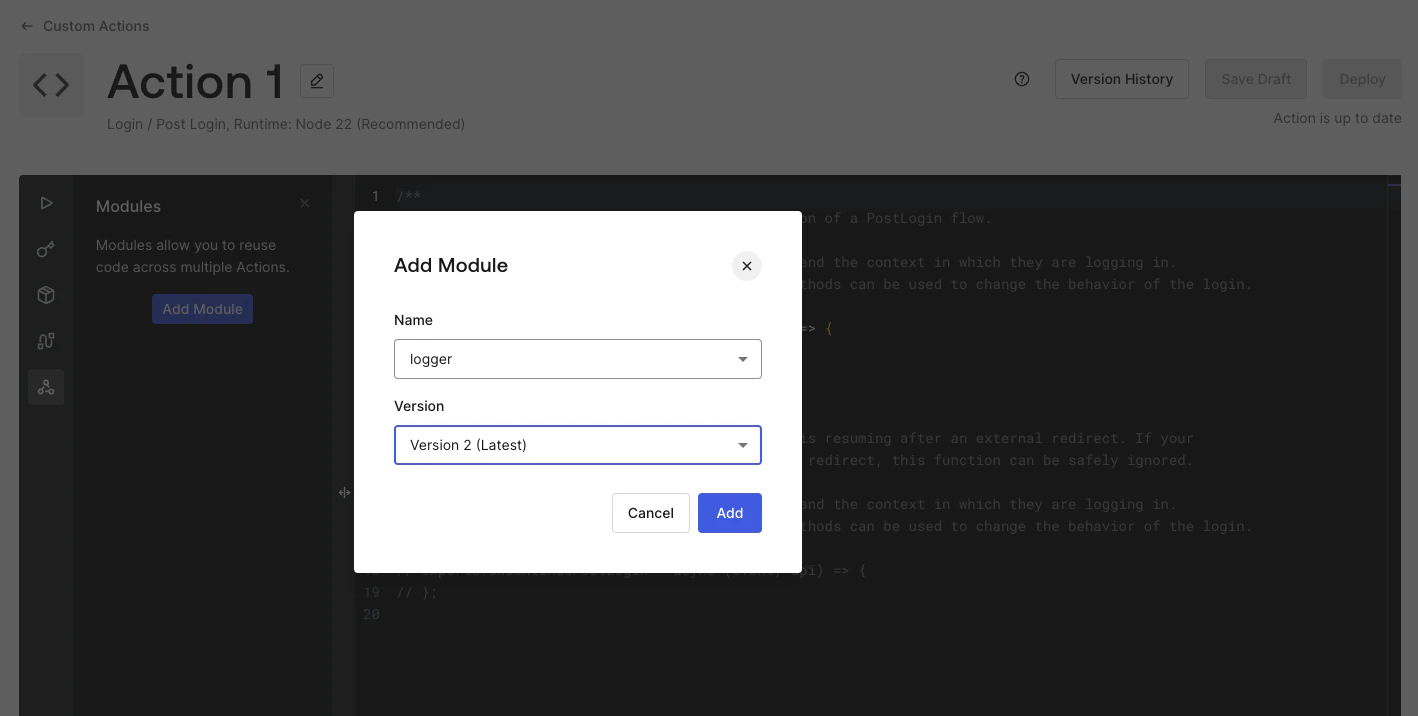
ActionにAction Moduleを追加しましょう。
1. [Auth0 Dashboard > Actions > ライブラリ](https://manage.auth0.com/#/actions/library) に移動して、特定の **Action** を選択します。
2. Action エディタに移動したら、左側のサイドバーにある **** アイコンを選択します。
3. **モジュールを追加**を選択します。
4. モジュールの**名前**と**バージョン**を選択します。
5. **追加**を選択します。
下書きを含む Action Module Version の一覧が表示されます。
これで、Action で Action Module を使えるようになります。
各 **Action** では、**Action Module Version** を明示的に参照する必要があります。これにより、予期しないエラーにつながる自動アップグレードを防げます。
ActionにAction Moduleを追加しましょう。
1. [Auth0 Dashboard > Actions > ライブラリ](https://manage.auth0.com/#/actions/library) に移動して、特定の **Action** を選択します。
2. Action エディタに移動したら、左側のサイドバーにある **** アイコンを選択します。
3. **モジュールを追加**を選択します。
4. モジュールの**名前**と**バージョン**を選択します。
5. **追加**を選択します。
 次に、Action 内で Action Module を使ってみましょう。
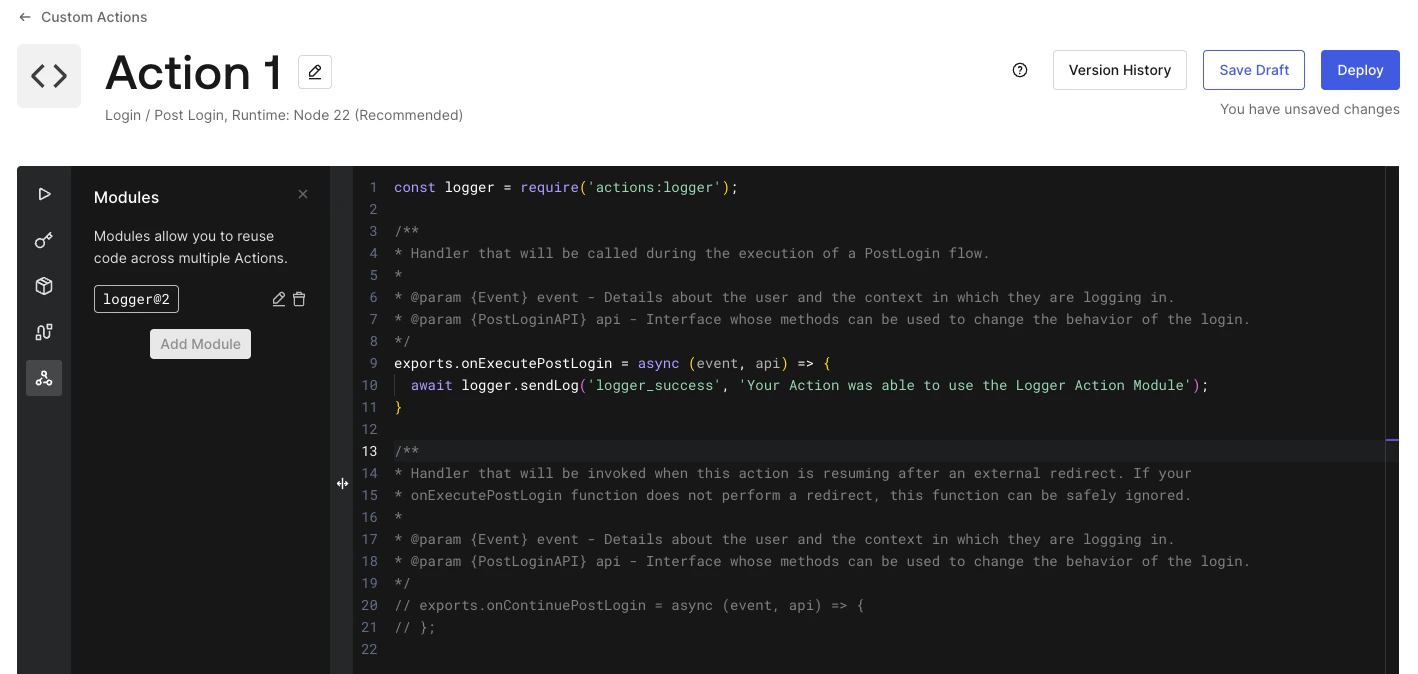
1. **require** 文を追加します。
```javascript lines theme={null}
const logger = require('actions:logger');
```
**require** 文では、**actions:\[module-name]** の形式で Action Module を参照します。
2. ログを送信したい箇所の **Action 関数** に、`logger.sendLog` の呼び出しを追加します。
```javascript lines theme={null}
await logger.sendLog('logger_success', 'Your Action was able to use the Logger Action Module');
```
3. Action を **Deploy** します。
次に、Action 内で Action Module を使ってみましょう。
1. **require** 文を追加します。
```javascript lines theme={null}
const logger = require('actions:logger');
```
**require** 文では、**actions:\[module-name]** の形式で Action Module を参照します。
2. ログを送信したい箇所の **Action 関数** に、`logger.sendLog` の呼び出しを追加します。
```javascript lines theme={null}
await logger.sendLog('logger_success', 'Your Action was able to use the Logger Action Module');
```
3. Action を **Deploy** します。
 Action をトリガーにバインドすることを忘れないでください。
**チェックポイント**
これで、完全に動作する **Action Module** を **Action** で使用できるようになっているはずです。
***
Action をトリガーにバインドすることを忘れないでください。
**チェックポイント**
これで、完全に動作する **Action Module** を **Action** で使用できるようになっているはずです。
***
## 応用的な使い方
各 **Action Module** では、**[NPM依存関係](https://www.npmjs.com/)** を追加して利用できます。
1. コードエディターの左側のサイドバーで、**** アイコンを選択します。
2. **Add Dependency** を選択します。
3. **NPM package** の **Name** を入力します。
4. **NPM package** の **Version** を入力します。
5. **Create** を選択します。
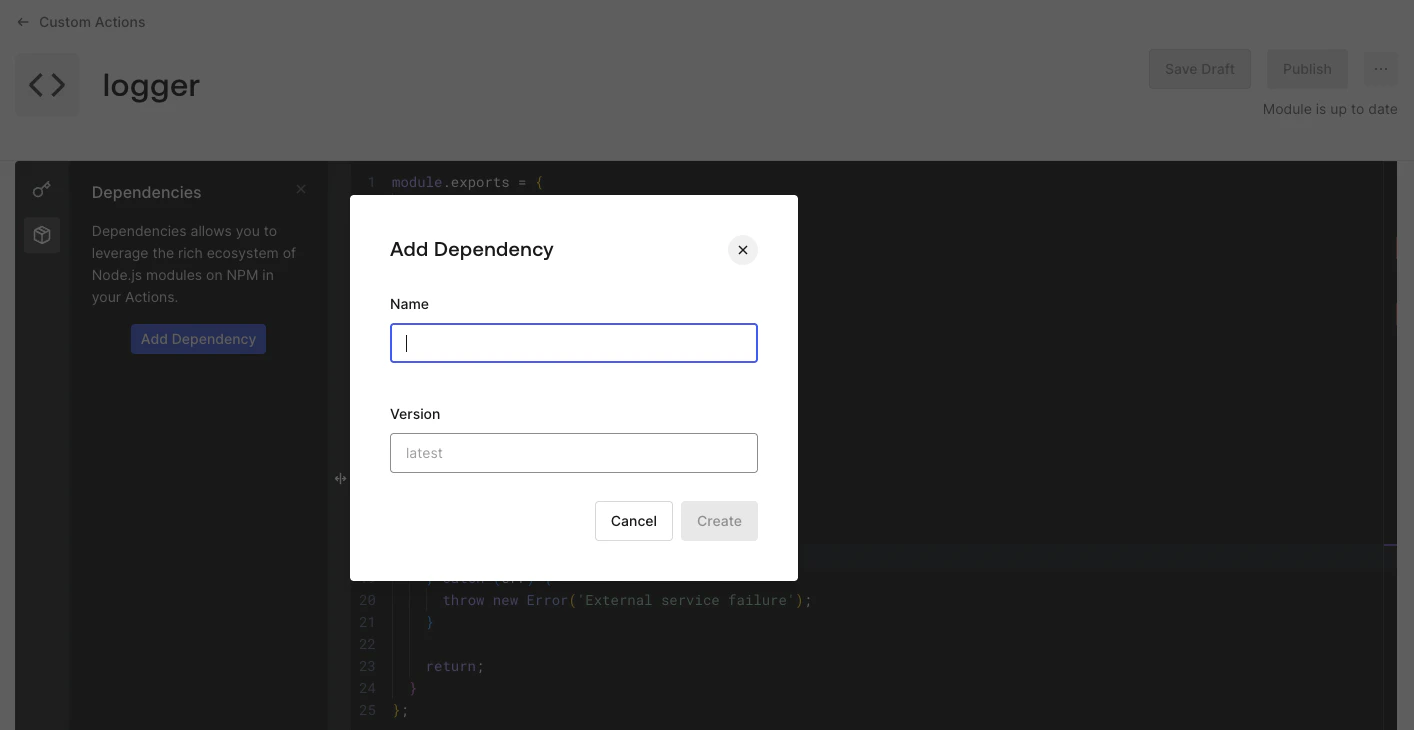 Auth0 によって、その依存関係が Action Module の依存関係一覧に追加されます。
一覧に表示されている **依存関係** は、`require('[package-name]')` で読み込むことで Action Module 内で使用できます。
この Action を保存すると、Auth0 は依存関係の最新バージョンを解決し、今後のパッケージ更新によって Action が壊れないよう、特定のバージョン番号に置き換えます。
latest の代わりに、特定のバージョンを指定することもできます。
Auth0 によって、その依存関係が Action Module の依存関係一覧に追加されます。
一覧に表示されている **依存関係** は、`require('[package-name]')` で読み込むことで Action Module 内で使用できます。
この Action を保存すると、Auth0 は依存関係の最新バージョンを解決し、今後のパッケージ更新によって Action が壊れないよう、特定のバージョン番号に置き換えます。
latest の代わりに、特定のバージョンを指定することもできます。