> ## Documentation Index
> Fetch the complete documentation index at: https://translations.mintlify.site/llms.txt
> Use this file to discover all available pages before exploring further.
> Auth0 で単一の論理 API を使って複数の API へのアクセスを表現し、管理する方法を学びます。
# 複数の API 向けの論理 API を設定する
export const AuthCodeBlock = ({filename, icon, language, highlight, children}) => {
const [displayText, setDisplayText] = useState(children);
const [copyText, setCopyText] = useState(children);
const wrapperRef = React.useRef(null);
useEffect(() => {
let unsubscribe = null;
function init() {
if (!window.autorun || !window.rootStore) {
return;
}
unsubscribe = window.autorun(() => {
let processedChildrenForDisplay = children;
let processedChildrenForCopy = children;
for (const [key, value] of window.rootStore.variableStore.values.entries()) {
const escapedKey = key.replaceAll(/[.*+?^${}()|[\]\\]/g, (String.raw)`\$&`);
let displayValue = value;
if (key === "{yourClientSecret}" && value !== "{yourClientSecret}") {
displayValue = value.substring(0, 3) + "*****MASKED*****";
}
processedChildrenForDisplay = processedChildrenForDisplay.replaceAll(new RegExp(escapedKey, "g"), displayValue);
processedChildrenForCopy = processedChildrenForCopy.replaceAll(new RegExp(escapedKey, "g"), value);
}
setDisplayText(processedChildrenForDisplay);
setCopyText(processedChildrenForCopy);
});
}
if (window.rootStore) {
init();
} else {
window.addEventListener("adu:storeReady", init);
}
return () => {
window.removeEventListener("adu:storeReady", init);
unsubscribe?.();
};
}, [children]);
useEffect(() => {
if (!wrapperRef.current) return;
const originalWriteText = navigator.clipboard.writeText.bind(navigator.clipboard);
let isOverriding = false;
const handleClick = e => {
const button = e.target.closest('[data-testid="copy-code-button"]');
if (!button || !wrapperRef.current.contains(button)) return;
isOverriding = true;
navigator.clipboard.writeText = text => {
if (isOverriding) {
isOverriding = false;
navigator.clipboard.writeText = originalWriteText;
return originalWriteText(copyText);
}
return originalWriteText(text);
};
setTimeout(() => {
if (isOverriding) {
isOverriding = false;
navigator.clipboard.writeText = originalWriteText;
}
}, 100);
};
const wrapper = wrapperRef.current;
wrapper.addEventListener('click', handleClick, true);
return () => {
wrapper.removeEventListener('click', handleClick, true);
if (navigator.clipboard.writeText !== originalWriteText) {
navigator.clipboard.writeText = originalWriteText;
}
};
}, [copyText]);
return
{displayText}
;
};
export const codeExample = `https://{yourDomain}/authorize?
scope=read:contacts%20read:calendar&
audience=organize&
response_type=id_token%20token&
client_id={yourClientId}&
redirect_uri=http://localhost:3000&
nonce={nonce}
`;
同じ API の一部として論理的にまとまる複数の異なる API 実装がある場合は、それらを Auth0 Dashboard で 1 つの論理 API として表すことで、認可プロセスを簡素化できます。こうすることで、実装する 認可フロー は 1 つだけで済みますが、適切なスコープを割り当てることで、個々の API へのアクセスは引き続き制御できます。
以下のセクションでは、複数の API を Auth0 で 1 つの リソースサーバー として使用し、表現する方法を説明します。例では、次のサンプルアプリケーションを使用します。このサンプルアプリケーションはマイクロサービスアーキテクチャを採用しており、以下を含みます。
* 2 つの Node.js API: `contacts` と `calendar` (マイクロサービスと考えることができます)
* 2 つの API を表す 1 つのリソースサーバー
* 2 つの名前空間付きスコープ: `read:contacts` と `read:calendar`
* 両方の API で機能する `access_token` を取得するためのインプリシットグラントフロー
この 2 つの API は、`Organizer Service` という 1 つの Auth0 API だけを使って表します。次に 2 つのスコープを作成し、[インプリシットフロー](/docs/ja-jp/get-started/authentication-and-authorization-flow/authorization-code-flow-with-pkce) を使って SPA から `calendar` API と `contacts` API にアクセスする方法を示します。
次の手順を完了する必要があります。
1. アプリケーションの接続を有効にする
2. テストユーザーを作成する
3. Auth0 に論理 API を登録する
4. 論理 API のスコープを設定する
5. 論理 API へのアクセスを付与する
6. (任意) シングルログアウト (SLO) またはシングルサインオン (SSO) を実装する
## 前提条件
* [アプリケーションを登録します](/docs/ja-jp/get-started/auth0-overview/create-applications/single-page-web-apps)。
* **アプリケーションの種類** で **Single-Page App** を選択します。
* **Allowed Callback URLs** に `http://localhost:3000` と `http://localhost:3000/callback.html` を追加します。
* [サンプルアプリケーション](https://github.com/auth0-samples/auth0-api-auth-implicit-sample)をダウンロードします。セットアップ方法については、[README](https://github.com/auth0-samples/auth0-api-auth-implicit-sample#readme)を参照してください。
## アプリケーションで接続を有効にする
新しく登録したアプリケーションでユーザーを利用できるようにするには、ユーザーの情報源として[接続](/docs/ja-jp/authenticate/identity-providers)を設定する必要があります。このサンプルでは、ユーザーのメールアドレスとパスワードだけを求めるシンプルな[データベース接続](/docs/ja-jp/authenticate/database-connections)を作成します。詳しくは、[データベース接続を設定する](/docs/ja-jp/get-started/applications/set-up-database-connections)をご覧ください。
## テストユーザーを作成する
新しく作成した接続を使用しているため、まだ関連付けられたユーザーはいません。サンプルアプリケーションのログインプロセスをテストする前に、ユーザーを作成してその接続に関連付ける必要があります。ユーザーを作成する際は、必ず新しく作成した接続を選択してください。詳しくは、[ユーザーを作成する](/docs/ja-jp/manage-users/user-accounts/create-users)をご覧ください。
## Auth0 で論理 API を登録する
サンプルアプリケーションに含まれる複数の API を表すために使用する、1 つの論理 API を登録します。このサンプルでは、API の名前を `Organizer Service`、一意の識別子を `organize` に設定します。既定では、この API 用に取得するトークンの 署名アルゴリズム は **RS256** なので、そのままにしておきます。詳しくは、[API を登録する](/docs/ja-jp/get-started/auth0-overview/set-up-apis) を参照してください。
## 論理 API の権限を設定する
サンプルアプリケーションに含まれる API を論理 API が表現できるようにするには、適切な権限 (スコープ) を作成する必要があります。
スコープを使うと、呼び出し元のアプリケーションが利用できる API の操作を定義できます。各スコープは、1 つの API と 1 つの操作の組み合わせに対応します。このサンプルでは、呼び出し元のアプリケーションが `calendar` という API と、`contacts` という別の API から `read` できるようにしたいため、次の権限を作成する必要があります。
* `read:calendar`
* `read:contacts`
それぞれを 1 つのマイクロサービスと考えることができます。詳しくは、[API の権限を追加する](/docs/ja-jp/get-started/apis/add-api-permissions) と [API スコープ](/docs/ja-jp/get-started/apis/scopes/api-scopes) を参照してください。
## 論理 API へのアクセスを付与する
これで、論理 API が アクセストークン を取得できるようにすることで、API へのアクセスを提供する準備が整いました。必要なスコープを含めることで、論理 API が表す API に対するアプリケーションのアクセスを制御できます。以下の手順では、サンプルに合わせて [Implicit Flow](/docs/ja-jp/get-started/authentication-and-authorization-flow/implicit-flow-with-form-post) を使用します。ただし、ニーズに最も適したフローを使用できます。たとえば、次のようなものです。
* **Machine-to-Machine Application** がある場合は、[クライアント認証情報フロー](/docs/ja-jp/get-started/authentication-and-authorization-flow/client-credentials-flow) を実行することで、そのアプリケーションが API 用のアクセストークンをリクエストできるように認可できます。
* **Native App** を構築している場合は、[Authorization Code Flow with Proof Key for Code Exchange (PKCE)](/docs/ja-jp/get-started/authentication-and-authorization-flow/authorization-code-flow-with-pkce) を実装できます。
認可フローについて詳しくは、[Authentication and Authorization Flows](/docs/ja-jp/get-started/authentication-and-authorization-flow) をお読みください。
1. ユーザーが SPA 内で Login をクリックすると、アプリはユーザーを Auth0 認可サーバー (`/authorize` エンドポイント) にリダイレクトします。このリクエストのパラメーターについて詳しくは、チュートリアル「[Call Your API Using the Authorization Code Flow with PKCE](/docs/ja-jp/get-started/authentication-and-authorization-flow/authorization-code-flow-with-pkce/call-your-api-using-the-authorization-code-flow-with-pkce)」をご覧ください。
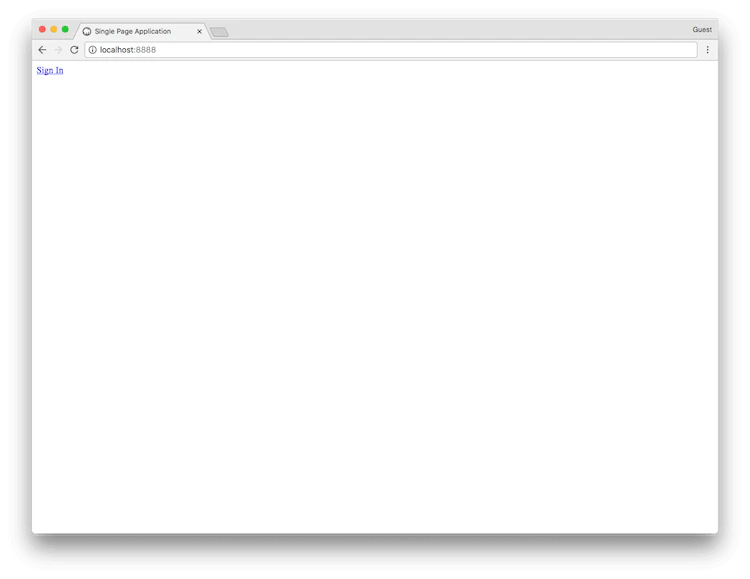 2. Auth0 認可サーバーはユーザーをログインページにリダイレクトし、そこでユーザーは設定済みのログインオプションのいずれかを使って認証します。
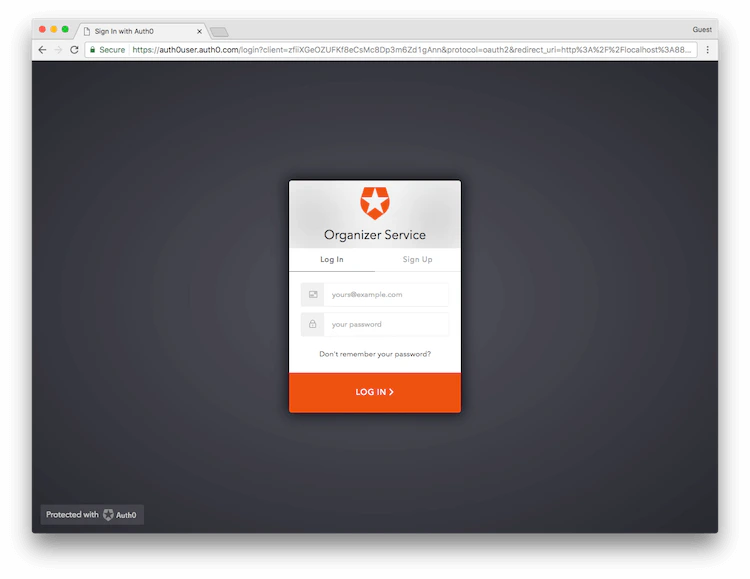 3. ユーザーがこのフローを利用するのが初めての場合、SPA に対して Auth0 が付与する権限の一覧を示す同意プロンプトが表示されます。この場合、ユーザーにはアプリが自分の連絡先とカレンダーを読み取ることへの同意が求められます。
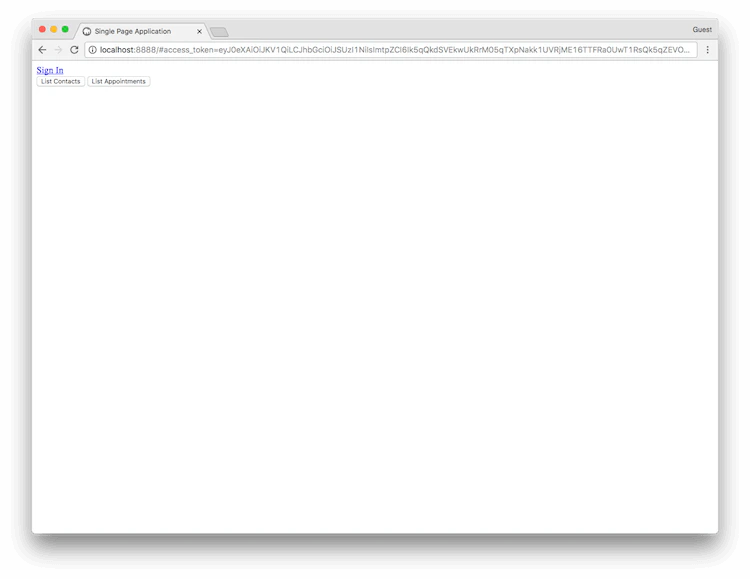
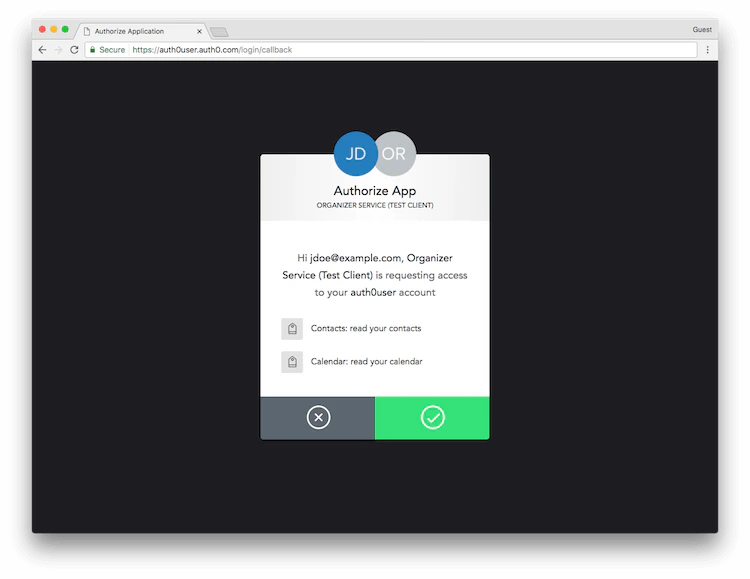 4. ユーザーが同意すると、Auth0 は URI のハッシュフラグメントにトークンを含めてユーザーを SPA にリダイレクトします。これで SPA は JavaScript を使用してハッシュフラグメントからトークンを抽出し、アクセストークンを使用してユーザーに代わって API を呼び出せるようになります。
```javascript lines theme={null}
function getParameterByName(name) {
var match = RegExp('[#&]' + name + '=([^&]*)').exec(window.location.hash);
return match && decodeURIComponent(match[1].replace(/\+/g, ' '));
}
function getAccessToken() {
return getParameterByName('access_token');
}
```
このサンプルでは、ログインに成功すると、論理 API から取得したアクセストークンを使って、いずれかの API を呼び出せるボタンが表示されます。
4. ユーザーが同意すると、Auth0 は URI のハッシュフラグメントにトークンを含めてユーザーを SPA にリダイレクトします。これで SPA は JavaScript を使用してハッシュフラグメントからトークンを抽出し、アクセストークンを使用してユーザーに代わって API を呼び出せるようになります。
```javascript lines theme={null}
function getParameterByName(name) {
var match = RegExp('[#&]' + name + '=([^&]*)').exec(window.location.hash);
return match && decodeURIComponent(match[1].replace(/\+/g, ' '));
}
function getAccessToken() {
return getParameterByName('access_token');
}
```
このサンプルでは、ログインに成功すると、論理 API から取得したアクセストークンを使って、いずれかの API を呼び出せるボタンが表示されます。
### シングルログアウト (SLO) またはシングルサインオン (SSO) を実装する
複数のアプリケーションにまたがる一部のシナリオで、シングルログアウトが必要な場合 (あるアプリケーションからログアウトしたユーザーを、他のアプリケーションからもログアウトさせる必要がある場合) は、`checkSession()` を使って定期的に Auth0 をポーリングし、セッションが存在するかどうかを確認するようアプリケーションを設定できます。セッションが存在しない場合は、そのユーザーをアプリケーションからログアウトさせることができます。同じポーリング方法は、シングルサインオン (SSO) のシナリオでサイレント認証を実装するためにも使用できます。
今後この呼び出しでレート制限の問題が発生するのを避けるため、`checkSession()` の確認間隔は、呼び出しと呼び出しの間を少なくとも 15 分空けるようにしてください。
## 詳細はこちら
* [APIを登録する](/docs/ja-jp/get-started/auth0-overview/set-up-apis)
* [API の権限を追加する](/docs/ja-jp/get-started/apis/add-api-permissions)
* [API スコープ](/docs/ja-jp/get-started/apis/scopes/api-scopes)