> ## Documentation Index
> Fetch the complete documentation index at: https://translations.mintlify.site/llms.txt
> Use this file to discover all available pages before exploring further.
# iOS のパスキー
> iOS の Authentication Methods Management コンポーネント内にレンダリングされるパスキー認証要素の SDK 固有の動作、アプリケーション側のエンタイトルメント、カスタマイズについて説明します。
export const ReleaseStageNotice = ({feature, stage, plans, contact, terms}) => {
const stageTextMap = {
"beta": "Beta",
"ea": "早期アクセス"
};
const stageText = stageTextMap[stage] || "製品リリース段階";
const prsLink = "/docs/troubleshoot/product-lifecycle/product-release-stages";
const linkify = (text, url) => {
return {text};
};
const includeDetails = (plans, contact, terms) => {
const hasDetails = terms || plans || contact;
if (!hasDetails) return null;
return
{plans && <>この機能は{linkify(`${plans}プラン`, "https://auth0.com/pricing")}でご利用いただけます。 }
{contact && "参加をご希望の場合は、" + contact + "までお問い合わせください。 "}
{terms && <>この機能を使用することにより、Oktaの該当する無料トライアル規約および{linkify("Master Subscription Agreement", "https://www.okta.com/legal")}に同意したものとみなされます。}
;
};
return
{feature}機能は現在、{linkify(stageText, prsLink)}です。
{includeDetails(plans, contact, terms)}
;
};
[`MyAccountAuthMethodsView`](/docs/ja-jp/get-started/universal-components/ios/components/auth-methods-management)コンポーネントは、Auth0 [パスキー](/docs/ja-jp/authenticate/database-connections/passkeys)の登録フローをレンダリングできます。
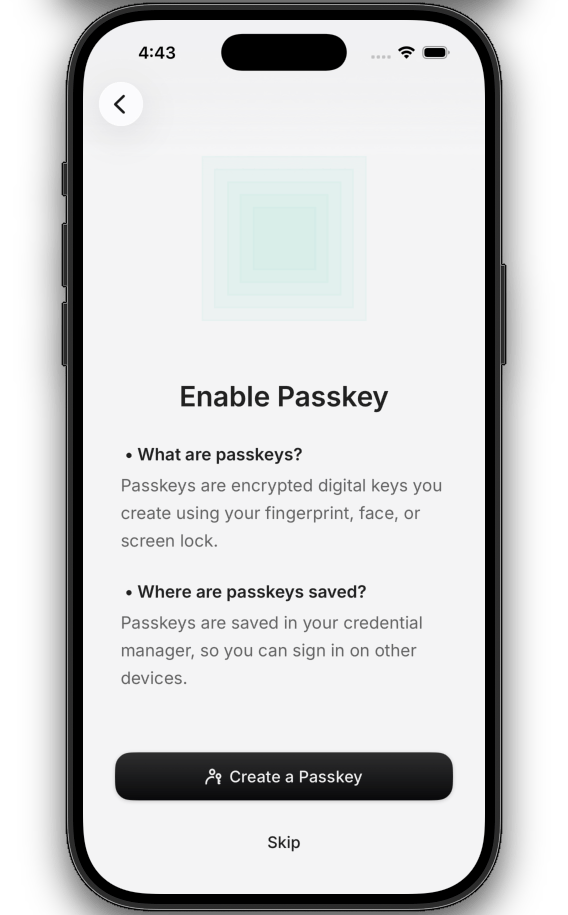
パスキー登録フローでは、説明画面、プラットフォーム認証器との WebAuthn 登録ハンドシェイク、認証器リストへの登録済み認証要素の追加がレンダリングされます。
パスキーは、他の認証要素と異なり、Universal Components for iOS SDK では設定できないアプリケーション側のプラットフォームエンタイトルメントを必要とします。
## 前提条件
iOS SDK 向け Universal Components でパスキーのサポートを有効にするには、次の準備が必要です。
* **Auth0 テナントでカスタムドメインを設定します**。パスキーには、パスキー資格情報をアプリケーションに関連付ける [Apple App Site Association (AASA) ](https://developer.apple.com/documentation/xcode/supporting-associated-domains) ファイルを提供する[カスタムドメイン](/docs/ja-jp/customize/custom-domains)が必要です。
* **Auth0 のデータベース接続でパスキーを有効にします**。Auth0 テナントでパスキーを有効にする方法については、[パスキーを設定する](/docs/ja-jp/authenticate/database-connections/passkeys/configure-passkey-policy#configure-passkeys)をお読みください。
* **Auth0 アプリケーションに Apple Team ID と Bundle ID を登録します**。詳細については、[モバイルアプリケーション向け Native Passkeys](/docs/ja-jp/authenticate/database-connections/passkeys/native-passkeys-for-mobile-applications#configure-auth0-dashboard)をお読みください。
* **iOS 向け Universal Components をインストールして設定します**。Universal Components のインストール、Auth0 テナントの設定、SDK の初期化については、[セルフサービスのアカウントセキュリティインターフェイスを構築する](/docs/ja-jp/get-started/universal-components/ios/components/my-account-overview)をお読みください。
* **OS バージョンを確認します**。パスキーは、**iOS 16.6+**、**macOS 13.5+**、または **visionOS 1.0+** を実行しているデバイスでサポートされています。
## プラットフォームのセットアップ
### Xcode で関連ドメインを追加する
Auth0 アプリケーションの Device Settings に Apple Team ID と Bundle ID を登録すると、Auth0 はカスタムドメインから AASA ファイルを配信します。Auth0 のカスタムドメインをアプリケーションに追加します。
1. [**Xcode**](https://developer.apple.com/documentation/xcode) を開きます。
2. ターゲットの **Signing & Capabilities** を選択します。
3. **Capability** を追加し、**Associated Domains** を選択します。
4. Auth0 のカスタムドメインを入力します。
```text theme={null}
webcredentials:YOUR_AUTH0_DOMAIN
```
5. **Signing & Capabilities → Team** が Auth0 アプリケーションの Device Settings に登録した Apple Team ID と一致し、ターゲットの **Bundle Identifier** が登録済みの Bundle ID と完全に一致することを確認します。iOS では大文字と小文字を区別してバイト単位で照合されます。たとえば、`com.example.OAuth2` と `com.example.oauth2` は異なります。
**開発中**は、Device Settings を変更した後も、Apple の CDN に古い AASA ファイルが数時間キャッシュされることがあります。
開発中に tenant から AASA を直接取得するには、エンタイトルメントに `?mode=developer` を追加し (例: `webcredentials:YOUR_AUTH0_DOMAIN?mode=developer`) 、デバイスで **Settings → Developer → Associated Domains Development** を有効にします。
実機でテストしてください。iOS Simulator では関連ドメインの設定が確実に反映されない場合があります。リリースビルドを出荷する前に、`?mode=developer` サフィックスを削除してください。
## SDK の制限事項
* **パスキーを登録できるのは `MyAccountAuthMethodsView` コンポーネント内のみです**。アプリケーション内の他の場所から、単独でパスキー登録を開始するための公開 SwiftUI API はありません。post-login の「パスキーを保存」アップセルプロンプトはサポートされていません。最新情報は [ui-components-ios](https://github.com/auth0/ui-components-ios/issues) で確認できます。
* **コンポーネント内でパスキーを削除しても、OS の認証情報ストアからは削除されません**。登録済みのパスキーは Auth0 アカウントから切り離されますが、ユーザーが OS レベルの認証情報マネージャーで削除するまで、秘密認証情報は iCloud Keychain に残ります。
* **アテステーションの伝達設定は公開されていません**。SDK では、アテステーションポリシー (`none` / `indirect` / `direct`) を選択したり、認証器のトランスポートを列挙したりすることはできません。Auth0 テナントで設定された [WebAuthn](/docs/ja-jp/secure/multi-factor-authentication/webauthn-as-mfa#webauthn-as-multi-factor-authentication) ポリシーが使用されます。
## 詳細情報
`MyAccountAuthMethodsView` コンポーネントのリファレンスと、サポート対象の認証要素の一覧をご確認ください。
SDK を初期化し、トークンプロバイダーを Auth0 テナントに接続します。