> ## Documentation Index
> Fetch the complete documentation index at: https://translations.mintlify.site/llms.txt
> Use this file to discover all available pages before exploring further.

# ユーザーMFA管理

> My Account API を使用して、ユーザー自身が多要素認証の認証要素を登録、表示、削除できるカード形式の UI をレンダリングする方法を説明します。

export const ReleaseStageNotice = ({feature, stage, plans, contact, terms}) => {
  const stageTextMap = {
    "beta": "Beta",
    "ea": "早期アクセス"
  };
  const stageText = stageTextMap[stage] || "製品リリース段階";
  const prsLink = "/docs/troubleshoot/product-lifecycle/product-release-stages";
  const linkify = (text, url) => {
    return <a href={url} target="_blank" rel="noreferrer" class="link">{text}</a>;
  };
  const includeDetails = (plans, contact, terms) => {
    const hasDetails = terms || plans || contact;
    if (!hasDetails) return null;
    return <span data-as="p">
            {plans && <>この機能は{linkify(`${plans}プラン`, "https://auth0.com/pricing")}でご利用いただけます。 </>}
            {contact && "参加をご希望の場合は、" + contact + "までお問い合わせください。 "}
            {terms && <>この機能を使用することにより、Oktaの該当する無料トライアル規約および{linkify("Master Subscription Agreement", "https://www.okta.com/legal")}に同意したものとみなされます。</>}
        </span>;
  };
  return <Warning>
            <span data-as="p">
                <strong>{feature}機能は現在、{linkify(stageText, prsLink)}です。</strong>
            </span>

            {includeDetails(plans, contact, terms)}
        </Warning>;
};

<ReleaseStageNotice feature="Auth0 Universal Components" stage="beta" terms="true" contact="Auth0 Support" />

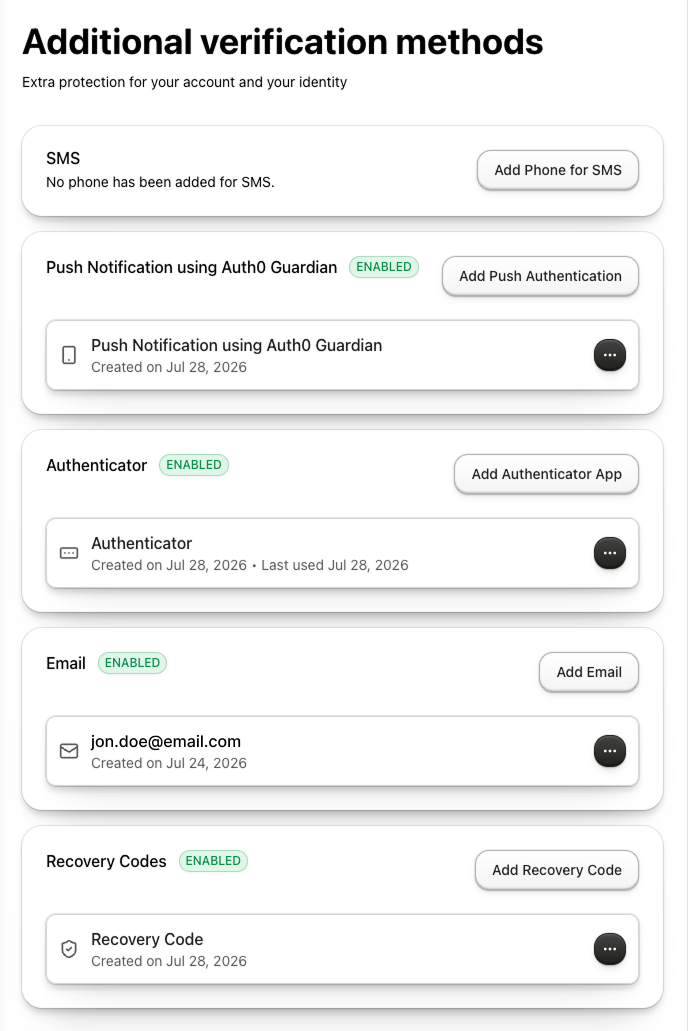
`UserMFAManagement` コンポーネントを使用すると、ユーザーは [My Account API](/docs/ja-jp/manage-users/my-account-api) を通じて、自身の多要素認証の認証要素を単一のカードベースのインターフェースで登録、表示、削除できます。

My Account API の[認証方法](/docs/ja-jp/manage-users/my-account-api#manage-authentication-methods)管理機能を使用して、ユーザーの認証方法を管理するための包括的な UI をレンダリングします。

`UserMFAManagement` コンポーネントを使用すれば、ナビゲーションを制御したり、API エンドポイントを呼び出したり、[state](/docs/ja-jp/api/authentication/authorization-code-flow/authorize-application#param-state) を管理したりする必要はありません。

<Frame>
  <img className="block dark:hidden" src="https://mintcdn.com/translations/-d41Muac7Op9CEDm/docs/images/universal-components/my-account/web/user-mfa-management-light.png?fit=max&auto=format&n=-d41Muac7Op9CEDm&q=85&s=5c5a9d87263aa0a6ee5337e57505db7d" alt="利用可能および登録済みの認証方法を表示する User MFA Management コンポーネント" width="688" height="1031" data-path="docs/images/universal-components/my-account/web/user-mfa-management-light.png" />

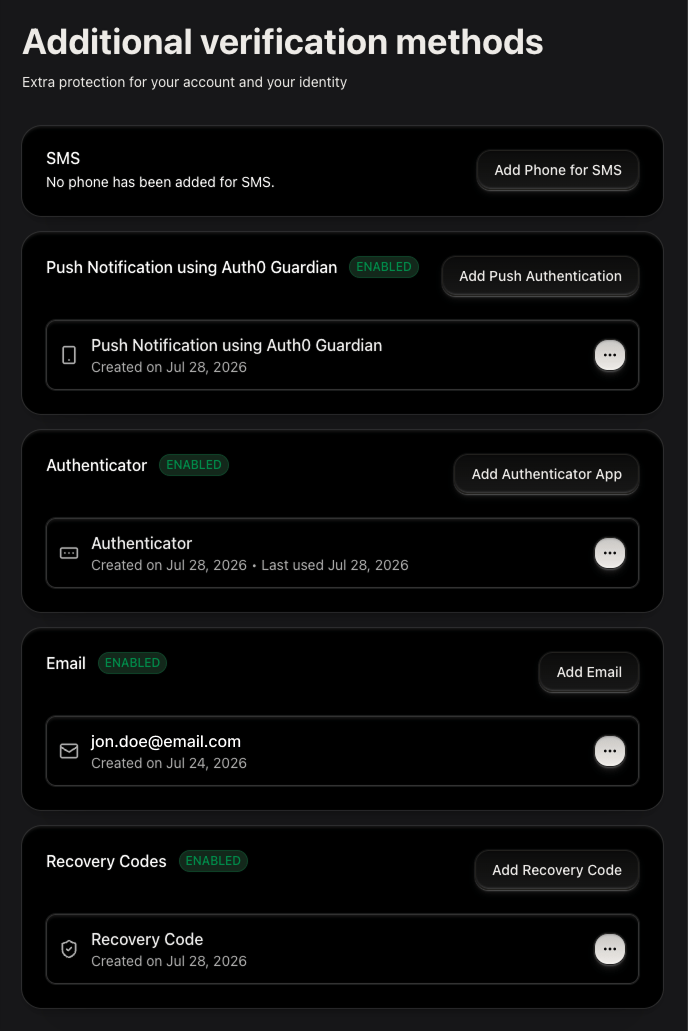
  <img className="hidden dark:block" src="https://mintcdn.com/translations/lC_NOnQ2Wbrs3KdZ/docs/images/universal-components/my-account/web/user-mfa-management-dark.png?fit=max&auto=format&n=lC_NOnQ2Wbrs3KdZ&q=85&s=f119ea3a1f7ec34bd446f5e4f4ea278d" alt="利用可能および登録済みの認証方法を表示する User MFA Management コンポーネント" width="688" height="1031" data-path="docs/images/universal-components/my-account/web/user-mfa-management-dark.png" />
</Frame>

<div id="supported-factors">
  ## サポート対象の認証要素
</div>

このコンポーネントは、My Account API で設定されたすべての認証方法に対応しています。

| **認証要素**                                                                                      | **コンポーネントがレンダリングする内容**                                                                                  |
| --------------------------------------------------------------------------------------------- | ------------------------------------------------------------------------------------------------------- |
| [Email OTP](/docs/ja-jp/secure/multi-factor-authentication/configure-mfa-email)               | メールアドレス入力 → 6 桁の OTP 検証                                                                                 |
| [SMS OTP](/docs/ja-jp/secure/multi-factor-authentication/configure-sms-notifications-for-mfa) | 国番号の選択 + 電話番号の入力 → 6 桁の OTP 検証                                                                          |
| [TOTP (認証器アプリ) ](/docs/ja-jp/secure/multi-factor-authentication/configure-otp)                | 手動入力用キー付き QR コード → 6 桁の OTP 検証                                                                          |
| [プッシュ通知](/docs/ja-jp/secure/multi-factor-authentication/enable-push-notifications-for-mfa)    | [Auth0 Guardian](/docs/ja-jp/secure/multi-factor-authentication/auth0-guardian) で読み取る QR コード → 「承認待ち」状態 |
| [パスキー](/docs/ja-jp/get-started/universal-components/web/components/user-passkey-management)   | 説明画面 → OS の生体認証プロンプト → リスト内の登録済みエントリ                                                                    |
| [リカバリーコード](/docs/ja-jp/secure/multi-factor-authentication/configure-recovery-codes-for-mfa)   | コピー操作と「コードを保存しました」の確認を含む、一度だけ表示されるコードのリスト                                                               |

<div id="configure-your-application">
  ## アプリケーションを設定する
</div>

フレームワークを選択して、環境変数とUniversal Componentsを構成します。

<Tabs>
  <Tab title="React（SPA）">
    ## 設定要件

    `UserMFAManagement` コンポーネントをレンダリングする前に、[Build Account Security UI](/docs/ja-jp/get-started/universal-components/web/components/my-account-overview) を参照して、Auth0 テナントとアプリケーションを設定してください。

    ### MFA方式とスコープを有効にする

    **MFA方式を有効にする**

    1. [**Dashboard > Security > Multi-factor Auth**](https://manage.auth0.com/dashboard/#/security/mfa) に移動します。
    2. 使用する認証要素を有効にします。詳細については、[Multi-Factor Authentication Factors](/docs/ja-jp/secure/multi-factor-authentication/multi-factor-authentication-factors#multi-factor-authentication-factors) を参照してください。

    **My Account API の権限を設定する**

    [Build Account Security UI](/docs/ja-jp/get-started/universal-components/web/components/my-account-overview#create-the-application-and-configure-my-account-api-permissions) に従って、My Account API のユーザー委譲アクセス権限を設定します。認証方式の管理フローを完全に利用するには、5 つすべての権限が必要です。

    ## コンポーネントをインストールする

    <CodeGroup>
      ```bash pnpm wrap lines theme={null}
      pnpm add @auth0/universal-components-react react-hook-form @tanstack/react-query
      ```

      ```bash npm wrap lines theme={null}
      npm install @auth0/universal-components-react react-hook-form @tanstack/react-query
      ```
    </CodeGroup>

    <Callout icon="file-lines" color="#0EA5E9" iconType="regular">
      `react-hook-form` と `@tanstack/react-query` はピア依存関係です。このコマンドでは、共有ユーティリティと Auth0 連携に必要な `@auth0/universal-components-core` の依存関係もインストールされます。
    </Callout>

    ## はじめに

    ```tsx wrap lines theme={null}
    import { UserMFAManagement } from "@auth0/universal-components-react";

    export function SecurityPage() {
      return <UserMFAManagement />;
    }
    ```

    <Callout icon="file-lines" color="#0EA5E9" iconType="regular">
      * コンポーネントは、フレームワークに関係なく、常にルートエントリ `@auth0/universal-components-react` からインポートします。
      * フレームワーク固有のサブパスを使用するのは `Auth0ComponentProvider` コンポーネントのみです。React アプリケーションでは `/spa`、Next.js アプリケーションでは `/rwa` を使用します。
    </Callout>

    <Accordion title="統合の完全な例">
      ```tsx wrap lines theme={null}
      import React from "react";
      import { UserMFAManagement } from "@auth0/universal-components-react";
      import { Auth0Provider } from "@auth0/auth0-react";
      import { Auth0ComponentProvider } from "@auth0/universal-components-react/spa";
      import { analytics } from "./lib/analytics";

      function SecurityPage() {
        return (
          <div className="max-w-3xl mx-auto p-6">
            <UserMFAManagement
              factorConfig={{
                phone: { visible: true, enabled: true },
                totp: { visible: true, enabled: true },
                "push-notification": { visible: true, enabled: true },
                email: { visible: true, enabled: true },
                "recovery-code": { visible: true, enabled: true },
                "webauthn-platform": { visible: false },
                "webauthn-roaming": { visible: false },
              }}
              enrollAction={{
                onAfter: (factor) => {
                  analytics.track("MFA Factor Enrolled", { factor });
                },
              }}
              deleteAction={{
                onBefore: (factor) => window.confirm(`Remove your ${factor} authenticator?`),
                onAfter: (factor) => {
                  analytics.track("MFA Factor Deleted", { factor });
                },
              }}
              customMessages={{
                header: {
                  title: "Two-Factor Authentication",
                  description: "Manage the extra verification methods used to protect your account.",
                },
              }}
              styling={{
                variables: {
                  light: { "--color-primary": "#4f46e5" },
                  dark: { "--color-primary": "#818cf8" },
                },
              }}
            />
          </div>
        );
      }

      export default function App() {
        const domain = "YOUR_TENANT_DOMAIN.auth0.com";
        const clientId = "YOUR_CLIENT_ID";

        return (
          <Auth0Provider
            domain={domain}
            clientId={clientId}
            authorizationParams={{ redirect_uri: window.location.origin }}
            interactiveErrorHandler="popup"
          >
            <Auth0ComponentProvider domain={domain}>
              <SecurityPage />
            </Auth0ComponentProvider>
          </Auth0Provider>
        );
      }
      ```
    </Accordion>
  </Tab>

  <Tab title="Next.js（RWA）">
    ## 設定要件

    `UserMFAManagement` コンポーネントをレンダリングする前に、[Build Account Security UI](/docs/ja-jp/get-started/universal-components/web/components/my-account-overview) の手順に従って、Auth0 テナントとアプリケーションを設定してください。

    ### MFA方式とスコープを有効にする

    **MFA方式を有効にする**

    1. [**Dashboard > Security > Multi-factor Auth**](https://manage.auth0.com/dashboard/#/security/mfa) に移動します。
    2. 使用する認証要素を有効にします。詳しくは、[Multi-Factor Authentication Factors](/docs/ja-jp/secure/multi-factor-authentication/multi-factor-authentication-factors#multi-factor-authentication-factors) を参照してください。

    **My Account API の権限を設定する**

    [Build Account Security UI](/docs/ja-jp/get-started/universal-components/web/components/my-account-overview#create-the-application-and-configure-my-account-api-permissions) で、My Account API のユーザー委譲アクセス権限を設定します。認証方式を完全に管理するフローには、5 つすべての権限が必要です。

    ## コンポーネントをインストールする

    <CodeGroup>
      ```bash pnpm wrap lines theme={null}
      pnpm add @auth0/universal-components-react react-hook-form @tanstack/react-query
      ```

      ```bash npm wrap lines theme={null}
      npm install @auth0/universal-components-react react-hook-form @tanstack/react-query
      ```
    </CodeGroup>

    <Callout icon="file-lines" color="#0EA5E9" iconType="regular">
      `react-hook-form` と `@tanstack/react-query` はピア依存関係です。このコマンドでは、共有ユーティリティと Auth0 連携に必要な `@auth0/universal-components-core` 依存関係もインストールされます。
    </Callout>

    ## はじめに

    ```tsx app/security/page.tsx wrap lines theme={null}
    "use client";

    import { UserMFAManagement } from "@auth0/universal-components-react";

    export default function SecurityPage() {
      return <UserMFAManagement />;
    }
    ```

    <Accordion title="連携の完全な例">
      ```tsx app/security/page.tsx wrap lines theme={null}
      "use client";

      import { UserMFAManagement } from "@auth0/universal-components-react";
      import { analytics } from "@/lib/analytics";

      export default function SecurityPage() {
        return (
          <div className="max-w-3xl mx-auto p-6">
            <UserMFAManagement
              factorConfig={{
                phone: { visible: true, enabled: true },
                totp: { visible: true, enabled: true },
                "push-notification": { visible: true, enabled: true },
                email: { visible: true, enabled: true },
                "recovery-code": { visible: true, enabled: true },
                "webauthn-platform": { visible: false },
                "webauthn-roaming": { visible: false },
              }}
              enrollAction={{
                onAfter: (factor) => {
                  analytics.track("MFA Factor Enrolled", { factor });
                },
              }}
              deleteAction={{
                onAfter: (factor) => {
                  analytics.track("MFA Factor Deleted", { factor });
                },
              }}
              customMessages={{
                header: { title: "Two-Factor Authentication" },
              }}
              styling={{
                variables: {
                  light: { "--color-primary": "#4f46e5" },
                  dark: { "--color-primary": "#818cf8" },
                },
              }}
            />
          </div>
        );
      }
      ```
    </Accordion>
  </Tab>

  <Tab title="shadcn">
    ## 設定要件

    `UserMFAManagement` コンポーネントをレンダリングする前に、[Build Account Security UI](/docs/ja-jp/get-started/universal-components/web/components/my-account-overview) の手順に従って、Auth0 テナントとアプリケーションを設定してください。

    ### MFA方式とスコープを有効にする

    **MFA方式を有効にする**

    1. [**Dashboard > Security > Multi-factor Auth**](https://manage.auth0.com/dashboard/#/security/mfa) に移動します。
    2. 必要な認証要素を有効にします。詳しくは、[Multi-Factor Authentication Factors](/docs/ja-jp/secure/multi-factor-authentication/multi-factor-authentication-factors#multi-factor-authentication-factors) を参照してください。

    **My Account API の権限を設定する**

    [Build Account Security UI](/docs/ja-jp/get-started/universal-components/web/components/my-account-overview#create-the-application-and-configure-my-account-api-permissions) で、My Account API のユーザー委譲アクセス権限を設定します。認証方式を完全に管理するフローには、5 つすべての権限が必要です。

    ## コンポーネントをインストールする

    ```bash wrap lines theme={null}
    npx shadcn@latest add https://auth0-universal-components.vercel.app/r/my-account/user-mfa-management.json
    ```

    <Callout icon="file-lines" color="#0EA5E9" iconType="regular">
      インストールコマンドを実行すると、コンポーネントのソースが、すべてのUI依存関係と、共有ユーティリティおよびAuth0連携用の`@auth0/universal-components-core`依存関係とともに`src/components/auth0/my-account/`に追加されます。
    </Callout>

    ## はじめに

    ```tsx wrap lines theme={null}
    import { UserMFAManagement } from "@/components/auth0/my-account/user-mfa-management";

    export function SecurityPage() {
      return <UserMFAManagement />;
    }
    ```

    <Accordion title="連携の完全な例">
      ```tsx wrap lines theme={null}
      import React from "react";
      import { UserMFAManagement } from "@/components/auth0/my-account/user-mfa-management";
      import { Auth0Provider } from "@auth0/auth0-react";
      import { Auth0ComponentProvider } from "@auth0/universal-components-react/spa";
      import { analytics } from "./lib/analytics";

      function SecurityPage() {
        return (
          <div className="max-w-3xl mx-auto p-6">
            <UserMFAManagement
              factorConfig={{
                phone: { visible: true, enabled: true },
                totp: { visible: true, enabled: true },
                "push-notification": { visible: true, enabled: true },
                email: { visible: true, enabled: true },
                "recovery-code": { visible: true, enabled: true },
                "webauthn-platform": { visible: false },
                "webauthn-roaming": { visible: false },
              }}
              enrollAction={{
                onAfter: (factor) => {
                  analytics.track("MFA Factor Enrolled", { factor });
                },
              }}
              deleteAction={{
                onBefore: (factor) => window.confirm(`Remove your ${factor} authenticator?`),
                onAfter: (factor) => {
                  analytics.track("MFA Factor Deleted", { factor });
                },
              }}
              customMessages={{
                header: { title: "Two-Factor Authentication" },
              }}
              styling={{
                variables: {
                  light: { "--color-primary": "#4f46e5" },
                  dark: { "--color-primary": "#818cf8" },
                },
              }}
            />
          </div>
        );
      }

      export default function App() {
        const domain = "YOUR_TENANT_DOMAIN.auth0.com";
        const clientId = "YOUR_CLIENT_ID";

        return (
          <Auth0Provider
            domain={domain}
            clientId={clientId}
            authorizationParams={{ redirect_uri: window.location.origin }}
            interactiveErrorHandler="popup"
          >
            <Auth0ComponentProvider domain={domain}>
              <SecurityPage />
            </Auth0ComponentProvider>
          </Auth0Provider>
        );
      }
      ```
    </Accordion>
  </Tab>
</Tabs>

<div id="props">
  ## プロップス
</div>

<div id="display-props">
  ### 表示プロップス
</div>

表示プロップスは、コンポーネントの動作に影響を与えずに、レンダリング方法を制御します。

<table class="table">
  <thead>
    <tr>
      <th>プロップ</th>
      <th>型</th>
      <th>デフォルト</th>
      <th>説明</th>
    </tr>
  </thead>

  <tbody>
    <tr>
      <td><code>hideHeader</code></td>
      <td><code>boolean</code></td>
      <td><code>false</code></td>
      <td>コンポーネントのヘッダー (タイトルと説明) を非表示にします。</td>
    </tr>

    <tr>
      <td><code>readOnly</code></td>
      <td><code>boolean</code></td>
      <td><code>false</code></td>
      <td>すべての変更操作 (登録と削除) を無効にします。認証要素は表示されますが、追加や削除はできません。</td>
    </tr>

    <tr>
      <td><code>showActiveOnly</code></td>
      <td><code>boolean</code></td>
      <td><code>false</code></td>
      <td>ユーザーに有効な登録が少なくとも1つある認証要素タイプのみを表示します。登録がない認証要素タイプは非表示になります。</td>
    </tr>

    <tr>
      <td><code>disableEnroll</code></td>
      <td><code>boolean</code></td>
      <td><code>false</code></td>
      <td>すべての認証要素タイプで登録ボタンを非表示にします。ユーザーは既存の認証要素を引き続き削除できます。</td>
    </tr>

    <tr>
      <td><code>disableDelete</code></td>
      <td><code>boolean</code></td>
      <td><code>false</code></td>
      <td>登録済みのすべての認証要素の行で削除ボタンを非表示にします。ユーザーは新しい認証要素を引き続き登録できます。</td>
    </tr>

    <tr>
      <td><code>factorConfig</code></td>
      <td><code>Partial<br />\<Record\<MFAType,<br />\{ visible?: boolean;<br /> enabled?: boolean }>></code></td>
      <td><code>\{}</code></td>
      <td>認証要素タイプごとの表示状態と有効状態。</td>
    </tr>
  </tbody>
</table>

**factorConfig**

`factorConfig` を使用すると、tenant の設定を編集せずに、特定の認証要素タイプを表示またはグレーアウトできます。
各キーは認証要素タイプを表す `string` です。どちらのフィールドも省略可能で、デフォルトは `true` です。

サポートされる認証要素タイプのキー: `phone`、`totp`、`email`、`push-notification`、`webauthn-platform`、`webauthn-roaming`、`recovery-code`。

* `visible` は、リスト内の認証要素の行をレンダリングします (非表示にするには `false`) 。
* `enabled` は、認証要素の行を操作可能な状態でレンダリングします (`false` の場合、グレーアウトされ操作できなくなります) 。

```tsx wrap lines theme={null}
<UserMFAManagement
  factorConfig={{
    phone: { visible: true, enabled: true },
    totp: { visible: true, enabled: true },
    email: { visible: true, enabled: false }, // 表示されるがグレーアウト
    "webauthn-platform": { visible: false },  // 完全に非表示
  }}
/>
```

<div id="action-props">
  ### Action プロップス
</div>

Action プロップスを使用すると、コンポーネントの認証要素の登録・削除に関するライフサイクルイベントにフックし、操作をトリガーまたはキャンセルできます。

<table class="table">
  <thead>
    <tr>
      <th>プロップ</th>
      <th>型</th>
      <th>説明</th>
    </tr>
  </thead>

  <tbody>
    <tr>
      <td><code>enrollAction</code></td>
      <td><code>ComponentAction\<MFAType></code></td>
      <td>認証要素の登録に関するライフサイクルフック。<code>disabled: true</code>を設定すると、登録アクションを無効にできます。</td>
    </tr>

    <tr>
      <td><code>deleteAction</code></td>
      <td><code>ComponentAction\<MFAType></code></td>
      <td>認証要素の削除に関するライフサイクルフック。<code>disabled: true</code>を設定すると、削除アクションを無効にできます。</td>
    </tr>
  </tbody>
</table>

**enrollAction**

フローの開始前に登録をキャンセルするには、`onBefore`を使用します。登録が正常に完了した後に関連するUIを更新したり、分析データを送信したりするには、`onAfter`を使用します。

```tsx wrap lines theme={null}
<UserMFAManagement
  enrollAction={{
    onBefore: (factor) => window.confirm(`Enroll ${factor}?`),
    onAfter: (factor) => {
      analytics.track("MFA Factor Enrolled", { factor });
    },
  }}
/>
```

**deleteAction**

組み込みの確認ダイアログが表示される前に削除をキャンセルするには、`onBefore` を使用します。認証要素が正常に削除された後、`onAfter` が実行されます。

```tsx wrap lines theme={null}
<UserMFAManagement
  deleteAction={{
    onBefore: (factor) =>
      window.confirm(`Remove your ${factor} authenticator? You may be locked out if this is your only factor.`),
    onAfter: (factor) => {
      analytics.track("MFA Factor Deleted", { factor });
    },
  }}
/>
```

<div id="customize-props">
  ### プロップスをカスタマイズ
</div>

カスタマイズ用プロップスを使用すると、ソースコードを変更せずに文言、バリデーションルール、スタイリングを調整できます。

<table class="table">
  <thead>
    <tr>
      <th>プロップス</th>
      <th>型</th>
      <th>説明</th>
    </tr>
  </thead>

  <tbody>
    <tr>
      <td><code>customMessages</code></td>
      <td><code>Partial\<UserMfaManagementMessages></code></td>
      <td>デフォルトの UI テキストと翻訳を上書きします。</td>
    </tr>

    <tr>
      <td><code>styling</code></td>
      <td><code>ComponentStyling\<UserMFAManagementClasses></code></td>
      <td>CSS 変数とクラスを上書きします。</td>
    </tr>

    <tr>
      <td><code>schema</code></td>
      <td><code>\{ email?: RegExp; phone?: RegExp }</code></td>
      <td>メールアドレスおよび電話番号の入力フィールド用のカスタムバリデーションパターン。</td>
    </tr>
  </tbody>
</table>

**customMessages**

すべてのテキストと翻訳をカスタマイズできます。すべてのフィールドは任意です。

<Accordion title="利用可能なメッセージ">
  **ヘッダー** `header.title`, `header.description`, `no_active_mfa`, `loading_text`, `component_error.title`, `component_error.description`

  **Actions** `actions.remove_button_label`, `actions.cancel_button_label`, `actions.confirm_button_label`, `actions.continue_button_label`, `actions.submit_button_label`, `actions.verify_button_label`, `actions.back_button_label`, `actions.deleting_button_text`, `actions.menu_aria_label`

  **認証要素タイプごと** (`{factor}`は、`phone`、`totp`、`email`、`push-notification`、`webauthn-platform`、`webauthn-roaming`、または`recovery-code`に置き換えます)  `factors.{factor}.title`, `factors.{factor}.description`, `factors.{factor}.button_text`

  **通知** `notifications.factor_enroll_success`, `notifications.factor_remove_success`, `notifications.fetch_factors_error`, `notifications.factor_delete_error`

  **登録と削除** `enrollment` および `remove_factor_dialog`
</Accordion>

```tsx wrap lines theme={null}
<UserMFAManagement
  customMessages={{
    header: {
      title: "Two-Factor Authentication",
      description: "Add extra layers of security to protect your account.",
    },
    no_active_mfa: "You haven't enrolled any authentication methods yet.",
    factors: {
      phone: {
        title: "Text message (SMS)",
        description: "Receive a one-time code via text message.",
        button_text: "Add method",
      },
      totp: {
        title: "Authenticator app",
        description: "Use Google Authenticator, Authy, or any TOTP app.",
      },
    },
    notifications: {
      fetch_factors_error: "Unable to load your security methods.",
    },
  }}
/>
```

**スタイルをカスタマイズ**

CSS変数とクラスの上書きで外観をカスタマイズできます。ライト／ダークテーマに対応しています。

<Accordion title="利用可能なスタイリングオプション">
  **変数**—CSSカスタムプロパティ

  * `common` 両方のテーマに適用
  * `light` ライトモードのみ
  * `dark` ダークモードのみ

  **クラスの上書き**

  * `UserMFAManagement-item` 各認証要素タイプのカードコンテナ
  * `EnrollFactorModal-dialogContent` 認証要素の登録用マルチステップダイアログのコンテンツ領域
  * `FactorDeleteModal-dialogContent` Delete確認ダイアログのコンテンツ領域
</Accordion>

```tsx wrap lines theme={null}
<UserMFAManagement
  styling={{
    variables: {
      light: { "--color-primary": "#4f46e5" },
      dark: { "--color-primary": "#818cf8" },
    },
    classes: {
      "UserMFAManagement-item": "rounded-2xl shadow-md border-2",
      "EnrollFactorModal-dialogContent": "max-w-lg",
      "FactorDeleteModal-dialogContent": "max-w-sm",
    },
  }}
/>
```

**schema**

enrollment 中のユーザー入力を検証するための組み込み正規表現パターンを上書きします。どちらの field も任意です。設定されていない field には default のパターンが使用されます。

* `email` は、Email-OTP enrollment 時に入力されたメールアドレスを検証します (default: 標準的な RFC-5322 形式のパターン) 。
* `phone` は、SMS enrollment 時に入力された電話番号を検証します (default: 国際 E.164 形式を受け入れます) 。

```tsx wrap lines theme={null}
<UserMFAManagement
  schema={{
    // 自社ドメインのみに制限
    email: /^[a-zA-Z0-9._%+-]+@example\.com$/,
    // 米国の電話番号のみ
    phone: /^\+1[2-9]\d{2}[2-9]\d{6}$/,
  }}
/>
```

<div id="typescript-definitions">
  ## TypeScript 型定義
</div>

```typescript wrap lines theme={null}
type MFAType =
  | "phone"
  | "totp"
  | "email"
  | "push-notification"
  | "webauthn-platform"
  | "webauthn-roaming"
  | "recovery-code";

interface FactorConfigOptions {
  visible?: boolean;
  enabled?: boolean;
}

interface UserMFAManagementClasses {
  "UserMFAManagement-item"?: string;
  "EnrollFactorModal-dialogContent"?: string;
  "FactorDeleteModal-dialogContent"?: string;
}

interface ComponentAction<Item, Context = void> {
  disabled?: boolean;
  onBefore?: (item: Item, context?: Context) => boolean;
  onAfter?: (item: Item, context?: Context) => void | boolean | Promise<boolean>;
}

interface UserMFAManagementProps {
  hideHeader?: boolean;
  showActiveOnly?: boolean;
  disableEnroll?: boolean;
  disableDelete?: boolean;
  readOnly?: boolean;
  factorConfig?: Partial<Record<MFAType, FactorConfigOptions>>;
  customMessages?: Partial<UserMfaManagementMessages>;
  styling?: ComponentStyling<UserMFAManagementClasses>;
  schema?: { email?: RegExp; phone?: RegExp };
  enrollAction?: ComponentAction<MFAType>;
  deleteAction?: ComponentAction<MFAType>;
}
```

<div id="advanced-customization">
  ## 高度なカスタマイズ
</div>

上記のコンポーネント設定に加え、カスタムMFA管理インターフェースを構築する必要がある場合は、`useUserMFA` フックを使用します。

```tsx wrap lines theme={null}
import { useUserMFA } from "@auth0/universal-components-react";

export function CustomMfaManagement() {
  const {
    factorsByType,
    isLoadingFactors,
    error,
    visibleFactorTypes,
    handleEnroll,
    handleDeleteFactor,
  } = useUserMFA({
    factorConfig: {
      phone: { visible: true, enabled: true },
      totp: { visible: true, enabled: true },
    },
  });

  if (isLoadingFactors) return <p>Loading authentication methods…</p>;
  if (error) return <p role="alert">{error}</p>;

  return (
    <ul>
      {visibleFactorTypes.map((factorType) => (
        <li key={factorType}>
          <button onClick={() => handleEnroll(factorType)}>
            Add {factorType}
          </button>
          {factorsByType[factorType]?.map((factor) => (
            <button
              key={factor.id}
              onClick={() => handleDeleteFactor(factor.id, factorType)}
            >
              Remove {factorType}
            </button>
          ))}
        </li>
      ))}
    </ul>
  );
}
```

このフックは、`showActiveOnly`、`readOnly`、`disableDelete`、`factorConfig`、`customMessages`、`enrollAction`、`deleteAction` を受け取ります。認証要素のデータ、読み込み状態とアクションの状態、登録と削除の状態のほか、登録、検証、削除のフローを実装するために必要なハンドラーを返します。

組み込みのインターフェースを使用する場合は、`UserMFAManagement` を使用してください。フックを使用する場合は、サポートする認証要素タイプに対応した登録、検証、復旧コード、削除用の UI を実装してください。

<Note>
  `enrollAction` と `deleteAction` の `onAfter` は、アクションの完了直後ではなく、成功通知が閉じたときに実行されます。
</Note>

<div id="learn-more">
  ## 詳しく見る
</div>

<CardGroup cols={2}>
  <Card title="ユーザーのパスキー管理" icon="key" href="/docs/ja-jp/get-started/universal-components/web/components/user-passkey-management">
    同じライフサイクルの仕組みでWebAuthnパスキーを管理します。
  </Card>

  <Card title="セルフサービスのアカウントセキュリティインターフェースを構築" icon="shield" href="/docs/ja-jp/get-started/universal-components/web/components/my-account-overview">
    すべてのMy Accountコンポーネントの概要、前提条件、フレームワークの設定について説明します。
  </Card>
</CardGroup>