> ## Documentation Index
> Fetch the complete documentation index at: https://translations.mintlify.site/llms.txt
> Use this file to discover all available pages before exploring further.
# On-Behalf-Of Token Exchange
> On-Behalf-Of(OBO)トークン交換を使用して、中間層サービスがダウンストリームAPIを呼び出す際に、ユーザーのIDと権限を保持する方法を説明します。
On-Behalf-Of (OBO) Token Exchange ([RFC 8693](https://www.rfc-editor.org/rfc/rfc8693.html)) を使用すると、中間層サービスはダウンストリームAPIの呼び出し時に、ユーザーのIDと権限を保持できます。
アプリケーションがダウンストリームAPIを呼び出す必要がある場合は、次の方法を使用できます。
* [Client Credentials Flow](/docs/ja-jp/get-started/authentication-and-authorization-flow/client-credentials-flow): アプリケーションは自身の代理として動作し、自身として認証されます。リクエストがユーザーによって開始された場合でも、そのコンテキストは失われます。ダウンストリームサービスが認識できるのは、呼び出し元アプリケーションのIDだけです。
* On-Behalf-Of (OBO) Token Exchange: アプリケーションはユーザーにスコープが付与されたトークンを受け取り、それを新しいトークンに交換してダウンストリームサービスを呼び出せます。これにより、元のエンドユーザーのIDとコンテキストが呼び出しチェーン全体で保持されます。
たとえば、ユーザーが Service A への呼び出しをトリガーし、その後 Service A が Service B を呼び出す場合、OBO token exchange を使用すると、Service A はユーザーのアクセストークンを次のような新しいトークンに交換できます。
* 元のユーザーのIDと権限を維持する
* Service B 用に特化したスコープが設定されている
* Service B がエンドユーザーに基づいて認可の判断を行えるようにする
OBO token exchange では、[`post-login` Action トリガー](/docs/ja-jp/customize/actions/explore-triggers/signup-and-login-triggers/login-trigger)が実行されます。ここで:
* [`event.transaction.protocol`](/docs/ja-jp/customize/actions/explore-triggers/signup-and-login-triggers/login-trigger/post-login-event-object#param-protocol) は `oauth2-token-exchange` に設定されます。
* [`event.transaction.actor`](/docs/ja-jp/customize/actions/explore-triggers/signup-and-login-triggers/login-trigger/post-login-event-object#param-actor) は完全な委譲チェーンを追跡します。
標準的なログインフローと同様に、ダウンストリームAPI呼び出しに対して返されるスコープは、ユーザーの [Role-Based Access Control (RBAC)](/docs/ja-jp/manage-users/access-control/rbac) ポリシーに基づきます。
Auth0 for AI Agents アドオンを購入すると、OBO token exchange に対して、ご利用中のサブスクリプションティアにおける Authentication API の最大レート制限を使用できます。たとえば、[Private Cloud 100 RPS](/docs/ja-jp/troubleshoot/customer-support/operational-policies/rate-limit-policy/rate-limit-configurations/tier-100-rps-private-cloud) を利用している場合、OBO token exchange の 30 RPS というレート制限を超えて、OBO token exchange リクエストに対して最大 100 RPS の容量を利用できます。Authentication API の制限は共有されており、ログイン、トークンの更新、トークン交換を含む、すべての Authentication API リクエストを合算した全体の上限として機能します。詳細については、Technical Account Manager にお問い合わせください。
## ユースケース
OBO Token Exchange の一般的なユースケースには、次のようなものがあります。
* ユーザーに代わってファーストパーティ API を呼び出す必要がある MCP サーバー
* ユーザーに代わってダウンストリームサービスを呼び出す必要があるマイクロサービス
アプリケーションがユーザーに代わってサードパーティ API を呼び出せるようにするには、[Token Vault](/docs/ja-jp/secure/call-apis-on-users-behalf/token-vault) を使用します。
## 仕組み
OBO token exchange により、中間層サービスは受信したユーザー token を、downstream service 向けの scope を持つ新しい token に交換できます。この新しい token は元のユーザーの ID を保持しながら、JSON Web Token (JWT) の payload 内で、関与したサービスの連鎖を追跡します。
### 例: MCPサーバーがファーストパーティAPIを呼び出す
ユーザーがAuth0を使ってクライアントアプリケーションに認証し、そのクライアントアプリケーションがMCPサーバーを呼び出します。さらに、そのMCPサーバーはファーストパーティAPIを呼び出す必要があります。
#### ステップ 1: ユーザー認証
ユーザーがログインすると、Auth0 は JWT のペイロードに次のクレームを含む、MCP サーバー向けのスコープが設定されたアクセストークンを発行します。
```json theme={null}
{
"sub": "auth0|user123",
"aud": "https://mcp-server.example.com",
"azp": "spa_client_id" // またはトークンの仕様によっては "client_id"
}
```
| クレーム | 値 | 説明 |
| ----------------------------------------------------------------------------------------------------------------------------- | -------------------------------- | -------------------------- |
| `sub` | `auth0\|user123` | エンドユーザーの識別子 |
| `aud` | `https://mcp-server.example.com` | MCP サーバー向けのスコープを持つトークン |
| `azp` (or `client_id` depending on the [Access token profile](/docs/ja-jp/secure/tokens/access-tokens/access-token-profiles)) | `spa_client_id` | トークンをリクエストしたクライアントアプリケーション |
#### ステップ 2: OBO 交換
OBOトークン交換を使用して、MCPサーバーはユーザーのトークンをAuth0に提示し、ファーストパーティAPI向けのスコープが設定されたアクセストークンをリクエストします。Auth0は、次のクレームを含む、API向けにスコープが設定された新しいアクセストークンを発行します。
```json theme={null}
{
"sub": "auth0|user123",
"aud": "https://first-party-api.example.com",
"azp": "mcp_server_client_id", // またはトークンの仕様によっては "client_id"
"act": {
"sub": "mcp_server_client_id",
"act": {
"sub": "spa_client_id"
}
}
}
```
| クレーム | 値 | 説明 |
| ----------------------------------------------------------------------------------------------------------------------- | ------------------------------------------------------------------------- | ------------------------------------- |
| `sub` | `auth0\|user123` | 同じユーザー ID が維持される |
| `aud` | `https://first-party-api.example.com` | ファーストパーティ API を対象とするトークン |
| `azp` (or `client_id` depending on the [アクセストークンプロファイル](/docs/ja-jp/secure/tokens/access-tokens/access-token-profiles)) | `mcp_server_client_id` | トークンをリクエストしたクライアント (交換を実行した MCP サーバー) |
| `act` | `{"sub": "mcp_server_client_id",`
`"act": {"sub": "spa_client_id"}}` | 関与したすべてのアクターを示す委譲チェーン |
#### `act` クレーム
`act` (actor) クレーム は、委譲チェーン全体を追跡します。各 `act` レベルは呼び出しチェーン内のサービスを表し、最も外側の `act.sub` は、token exchange を実行した現在のアクターを識別します。
この例では:
* 最も外側の `act.sub`: `mcp_server_client_id` (直前に token exchange を行った MCP サーバー)
* ネストされた `act.sub`: `spa_client_id` (元のクライアントアプリケーション)
`azp` クレーム は最も外側の `act.sub` の値と一致し、直近で token exchange を実行したサービスを示す必要があります。
ファーストパーティ API が別のダウンストリームサービス (`https://calendar-api.acme.com`) を呼び出す場合、委譲チェーンはさらに延びます:
```json theme={null}
{
"sub": "auth0|user123",
"aud": "https://calendar-api.acme.com",
"azp": "first_party_api_client_id",
"act": {
"sub": "first_party_api_client_id",
"act": {
"sub": "mcp_server_client_id",
"act": {
"sub": "spa_client_id"
}
}
}
}
```
委譲チェーンは5段階までのネストに制限されています。exchange によって現在のクライアントがさらに1段階として追加されるため、subject token にすでに `act` のネストが4段階ある場合、OBO トークン交換は失敗します。
```json theme={null}
400 Bad Request
{
"error": "invalid_request",
"error_description": "Delegation chain (`act` claim) depth exceeds the maximum allowed limit of 4"
}
```
API呼び出しのたびに新しいトークンを要求するのではなく、アクセストークンは有効期限が切れるまでキャッシュして使ってください。アクセストークンは有効期限内であれば再利用できるため、トークン交換を繰り返すと、リソースの無駄遣いになり、待ち時間が増え、レート制限にかかるおそれがあります。
### User > MCPサーバー > API フロー
次の図は、MCPサーバーがユーザーに代わってファーストパーティ API を呼び出すエンドツーエンドの OBO トークン交換フローを示しています。
```mermaid theme={null}
sequenceDiagram
participant User
participant Client App
participant Auth0
participant MCP Server
participant First-Party API
Note over User,Auth0: ステップ1: ユーザー認証
User->>Client App: 認証 (Login)
Client App->>Auth0: ユーザートークンをリクエスト
Auth0-->>Client App: トークンAを発行
(aud: MCP Server, sub: UserX)
Note over Client App,MCP Server: ステップ2: 初回リクエスト
Client App->>MCP Server: エンドポイントを呼び出す (トークンA)
Note right of Client App: Authorization: Bearer [Token A]
Note over MCP Server,Auth0: ステップ3: 検証とトークン交換
activate MCP Server
MCP Server->>MCP Server: トークンAを検証
MCP Server->>Auth0: POST /oauth/token (トークン交換)
Note right of MCP Server: client_id: MCP_Server_Client_ID
subject_token: [Token A]
audience: First-Party API
Note over Auth0: ステップ4: トークン発行
activate Auth0
Auth0-->>MCP Server: トークンBを発行
(aud: First-Party API, sub: UserX)
deactivate Auth0
Note right of Auth0: トークンBにはactクレームが含まれ
MCP Serverがアクターとして示される
Note over MCP Server,First-Party API: ステップ5: ダウンストリーム呼び出し
MCP Server->>First-Party API: エンドポイントを呼び出す (トークンB)
Note right of MCP Server: Authorization: Bearer [Token B]
activate First-Party API
First-Party API->>First-Party API: トークンBを検証
サブジェクトをUserXとして識別
First-Party API-->>MCP Server: 200 OK (データ)
deactivate First-Party API
MCP Server-->>Client App: 200 OK (処理済みデータ)
deactivate MCP Server
```
1. **ユーザー認証**: ユーザーはクライアントアプリケーションで認証を行います。Auth0 Authorization Server は、MCP サーバー向けのscopeを持つ Token A を発行します。
2. **最初のリクエスト**: クライアントアプリケーションは MCP Server を呼び出し、`Authorization: Bearer` ヘッダーで Token A を渡します。
3. **検証とトークン交換**: MCP サーバーは Token A を受け取り、検証したうえで、Auth0 Authorization Server の `/oauth/token` エンドポイントに渡します。OBO token exchange を使用して、MCP サーバーは `subject_token` として Token A を提示し、ファーストパーティ API 用の新しい token をリクエストします。
4. **トークン発行**: Auth0 Authorization Server は Token B を発行します。Token B は Token A と同じ `sub` (ユーザー ID) を持ちますが、`aud` (audience) はファーストパーティ API になります。
5. **ダウンストリーム呼び出し**: MCP Server は Token B を使用してファーストパーティ API を呼び出します。API は Token B を検証し、そのリクエストが正当に元のユーザーに「代わって」行われていることを確認します。
### ユーザー > API1 > API2 > API3
次の図は、ユーザーに代わって下流のサービスを呼び出すマイクロサービスの連鎖における、エンドツーエンドのフローを示しています。
```mermaid theme={null}
sequenceDiagram
participant User
participant Client App
participant Auth0
participant API1
participant API2
participant API3
Note over User,Auth0: ステップ1: ユーザー認証
User->>Client App: Authenticates (Login)
Client App->>Auth0: Requests User Token
Auth0-->>Client App: Issues Token A
(aud: API1, sub: UserX)
Note over Client App,API1: Step 2: Initial Request
Client App->>API1: Call Endpoint (Token A)
Note right of Client App: Authorization: Bearer [Token A]
Note over API1,Auth0: Step 3: API1 Delegates to API2
activate API1
API1->>API1: Validates Token A
API1->>Auth0: POST /oauth/token (Token Exchange)
Note right of API1: client_id: API1_ID
subject_token: [Token A]
audience: API2
Note over Auth0: Step 4: Token Issuance
activate Auth0
Auth0-->>API1: Issues Token B
(aud: API2, sub: UserX)
deactivate Auth0
Note right of Auth0: Token B contains act claim
showing API1 as actor
Note over API1,API2: Step 5: Downstream Call
API1->>API2: Call Endpoint (Token B)
Note right of API1: Authorization: Bearer [Token B]
activate API2
API2->>API2: Validates Token B
Identifies subject as UserX
Note over API2,Auth0: Step 6: API2 Delegates to API3
API2->>Auth0: POST /oauth/token (Token Exchange)
Note right of API2: client_id: API2_ID
subject_token: [Token B]
audience: API3
activate Auth0
Note over Auth0: Step 7: Token Issuance
Auth0-->>API2: Issues Token C
(aud: API3, sub: UserX)
deactivate Auth0
Note right of Auth0: Token C contains act claim
showing API2 as actor
Note over API2,API3: Step 8: Downstream Call
API2->>API3: Call Endpoint (Token C)
Note right of API2: Authorization: Bearer [Token C]
activate API3
API3->>API3: Validates Token C
Identifies subject as UserX
API3-->>API2: 200 OK
deactivate API3
API2-->>API1: 200 OK (Data)
deactivate API2
API1-->>Client App: 200 OK (Processed Data)
deactivate API1
```
1. **ユーザー認証**: ユーザーはクライアントアプリケーションで正常に認証されます。Auth0 Authorization Server は、API1 向けのスコープを持つ Token A を発行します。
2. **最初のリクエスト**: クライアントアプリケーションは API1 を呼び出し、`Authorization: Bearer` ヘッダーで Token A を渡します。
3. **API1 から API2 への委譲**: API1 は Token A を受け取って検証した後、Auth0 Authorization Server の `/oauth/token` エンドポイントに渡します。OBO token exchange を使用して、API1 は Token A を `subject_token` として提示し、API2 向けの新しいトークンを要求します。
4. **トークンの発行**: Auth0 Authorization Server は API1 に新しいアクセストークンである Token B を付与します。Token B は Token A と同じ `sub` (ユーザー ID) を持ちますが、`aud` (オーディエンス) は API2 になります。
5. **ダウンストリーム呼び出し**: API1 は Token B を使用して API2 にリクエストを送信します。
6. **API2 から API3 への委譲**: API2 は Token B を受け取って検証した後、Auth0 Authorization Server の `/oauth/token` エンドポイントに渡します。OBO token exchange を使用して、API2 は Token B を `subject_token` として提示し、API3 向けの新しいトークンを要求します。
7. **トークンの発行**: Auth0 Authorization Server は API2 に新しいアクセストークンである Token C を付与します。Token C は Token A および Token B と同じ `sub` (ユーザー ID) を持ちますが、`aud` (オーディエンス) は API3 になります。
8. **ダウンストリーム呼び出し**: API2 は Token C を使用して API3 にリクエストを送信します。API3 は Token C を検証し、そのリクエストが元のユーザーに代わって正当に行われていることを確認します。
## 前提条件
OBOトークン交換を使用できるのは、リソースサーバーに関連付けられた Custom API クライアントのみです。Custom API クライアントは、リソースサーバーと同じ identifier を共有している場合、そのリソースサーバーにリンクされます。
Custom API クライアントには、次の要件があります。
* `app_type` を `resource_server` に設定します。
* `resource_server_identifier` を有効なリソースサーバー (例: `https://my-api.example.com`) に設定します。Auth0 は、認可リクエストでリソースサーバー identifier を audience パラメーターとして使用します。
Custom API クライアントはファーストパーティクライアントであるため、ファーストパーティクライアントがアクセスする必要がある API では、必ず[ユーザーの同意をスキップ](/docs/ja-jp/get-started/applications/confidential-and-public-applications/user-consent-and-third-party-applications#skip-consent-for-first-party-applications)してください。
### Custom API クライアントを作成
Auth0 Dashboard または Management API を使用して、Custom API クライアントを作成できます。
Auth0 Dashboard で Custom API クライアントを作成するには、次の手順に従います。
1. [**Applications > APIs**](https://manage.auth0.com/#/apis) に移動し、バックエンド API を選択します。
 2. **Add Application** を選択し、アプリケーション名を入力します。
3. **Add** を選択します。
アプリケーションが正常に作成されたら、**Configure Application** を選択して確認し、**Application Properties** までスクロールします。**Application Type** は **Custom API Client** です。
2. **Add Application** を選択し、アプリケーション名を入力します。
3. **Add** を選択します。
アプリケーションが正常に作成されたら、**Configure Application** を選択して確認し、**Application Properties** までスクロールします。**Application Type** は **Custom API Client** です。
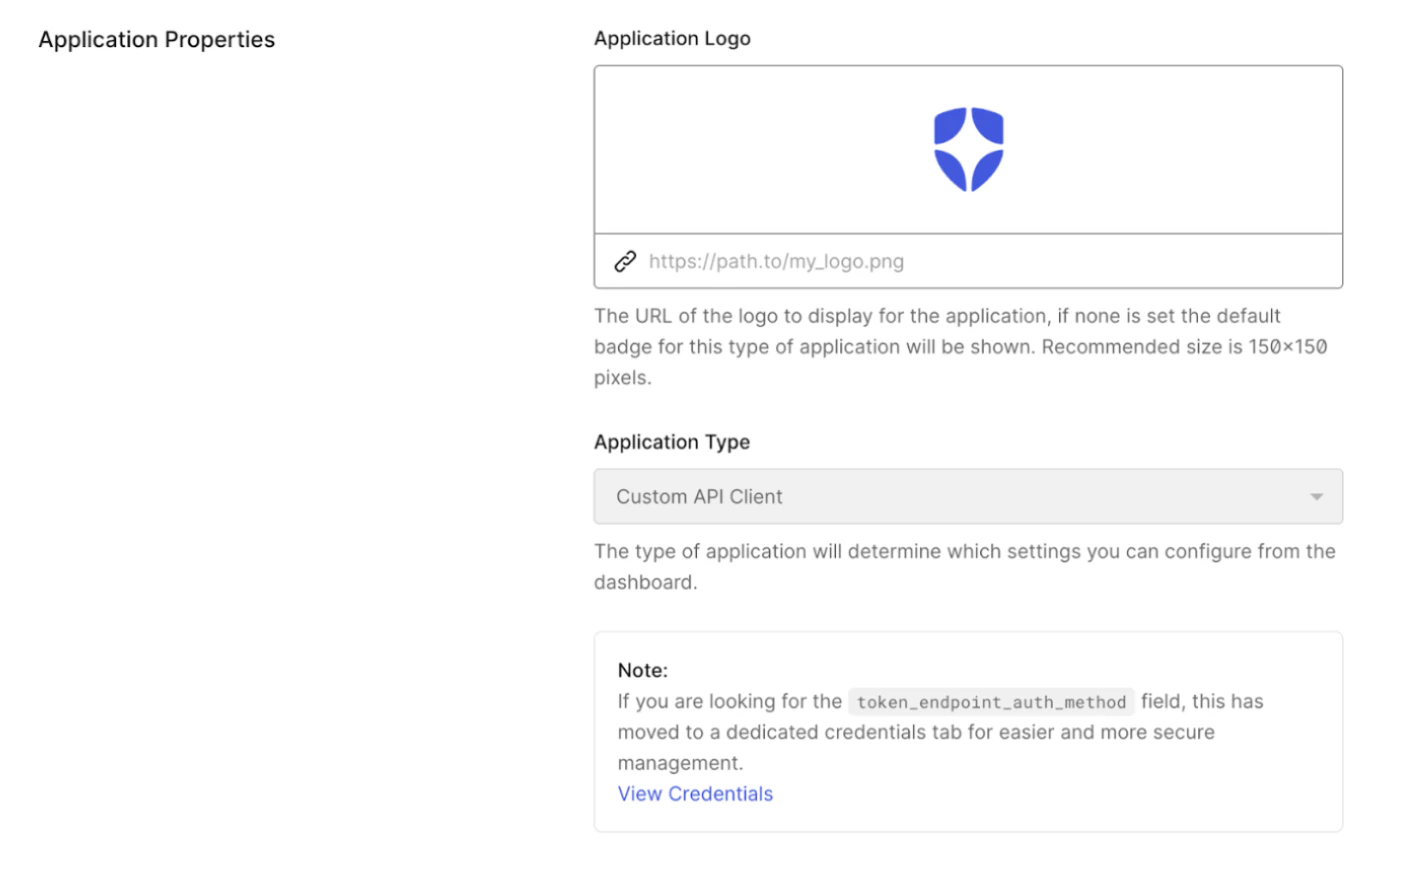 リソースサーバーと同じ識別子を持つ Custom API クライアントを作成するには、次のリクエストボディを指定して [`/api/v2/clients`](https://auth0.com/docs/api/management/v2/clients/post-clients) エンドポイントに `POST` リクエストを送信します。
```bash theme={null}
curl --request POST 'https://{yourDomain}/api/v2/clients' \
--header 'Content-Type: application/json' \
--header 'Authorization: Bearer YOUR_MANAGEMENT_API_TOKEN' \
--data '{
"name": "Custom API Client",
"app_type": "resource_server",
"resource_server_identifier": "https://my-api.example.com"
}'
```
| パラメーター | 説明 |
| ---------------------------- | -------------------------------------------------------------------------------------- |
| `name` | Custom API クライアントの名前。 |
| `app_type` | Custom API クライアントのアプリケーションタイプ。`resource_server` に設定します。 |
| `resource_server_identifier` | Custom API クライアントの一意の識別子。リソースサーバーの audience (つまり `https://my-api.example.com`) に設定します。 |
リソースサーバーと同じ識別子を持つ Custom API クライアントを作成するには、次のリクエストボディを指定して [`/api/v2/clients`](https://auth0.com/docs/api/management/v2/clients/post-clients) エンドポイントに `POST` リクエストを送信します。
```bash theme={null}
curl --request POST 'https://{yourDomain}/api/v2/clients' \
--header 'Content-Type: application/json' \
--header 'Authorization: Bearer YOUR_MANAGEMENT_API_TOKEN' \
--data '{
"name": "Custom API Client",
"app_type": "resource_server",
"resource_server_identifier": "https://my-api.example.com"
}'
```
| パラメーター | 説明 |
| ---------------------------- | -------------------------------------------------------------------------------------- |
| `name` | Custom API クライアントの名前。 |
| `app_type` | Custom API クライアントのアプリケーションタイプ。`resource_server` に設定します。 |
| `resource_server_identifier` | Custom API クライアントの一意の識別子。リソースサーバーの audience (つまり `https://my-api.example.com`) に設定します。 |
### クライアントグラントを作成
アクセスを認可するには、Custom API client とダウンストリーム API の間に、ユーザー委任アクセス用のクライアントグラントを作成する必要があります。
1. [**Applications > Applications**](https://manage.auth0.com/#/applications) に移動し、Custom API client を選択します。
2. **API Access** でリソースサーバー (例: `https://my-api.example.com`) を見つけ、**Edit** を選択します。
3. **User-Delegated Access** で **Grant Access** を選択し、付与する権限、または **Always grant all permissions** を選択します。
4. **Save** を選択します。
次のリクエストボディを使用して、[`/api/v2/client-grants`](https://auth0.com/docs/api/management/v2/client-grants/post-client-grants) エンドポイントに `POST` リクエストを送信します。
```bash theme={null}
curl --location 'https://{yourDomain}/api/v2/client-grants' \
--header 'Content-Type: application/json' \
--header 'Authorization: Bearer YOUR_MANAGEMENT_API_TOKEN' \
--data '{
"client_id": "YOUR_CLIENT_ID",
"audience": "https://my-api.example.com",
"scope": [
"read:item"
],
"subject_type": "user"
}'
```
### OBO token exchange を設定する
OBO token exchange グラントを使用して Custom API client を設定する方法を説明します。
1. **アプリケーション > アプリケーション** に移動し、Custom API client を選択します。
2. **Token Exchange** で、**On-Behalf-Of Token Exchange** をオンにします。
3. **Save** を選択します。
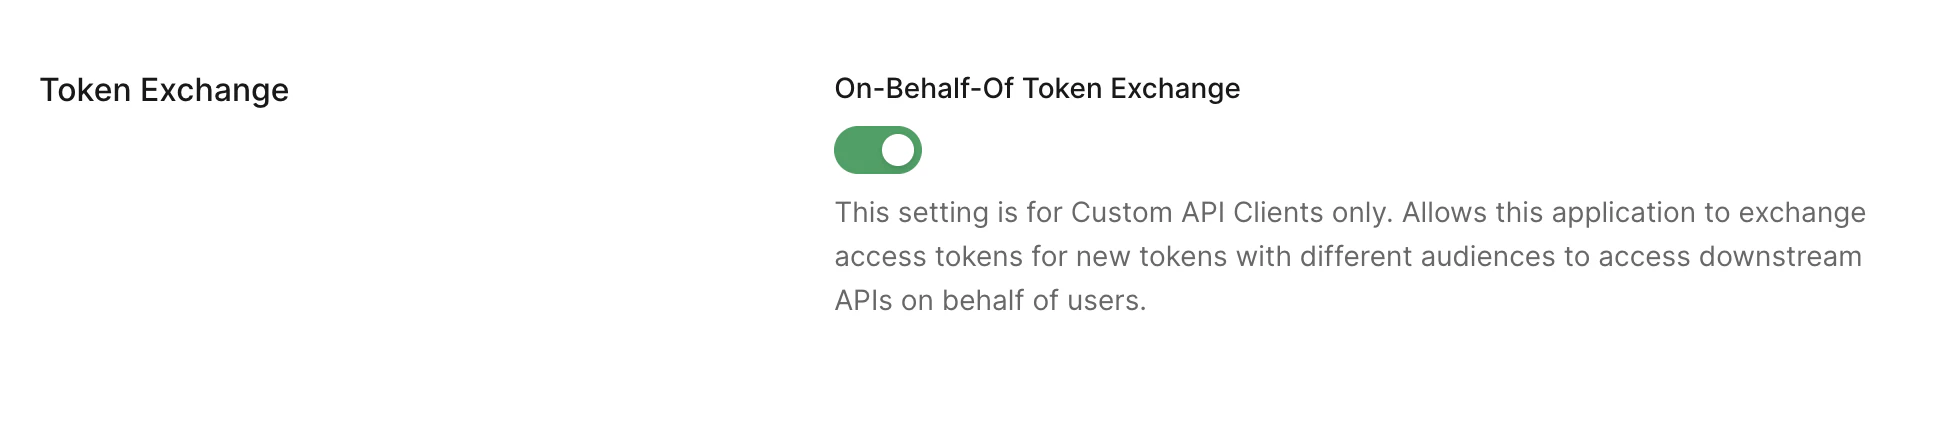 次のリクエストボディを指定して、[`/api/v2/clients/{clientId}`](https://auth0.com/docs/api/management/v2/clients/patch-clients-by-id) エンドポイントに `PATCH` リクエストを送信します。
```bash theme={null}
curl --location --request PATCH 'https://{yourDomain}/api/v2/clients/{clientId}' \
--header 'Content-Type: application/json' \
--header 'Authorization: Bearer YOUR_MANAGEMENT_API_TOKEN' \
--data '{
"token_exchange": {
"allow_any_profile_of_type": ["on_behalf_of_token_exchange"]
}
}'
```
次のリクエストボディを指定して、[`/api/v2/clients/{clientId}`](https://auth0.com/docs/api/management/v2/clients/patch-clients-by-id) エンドポイントに `PATCH` リクエストを送信します。
```bash theme={null}
curl --location --request PATCH 'https://{yourDomain}/api/v2/clients/{clientId}' \
--header 'Content-Type: application/json' \
--header 'Authorization: Bearer YOUR_MANAGEMENT_API_TOKEN' \
--data '{
"token_exchange": {
"allow_any_profile_of_type": ["on_behalf_of_token_exchange"]
}
}'
```
## OBO token exchange を実行する
OBO token exchange を実行するには、[`auth0-api-js`](https://github.com/auth0/auth0-auth-js)、[`auth0_api_python`](https://github.com/auth0/auth0-api-python)、または [Authentication API](https://auth0.com/docs/api/authentication) を使用します。
API 呼び出しのたびに新しいトークンをリクエストするのではなく、アクセストークンは有効期限が切れるまでキャッシュしてください。アクセストークンは期限切れになるまで再利用できます。トークン交換を繰り返すと、リソースの無駄遣いになり、レイテンシが増加し、レート制限に達するおそれがあります。
始める前に、[`auth0-api-js`](https://github.com/auth0/auth0-auth-js) ライブラリと、その依存関係がインストールされていることを確認してください。
まず、MCP サーバーの資格情報を使って `ApiClient` を初期化します。
```javascript theme={null}
import { ApiClient } from '@auth0/auth0-api-js';
const apiClient = new ApiClient({
domain: 'YOUR_AUTH0_DOMAIN',
audience: 'YOUR_MCP_SERVER_AUDIENCE',
clientId: 'YOUR_CLIENT_ID',
clientSecret: 'YOUR_CLIENT_SECRET',
});
```
次に、`getTokenOnBehalfOf()` メソッドを使用してトークン交換を行います。
```javascript theme={null}
const result = await apiClient.getTokenOnBehalfOf(accessToken, {
audience: 'YOUR_DOWNSTREAM_API_AUDIENCE',
scope: 'read:private', // 省略可能
});
```
`getTokenOnBehalfOf()` は、次のプロパティを含むオブジェクトを返します。
* `accessToken`: downstream API 用の新しいトークン
* `scope`: 付与されたスコープ
* `expiresIn`: トークンの有効期限 (秒)
始める前に、[`auth0_api_python`](https://github.com/auth0/auth0-api-python)ライブラリと、その依存関係がインストールされていることを確認してください。
まず、必要なクラスをインポートし、MCP サーバーの資格情報を使って `ApiClient` を初期化します。
```python theme={null}
from auth0_api_python import ApiClient, ApiClientOptions
api_client = ApiClient(
ApiClientOptions(
domain='YOUR_AUTH0_DOMAIN',
audience='YOUR_MCP_SERVER_AUDIENCE',
client_id='YOUR_CLIENT_ID',
client_secret='YOUR_CLIENT_SECRET',
)
)
```
次に、`get_token_on_behalf_of()` メソッドを使用してトークンを交換します。
```python theme={null}
result = await api_client.get_token_on_behalf_of(
access_token=access_token,
audience='YOUR_DOWNSTREAM_API_AUDIENCE',
scope='read:private' # 省略可能
)
```
`get_token_on_behalf_of()` は、以下を含む辞書を返します。
* `access_token`: ダウンストリーム API 用の新しいトークン
* `scope`: 付与されたスコープ
* `expires_in`: トークンの有効期限 (秒)
次のリクエストボディを指定して、`/oauth/token` エンドポイントに `POST` リクエストを送信します:
```bash theme={null}
curl --location 'https://YOUR_DOMAIN.us.auth0.com/oauth/token' \
--header 'Content-Type: application/json' \
--data '{
"client_id": "YOUR_CLIENT_ID",
"client_secret": "YOUR_CLIENT_SECRET",
"subject_token": "AUTH0_SUBJECT_TOKEN",
"grant_type": "urn:ietf:params:oauth:grant-type:token-exchange",
"subject_token_type": "urn:ietf:params:oauth:token-type:access_token",
"requested_token_type": "urn:ietf:params:oauth:token-type:access_token",
"audience": "https://my-api.example.com"
}'
```
| Parameter | Example | Description |
| ---------------------- | ------------------------------------------------- | ------------------------------------------------------------------------------------------------------------------------- |
| `grant_type` | `urn:ietf:params:oauth:grant-type:token-exchange` | 必須。標準的なログインではなく、トークン交換を行うよう Authorization Server に指示します。 |
| `client_id` | `` | 必須。リクエストを行う中間層サービスの一意の ID です。 |
| `client_secret` | `` | 任意。中間層サービス自体を認証するために使用するシークレット (またはアサーション) です。クライアント認証方式はどれでも使用できますが、`token_endpoint_auth_method` を `none` に設定することはできません。 |
| `subject_token` | `` | 必須。ユーザー/クライアントから受け取り、中間層サービスが現在保持しているトークンです。 |
| `subject_token_type` | `urn:ietf:params:oauth:token-type:access_token` | 必須。`subject_token` の形式を定義します (例: アクセストークンや ID トークン) 。 |
| `requested_token_type` | `urn:ietf:params:oauth:token-type:access_token` | 必須。返却してほしいトークンの種類を指定します (通常は次の API 用のアクセストークン) 。 |
| `audience` | `https://my-api.example.com` | 必須。新しいトークンを受け取って検証するダウンストリームサービスの識別子です。 |
| `scope` | `read:data write:data` | 任意。ダウンストリームへの呼び出しで要求する特定の権限を、スペース区切りで指定したリストです。 |
成功すると、次のようなレスポンスが返されます。
```json theme={null}
{
"access_token": "YOUR_AUTH0_ACCESS_TOKEN",
"expires_in": 86400,
"token_type": "Bearer",
"issued_token_type": "urn:ietf:params:oauth:token-type:access_token"
}
```
| パラメータ | 例 | 説明 |
| ------------------- | ----------------------------------------------- | --------------------------------------------------------------------------------------------------------------------------------------------------------------------------------- |
| `access_token` | `eyJ...` | 「新しい」Auth0 アクセストークンです。これは JWT またはオペークな文字列で、中間層サービスが downstream API を呼び出す際に使用します。 |
| `issued_token_type` | `urn:ietf:params:oauth:token-type:access_token` | 返されるトークンの形式を示します。これは、リクエスト内の `requested_token_type` と一致するか、そのサブセットになります。 |
| `token_type` | `Bearer` | `Authorization` ヘッダーで使用する認証スキームを指定します。OBO では通常 `Bearer` ですが、中間層サービスと downstream API が DPoP を使用している場合は `DPoP` になります。 |
| `expires_in` | `3600` | downstream API の設定に応じた、トークンの有効期間 (秒) です。これは元のユーザートークンより短いことがよくあります。 |
| `scope` | `read:data` | トークンに付与される具体的な権限です。これらの権限は、[ユーザー委任アクセス クライアントグラント](/docs/ja-jp/get-started/applications/application-access-to-apis-client-grants#user-access-vs-client-access) を使用して有効にする必要があります。 |
## トークンバインディング
[DPoP](/docs/ja-jp/secure/sender-constraining/demonstrating-proof-of-possession-dpop) または [mTLS](/docs/ja-jp/secure/sender-constraining/mtls-sender-constraining) を使用してトークンが送信者に制約されている場合、キーまたは証明書の正当な保有者のみが所有を証明してトークンを使用できます。
OBO 交換中、トークンは[中間層サービス](/docs/ja-jp/secure/call-apis-on-users-behalf/on-behalf-of-token-exchange)が保持します。
Auth0 は、中間層サービスが元の保有者のキーまたは証明書を保持していることを暗号学的に検証できないため、交換時に元のトークンのバインディングを再検証しません。
中間層サービスには、次の責任があります。
* トークンバインディングの検証
* 新しいトークンのバインディング
* DPoP と mTLS 間でバインディングメカニズムを切り替える仕組みの管理
トークンバインディングの検証は中間層サービスの責任です。バインディングとは、トークン保有者が元の保有者のキーまたは証明書を所有していることを示す暗号学的証明です。バインドされたトークンを交換する前に、元のトークンのバインディングが検証済みであることを確認してください。
* DPoP: 受信した DPoP proof の `jwk` の JWK SHA-256 thumbprint を計算し ([RFC 7638](https://www.rfc-editor.org/rfc/rfc7638) に従う) 、サブジェクトトークンの `cnf.jkt` クレーム と一致することを検証します。Auth0 はトークン交換中にこのチェックを実行しません。
* mTLS: クライアント証明書の DER エンコーディングの SHA-256 thumbprint を base64url エンコードし、サブジェクトトークンの `cnf.x5t#S256` クレーム と一致することを検証します。
バリデーションに失敗した場合は、交換を試行せずに request を拒否してください。
**新しいトークンのバインディング**: [ダウンストリームリソースサーバーで送信者制約が有効または必須になっている](/docs/ja-jp/secure/sender-constraining)場合、中間層サービスが有効な DPoP proof または mTLS 証明書を `/oauth/token` endpoint に提示すると、Auth0 は新たに発行する アクセストークン を送信者に制約します。
| **メカニズム** | **新しいトークンをバインドする方法** |
| --------- | ------------------------------------------------------------------------------------------------------------------------------------------------------------------------------------------------------------------------------------------------------ |
| DPoP | 新たに生成した `DPoP` proof header を `/oauth/token` request に含めます。proof はこの request に限定する必要があります。`htm` を `POST` に、`htu` を Auth0 テナントの `/oauth/token` endpoint URI に設定します。発行されたトークンは DPoP にバインドされ、response の `token_type` は `DPoP` になります。 |
| mTLS | mTLS バインディングの場合、OBO トークン交換には相互 TLS が必要です。中間層サービスは、サーバー側 TLS に依存するだけでなく、クライアント証明書で認証する必要があります。証明書は、[Auth0 の中間層クライアントにプロビジョニングされている](/docs/ja-jp/get-started/applications/configure-mtls)必要があります。Auth0 は `cnf.x5t#S256` confirmation クレーム を含むトークンを発行します。 |
DPoP proof も mTLS 証明書も提示されない場合、Auth0 は元のサブジェクトトークンのバインディング status にかかわらず、バインドされていない bearer token を発行します。
**バインディングメカニズムの移行と capabilities の不一致**: 中間層サービスは、新しいメカニズムに必要な資格情報 (たとえば、プロビジョニング済みの mTLS 証明書) を保有していれば、OBO 交換中にバインディングメカニズムを切り替えられます (たとえば、DPoP から mTLS へ) 。新たに発行されるトークンには、新しいバインディングタイプが反映されます。
交換前に、ダウンストリーム API が提示するバインディングメカニズムをサポートしていることを確認してください。Auth0 はメカニズムの互換性を検証せず、互換性にかかわらずトークンを発行します。ダウンストリーム API が提示されたメカニズムをサポートしていない場合、runtime でトークンを拒否します。メカニズム間の調整ができない場合は、交換を試行せず、代わりに呼び出し元へ error を返してください。
**DPoP nonce**: 元のサブジェクトトークンが、サーバー発行 nonce を使用する DPoP により public client (SPA やモバイルアプリなど) に発行された場合、中間層サービスは `/oauth/token` endpoint で再バインディングするための有効な nonce を持っていない可能性があります。この場合、Auth0 は `DPoP-Nonce` response header に新しい nonce を含む `use_dpop_nonce` error を返します。新しい DPoP proof でその nonce を使用して request を再試行してください。
元のサブジェクトトークンが送信者に制約されているにもかかわらず、中間層サービスがバインディング資格情報 (DPoP proof または mTLS 証明書) を `/oauth/token` エンドポイントに提示しない場合、Auth0 はリクエストを拒否しません。代わりに、エラーを示さずにバインドされていない bearer token を発行します。ダウンストリーム API は Proof of Possession なしでこのトークンを受け入れるため、傍受されると再利用される可能性があります。ダウンストリームのリソースサーバーが送信者に制約された tokens を必要とする場合は、バインドされていない token を forward しないでください。拒否して、呼び出し元にエラーを返してください。
## Organizations のサポート
ユーザーが organization を通じて認証されると、アクセストークンには `org_id` クレームが含まれます。OBOトークン交換では、この organization のコンテキストが委譲チェーン全体で保持されます。
Auth0 が organization に関連付けられたアクセストークンを含む OBOトークン交換リクエストを受け取ると、次の点を検証します。
* `org_id` がテナント内に存在すること
* ユーザー (`sub` で識別される) がその organization のメンバーであること
検証に失敗した場合、Auth0 はトークン交換リクエストを拒否します。成功した場合、Auth0 は次のような新しいアクセストークンを発行します。
* 元のトークンと同じ `org_id` クレームを含む
* 同じ organization 固有の RBAC ポリシーを適用する
* [`post-login` Actions トリガー](/docs/ja-jp/customize/actions/explore-triggers/signup-and-login-triggers/login-trigger/post-login-event-object#event-organization)で、`event.organization` プロパティを通じて organization のコンテキストを利用できるようにする