> ## Documentation Index
> Fetch the complete documentation index at: https://translations.mintlify.site/llms.txt
> Use this file to discover all available pages before exploring further.
> リソースサーバー向けに Rich Authorization Requests (RAR) を設定する方法を説明します。
# Rich Authorization Requests (RAR) を設定する
[Rich Authorization Requests (RAR)](https://datatracker.ietf.org/doc/html/draft-ietf-oauth-rar) を使用すると、クライアントは [Authorization Code Flow with Pushed Authorization Requests (PAR)](/ja/docs/get-started/authentication-and-authorization-flow/authorization-code-flow/authorization-code-flow-with-par) および [クライアント主導バックチャネル認証フロー](/ja/docs/get-started/authentication-and-authorization-flow/client-initiated-backchannel-authentication-flow) で、エンドユーザーなどの リソースオーナー から きめ細かな認可 データを要求し、取得できます。
Rich Authorization Requests では、`authorization_details` パラメーターを使用します。このパラメーターは JSON オブジェクトの配列を受け取り、ユーザーに代わってクライアントがアクセスを求める特定のリソースやアクションなど、要求している認可の詳細情報を含めることができます。
要求された `authorization_details` は、次のいずれかを使用してユーザーにレンダリングできます。
* ブラウザー。 [カスタマイズした同意プロンプト](#set-customized-consent-prompt) を使用します
* [Auth0 Guardian SDK または Auth0 Guardian アプリ](/ja/docs/secure/multi-factor-authentication/auth0-guardian) でプッシュ通知を使用する場合のモバイルアプリケーション
リソースサーバー 向けに Rich Authorization Requests を設定するには、次の作業を行う必要があります。
1. リソースサーバーの [`authorization_details` タイプを登録](#register-authorization_details-types) します。
2. アプリがそれらのタイプを要求できるように、[API Access ポリシーを設定](#configure-the-api-access-policies) します。
3. `authorization_details` をレンダリングするために、[カスタマイズした同意プロンプトを設定](#set-customized-consent-prompt) します。
4. [任意: リソースサーバーの同意ポリシーを設定](#optional-configure-consent-policy-for-the-resource-server) します。
## `authorization_details` の型を登録する
JSON 配列内の各オブジェクトには、そのオブジェクトの構造を示す `type` フィールドが必要です。`authorization_details` 配列には、同じ `type` のエントリを複数含めることができます。
### Auth0 Guardian アプリ
Auth0 Guardian アプリを使用している場合、`authorization_details` パラメーター値の配列には 1 つのオブジェクトのみを含める必要があり、そのオブジェクトは次の Auth0 スキーマに準拠している必要があります。
| Field | Description | Example |
| ------------- | ------------------------------------------------------------------------------------------------------------------------------------------------------------------------------------------------------------------------------------------------------------------------------------------------------------------------------------------------------------------------------------------------------------------------------------------------------------------------------------------------------------------------ | --------------------------------------------------------------------------------------------------------------------------------- |
| `type` | 認可リクエストの種類を指定します:
- `urn:auth0:schemas:authorization-details`: Auth0 URN は、このリクエストで Auth0 スキーマを使用することを示します。
- `v1`: スキーマのバージョン。
- `user-profile`: このリクエストがユーザープロフィール情報を対象とすることを示す、顧客指定の値。
| `urn:auth0:schemas:authorization-details:v1:user-profile` |
| `instruction` | リクエストを承認するユーザー向けの、人が読んで理解できるメッセージ。 | `Please approve the request.` |
| `properties` | 要求されている特定のユーザー属性またはクレームを含む JSON オブジェクトです。各キー (例: `email`、`full_name`) は、特定のユーザープロフィールフィールドを表します:
- `display`: そのプロパティを同意ダイアログでユーザーに表示するかどうかを決定するブール値です。`true` の場合は表示され、`false` の場合はユーザーに表示しない内部専用のプロパティになります。
- `name`: プロパティの人が読んでわかる名前 (例: "Email Address") 。
- `display_order`: 同意ダイアログでプロパティを表示する順序を指定する整数。
- `description`: プロパティの目的を簡潔に説明する省略可能な項目。
- `value`: プロパティの実際のデータ値 (例: "[user@example.com](mailto:user@example.com)"、"John Doe") 。データ型は文字列、整数、ブール値などさまざまです。
| `"properties": { "stringPropertyForDisplay": { "display": true, "name": "A String:", "display_order": "1", "value": "Value 1"} }` |
以下は、Auth0 スキーマを使用した `authorization_details` タイプの例です:
```json lines theme={null}
{
"type": "urn:auth0:schemas:authorization-details:v1:user-profile",
"instruction": "An instruction to the user",
"properties": {
"stringPropertyForDisplay": {
"display": true,
"name": "A String:",
"display_order": 1,
"value": "Value 1"
},
"numericPropertyForDisplay": {
"display": true,
"name": "A Number:",
"display_order": 2,
"description": "An optional description",
"value": 100.00
},
"booleanPropertyForDisplay": {
"display": true,
"name": "A Boolean:",
"display_order": 3,
"value": true
},
"hiddenProperty": {
"display": false,
"value": "This value should not be displayed"
}
}
}
```
### その他の通知チャネル
Auth0 Guardian アプリを使用していない場合、`authorization_details` 型で Auth0 スキーマを使用する必要はありません。`authorization_details` をカスタマイズした同意プロンプト、または Auth0 Guardian SDK を使用した独自のモバイルアプリに表示する場合は、次の要件が適用されます。
* 最大 5 KB
* 有効な JSON であること
* オブジェクトの配列であること
* 配列内のエントリは最大 5 件
* すべてのオブジェクトに `type` プロパティが必要であること (API に事前登録されたもの)
* 1 つのオブジェクトあたりのプロパティ数は最大 10 個
* プロパティ名の最大文字数は 255
* プロパティ値の最大文字数は 255
* オブジェクトのネストは最大 5 レベル
* プロパティ名に使用できる文字は次のとおりです: `a-zA-Z0-9_.-`
以下は、Auth0 スキーマを使用しない `money_transfer` 型の `authorization_details` の例です。これには、次のオブジェクトフィールドが含まれます。
* `instructedAmount`: 送金される USD 建ての金額。
* `sourceAccount`: 資金の送金元となる銀行口座。
* `destinationAccount`: 資金の送金先となる銀行口座。
* `beneficiary`: 送金の受取人。
* `subject`: 送金の件名。
```json lines theme={null}
{
"type": "money_transfer",
"instructedAmount": {"amount": 2500, "currency": "USD"},
"sourceAccount": "xxxxxxxxxxx1234",
"destinationAccount": "xxxxxxxxxxx9876",
"beneficiary": "Hanna Herwitz",
"subject": "A Lannister Always Pays His Debts"
}
```
`authorization_details` タイプは、許可されたスコープを登録するのと同様に、リソースサーバーに登録する必要があります。`authorization_details` タイプは、[Auth0 Dashboard](https://manage.auth0.com/) または [Management API](https://auth0.com/docs/api/management/v2) を使用して登録できます。
Auth0 Dashboard で `authorization_details` を追加するには、次の手順に従います。
1. [Auth0 Dashboard > Applications > APIs](https://manage.auth0.com/#/apis) に移動します。
2. **Permissions** タブを選択します。
3. **Add an Authorization Details type** で、リソースサーバーに複数の `authorization_details` タイプを追加できます。`authorization_details` タイプを入力します。
4. **+Add** を選択します。
リソースサーバーに登録されている `authorization_details` タイプは、**List of Authorization Details Types** に表示されます。
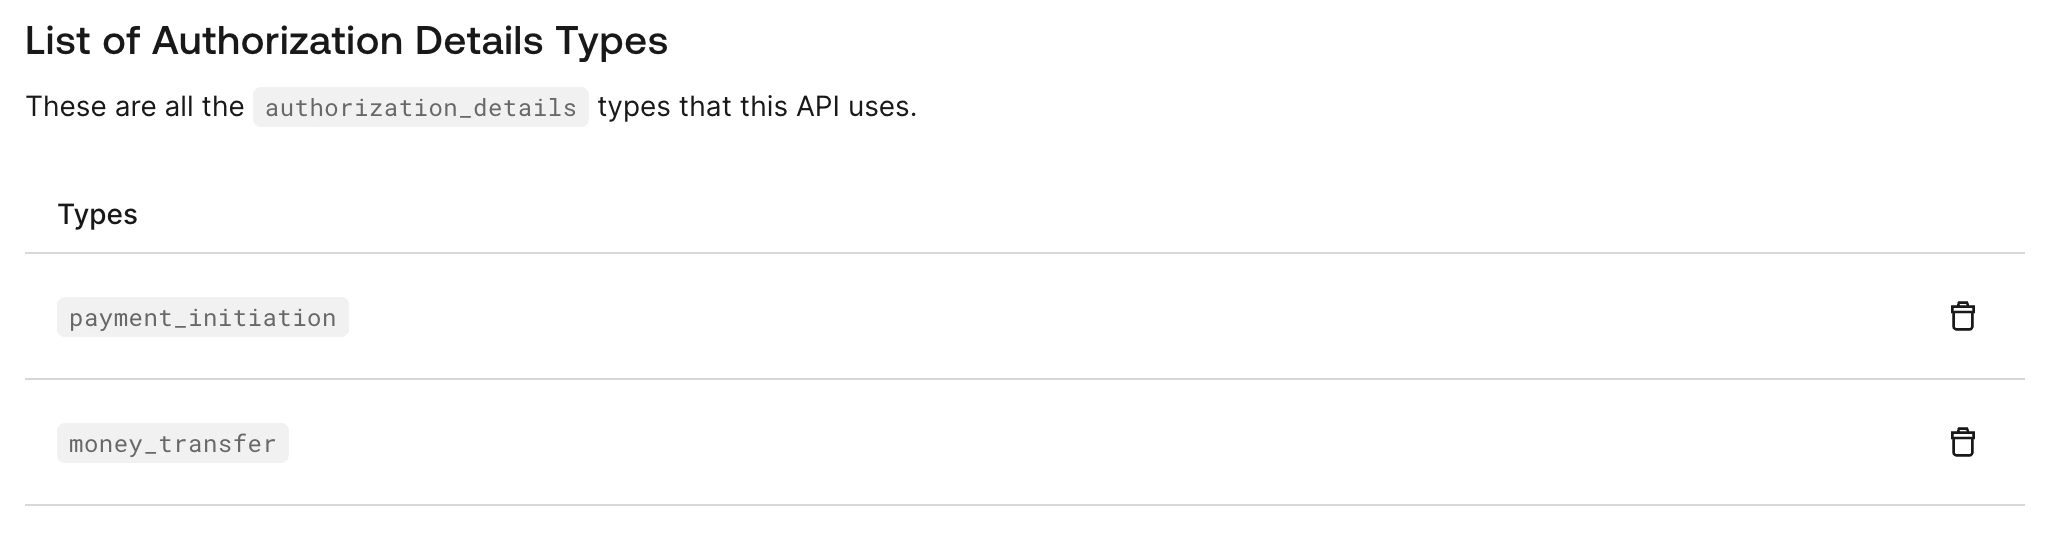 既存のリソースサーバーに `authorization_details` タイプを登録するには、[Update a resource server](https://auth0.com/docs/api/management/v2/resource-servers/patch-resource-servers-by-id) エンドポイントに `PATCH` リクエストを送信します。
次のコードサンプルは、リソースサーバーの `authorization_details` に `payment_initiation` タイプと `money_transfer` タイプを追加します。
```bash lines theme={null}
curl --location --request PATCH 'https://$tenant/api/v2/resource-servers/$resource-server-id' \
--header 'Authorization: Bearer $management_access_token' \
--header 'Content-Type: application/json' \
--data-raw '{
"authorization_details": [{"type": "payment_initiation"}, {"type": "money_transfer"}]
}'
```
登録済みの `authorization_details` タイプを含む新しいリソースサーバーを作成するには、`/resource-servers` エンドポイントに `POST` リクエストを送信します。
次の `POST` リクエストは、`authorization_details` タイプ `payment_initiation` を含む新しいリソースサーバーを作成します。
```bash lines theme={null}
curl --location --request POST 'https://$tenant/api/v2/resource-servers' \
--header 'Authorization: Bearer $management_access_token' \
--header 'Content-Type: application/json' \
--data-raw '{
"name": "Payments API",
"identifier": "https://payments.api/",
"authorization_details": [{"type": "payment_initiation"}]
}'
```
既存のリソースサーバーに `authorization_details` タイプを登録するには、[Update a resource server](https://auth0.com/docs/api/management/v2/resource-servers/patch-resource-servers-by-id) エンドポイントに `PATCH` リクエストを送信します。
次のコードサンプルは、リソースサーバーの `authorization_details` に `payment_initiation` タイプと `money_transfer` タイプを追加します。
```bash lines theme={null}
curl --location --request PATCH 'https://$tenant/api/v2/resource-servers/$resource-server-id' \
--header 'Authorization: Bearer $management_access_token' \
--header 'Content-Type: application/json' \
--data-raw '{
"authorization_details": [{"type": "payment_initiation"}, {"type": "money_transfer"}]
}'
```
登録済みの `authorization_details` タイプを含む新しいリソースサーバーを作成するには、`/resource-servers` エンドポイントに `POST` リクエストを送信します。
次の `POST` リクエストは、`authorization_details` タイプ `payment_initiation` を含む新しいリソースサーバーを作成します。
```bash lines theme={null}
curl --location --request POST 'https://$tenant/api/v2/resource-servers' \
--header 'Authorization: Bearer $management_access_token' \
--header 'Content-Type: application/json' \
--data-raw '{
"name": "Payments API",
"identifier": "https://payments.api/",
"authorization_details": [{"type": "payment_initiation"}]
}'
```
## API Access ポリシーを設定する
[アプリケーション向け API Access ポリシー](/ja/docs/get-started/apis/api-access-policies-for-applications)では、どのアプリケーションが API にアクセスできるか、また、どのスコープまたは `authorization_details` タイプへのアクセスが許可されるかを制御します。
Management API を使用して、API の現在のポリシーを確認できます。[リソースサーバーを取得する](https://auth0.com/docs/api/management/v2/resource-servers/get-resource-servers-by-id)エンドポイントに `GET` リクエストを送信し、レスポンスの `subject_type_authorization` プロパティを確認してください。
```bash lines theme={null}
curl --location --request GET 'https://$tenant/api/v2/resource-servers/$resource-server-id' \
--header 'Authorization: Bearer $management_access_token' \
--header 'Content-Type: application/json'
```
`subject_type_authorization` プロパティには、`client.policy` と `user.policy` に対する値があります。
* policy の値が `allow_all` の場合、アプリケーションまたはユーザーは、その API に登録されているすべての `authorization_details` タイプをリクエストできます。
* policy の値が `require_client_grant` の場合、各 `authorization_details` タイプは、そのアプリケーションのクライアントグラントで明示的に許可されている必要があります。
* policy の値が `deny_all` の場合、アプリケーションまたはユーザーは、その API に登録されている `authorization_details` タイプを一切リクエストできません。
アプリケーションのクライアントグラントの管理方法について詳しくは、[Application Access to APIs: Client Grants](/ja/docs/get-started/applications/application-access-to-apis-client-grants) を参照してください。
## カスタマイズした同意プロンプトを設定する
同意プロンプトで、Rich Authorization Request の `authorization_details` をレンダリングできます。そのためには、適切なテンプレート partials を使用して `customized-consent` プロンプトを設定します。
カスタマイズした同意プロンプトは、Auth0 CLI または Management API を使用して設定できます。
### Auth0 CLI
カスタマイズした consent partials を設定するには、ターミナルで適切なフラグを付けて `auth0 ul customize` コマンドを実行します。
```bash lines theme={null}
auth0 ul customize
```
詳しくは、[auth0 universal-login customize ドキュメント](https://auth0.github.io/auth0-cli/auth0_universal-login_customize.html)を参照してください。
### Management API
カスタマイズした consent partials を設定するには、`/prompts/customized-consent/partials` エンドポイントに `PUT` リクエストを送信します。
```bash lines theme={null}
curl --location --request PUT "https://$tenant/api/v2/prompts/customized-consent/partials" \
--header "Authorization: Bearer $management_access_token" \
--header "Content-Type: application/json" \
--data '{
"customized-consent": {
"form-content": "Operation Details
Transaction Type
{{ transaction.params.authorization_details[0].type }}
Amount
{{ transaction.params.authorization_details[0].instructedAmount.amount }} {{ transaction.params.authorization_details[0].instructedAmount.currency }}
Recipient
{{ transaction.params.authorization_details[0].beneficiary }}
Destination Account
{{ transaction.params.authorization_details[0].destinationAccount }}
"
}
}'
```
カスタマイズした consent テンプレートは、Auth0 がエンドユーザーに表示する次の consent プロンプト内で `authorization_details` をレンダリングします。
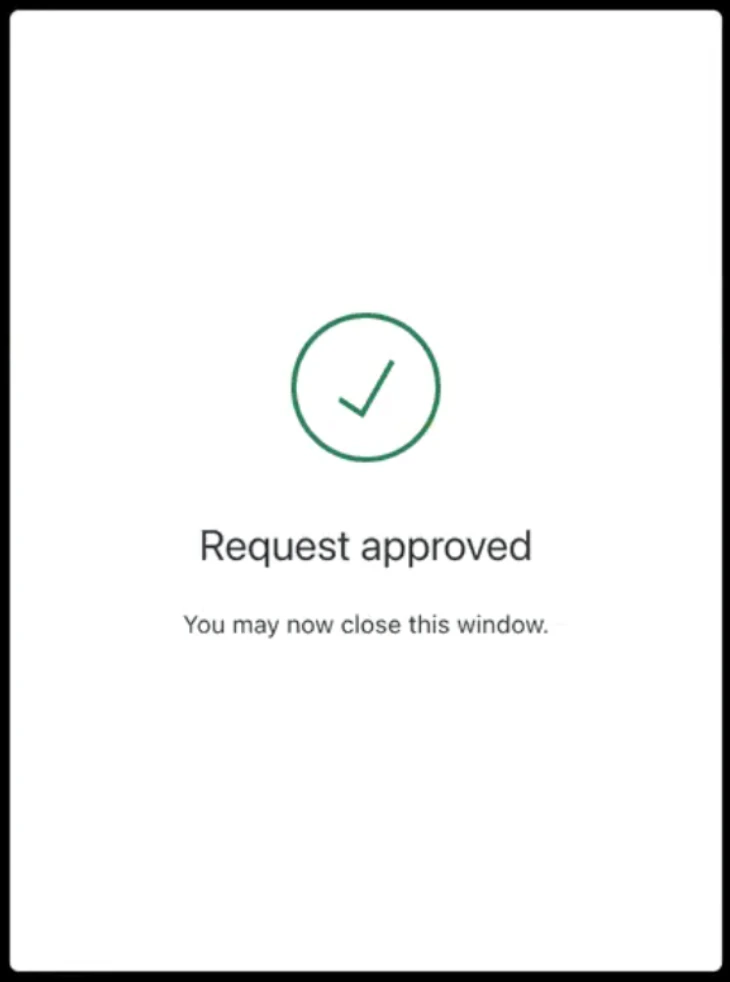
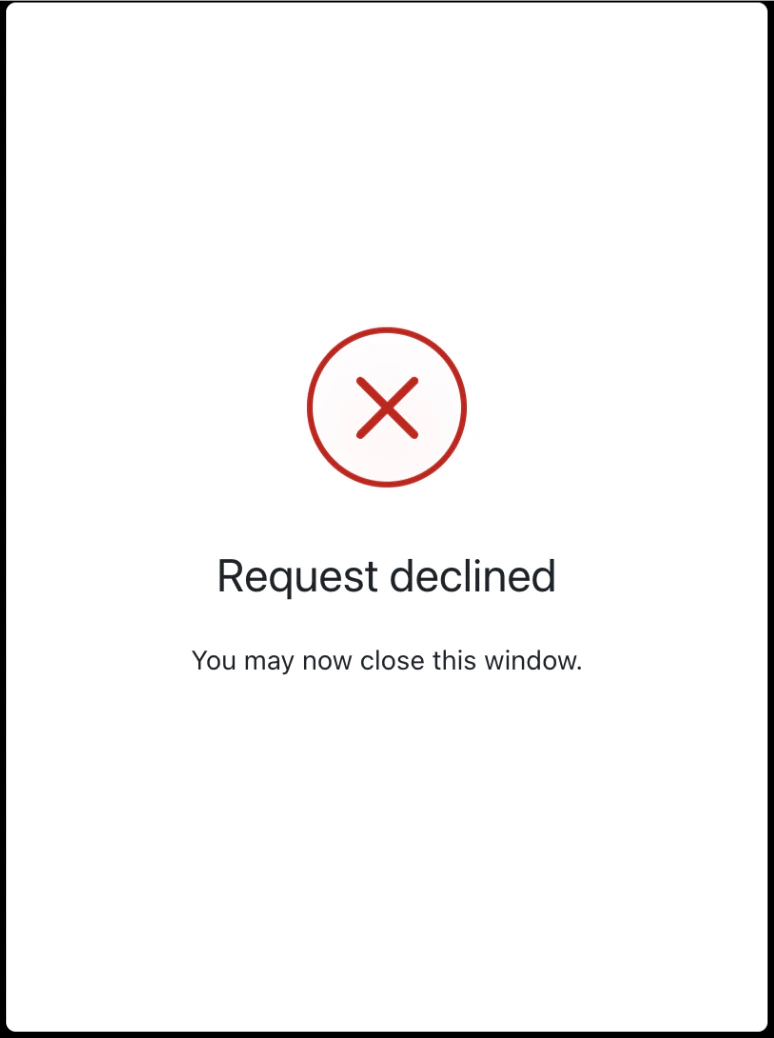
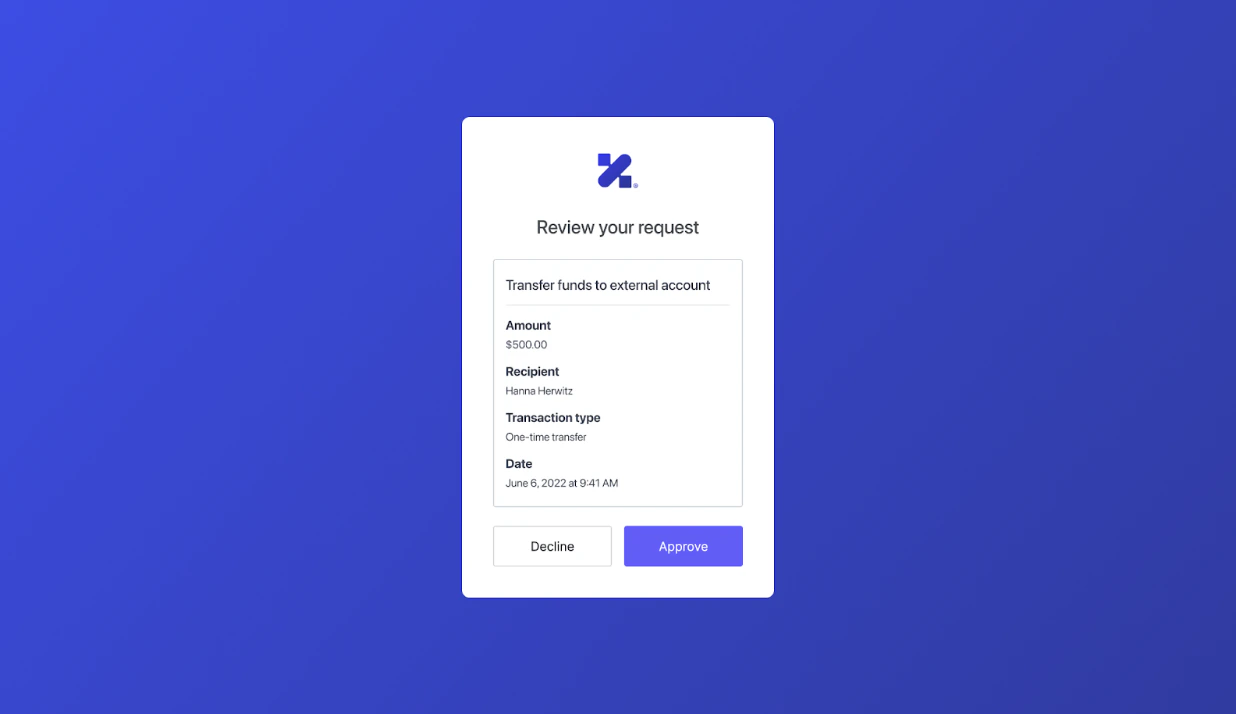 [CIBA と RAR フローでのメール通知](/ja/docs/get-started/authentication-and-authorization-flow/client-initiated-backchannel-authentication-flow/email-notifications-with-ciba)では、ユーザーに承認画面または拒否画面を表示するため、consent プロンプトをカスタマイズする必要があります。
 consent プロンプトのカスタマイズ方法について詳しくは、次を参照してください。
* [Universal Login ページをカスタマイズする](/ja/docs/customize/login-pages/universal-login/customize-templates)
* [ノーコードエディターで Universal Login をカスタマイズする](/ja/docs/customize/login-pages/universal-login/customize-themes)
* [プロンプト API ドキュメント用の partials を設定する](/ja/docs/api/management/v2/prompts/put-partials)
consent プロンプトのカスタマイズ方法について詳しくは、次を参照してください。
* [Universal Login ページをカスタマイズする](/ja/docs/customize/login-pages/universal-login/customize-templates)
* [ノーコードエディターで Universal Login をカスタマイズする](/ja/docs/customize/login-pages/universal-login/customize-themes)
* [プロンプト API ドキュメント用の partials を設定する](/ja/docs/api/management/v2/prompts/put-partials)
## 任意: リソースサーバーの同意ポリシーを設定する
リソースサーバーの同意ポリシーでは、Auth0 が `authorization_details` の値を保存し、プッシュ通知の送信時にモバイルアプリケーションで利用できるようにするかどうかを決定します。
`authorization_details` を含むリクエストに対する Auth0 の標準同意ポリシーの動作を確認してください。
| Flow | Push notification sent | Behavior |
| -------------------------------- | ---------------------- | ----------------------------------------------------------------------------------------------------------------------------------------------------------------------------------------------------------------------------------------------------------------------------------------------------------------------------------------------------------------------------------------------------------------------------------------------------------------------------------------------------------- |
| Any | No | カスタマイズされた同意プロンプトが表示されます。 |
| Authorization Code Flow with PAR | Yes | 同意プロンプトは表示されません。プッシュ通知チャレンジを受信するモバイルアプリケーション側で同意を表示する必要があります。
Auth0 Guardian アプリを使用している場合、`authorization_details` は自動的にユーザーに表示されます。
カスタムモバイルアプリを使用している場合は、Auth0 Guardian SDK を使用して `authorization_details` を取得できます。 |
| クライアント主導バックチャネル認証フロー | Yes | CIBA リクエストの認可に Auth0 Guardian アプリ を使用している場合、`authorization_details` は自動的に取得されて表示されます。
CIBA リクエストの認可にカスタムモバイルアプリを使用している場合は、Auth0 Guardian SDK を使用して `authorization_details` を取得できます。
CIBA リクエストを Web リンク (たとえばメール内のリンク) で認可する場合は、カスタマイズされた同意プロンプトが表示されます。
ユーザーが Web リンクで承認している CIBA リクエストに対して、顧客は第 2 認証要素としてプッシュ通知をトリガーすることもできます。この場合の動作は上記と同じです。Auth0 Guardian アプリ では `authorization_details` が再度自動的にユーザーに表示され、カスタムモバイルアプリでは必要に応じて Auth0 Guardian SDK を使用して `authorization_details` を取得できます。 |
`consent_policy` を `transactional-authorization-with-mfa` に設定することもできます。この場合の動作は次のとおりです。
| Flow | Push notification sent | Behaviour |
| -------------------------------- | ---------------------- | ------------------------------------------------------------------------------------------------------------------------------------------------------------------------------------------------------------------------------------------------------------------------------------------------------------------------------------------------------------------------------------------------------- |
| Authorization Code Flow with PAR | No | カスタマイズされた同意プロンプトが表示されます。 |
| Authorization Code Flow with PAR | Yes | 同意プロンプトは表示されません。顧客側のソリューションで、独自のユーザーインターフェースを使用して同意を表示する必要があります。Auth0 はリクエストに一意の ID を割り当て、`event.transaction.requested_authorization_details` とともに `event.transaction.linking_id` として Post-Login Action に渡します。
Auth0 Guardian アプリを使用している場合、`authorization_details` は表示されません。
カスタムモバイルアプリを使用している場合、プッシュ通知には `linking_id` が含まれるため、アプリケーション開発者は必要に応じて独自の API から `authorization_details` を取得できます。 |
| クライアント主導バックチャネル認証フロー | Any | `transactional-authorization-with-mfa` 同意ポリシーでは CIBA フローはサポートされません |
リソースサーバーの同意ポリシーは、[Auth0 Dashboard](https://manage.auth0.com/) または [Management API](https://auth0.com/docs/api/management/v2) を使用して設定できます。
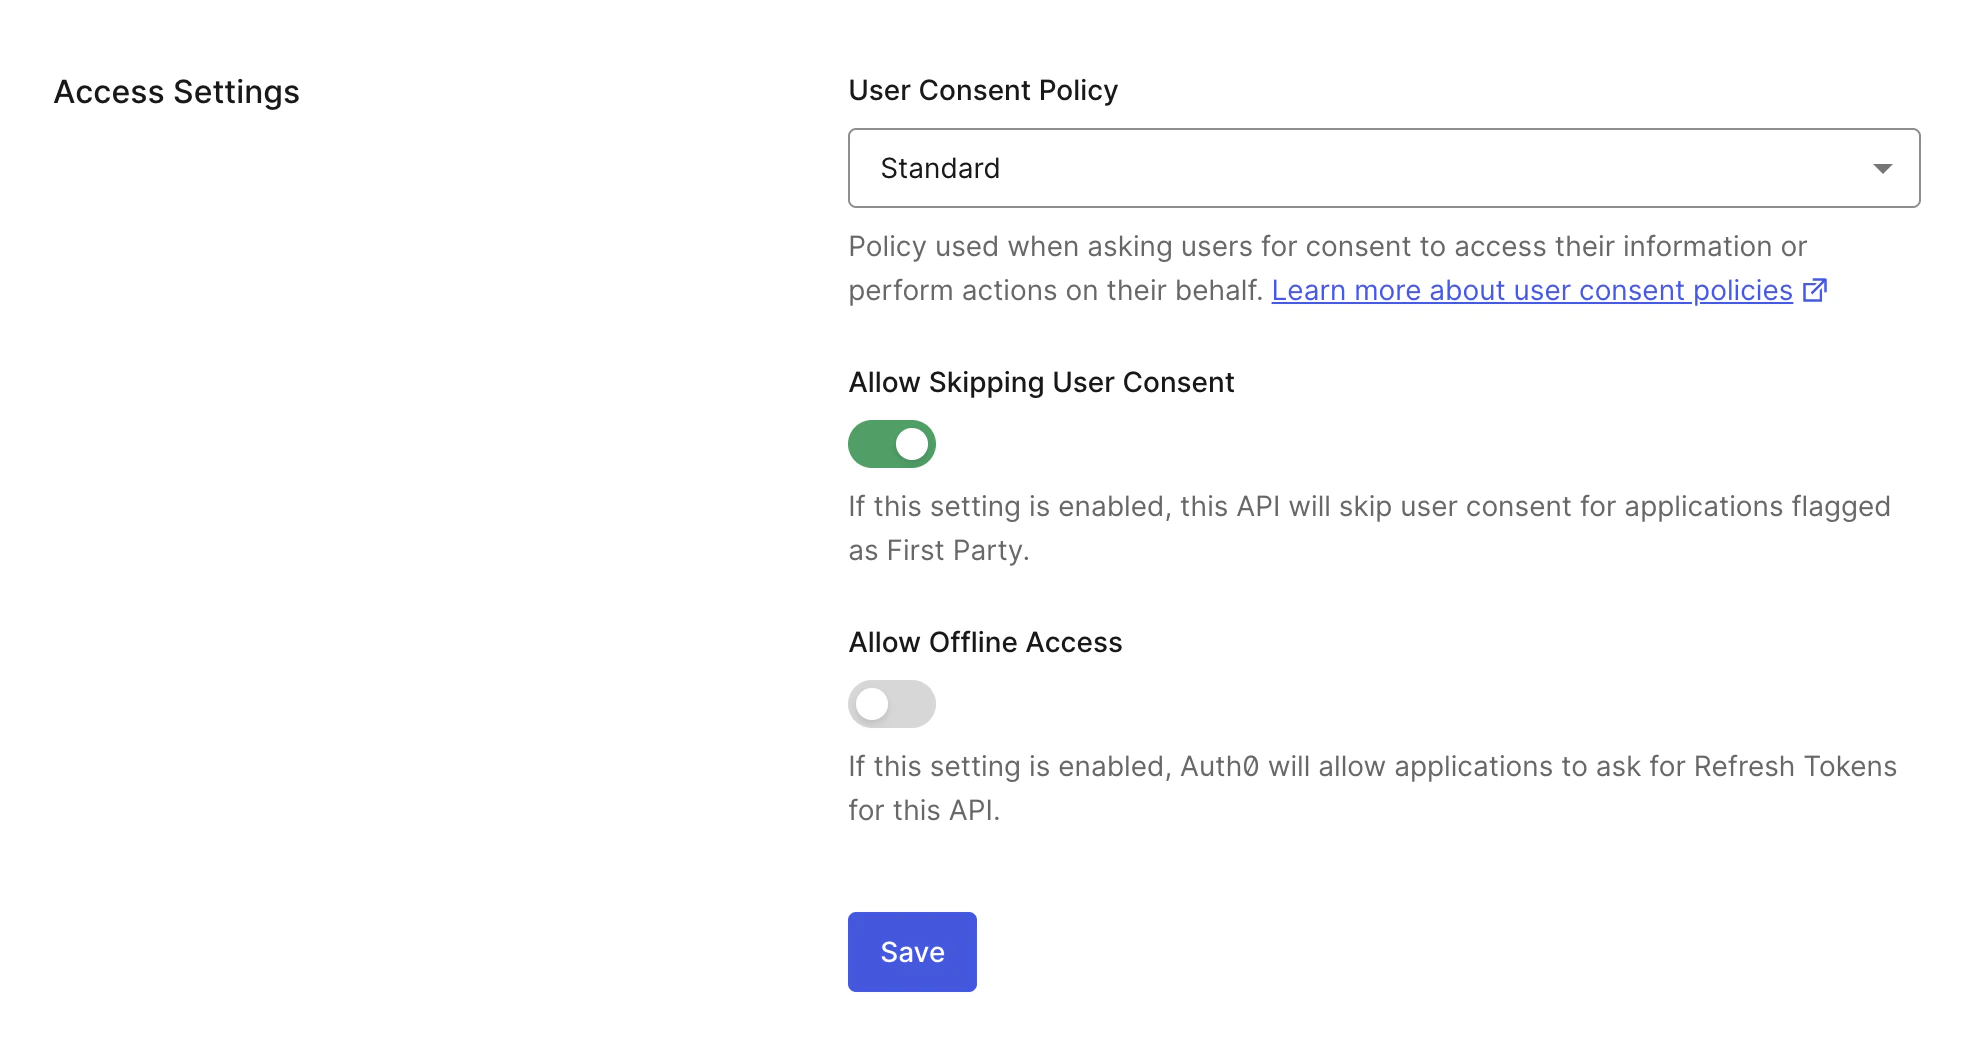
Auth0 Dashboard の API 設定で同意ポリシーを設定します。
1. [Auth0 Dashboard > Applications > APIs](https://manage.auth0.com/#/apis) に移動します。
2. **Settings** タブを選択します。
3. **Access Settings** で、**Standard** 同意ポリシーを選択します。
4. 変更を保存します。
 Management API を使用してリソースサーバーまたは API の同意ポリシーを設定するには、[Update a resource server](https://auth0.com/docs/api/management/v2/resource-servers/patch-resource-servers-by-id) エンドポイントに `PATCH` リクエストを送信します。`PATCH` リクエストで `consent_policy` を `standard` に設定します。
```bash wrap lines theme={null}
curl --location --request PATCH 'https://$tenant/api/v2/resource-servers/$resource-server-id' \
--header 'Authorization: Bearer $management_access_token' \
--header 'Content-Type: application/json' \
--data-raw '{ "consent_policy": "standard" }'
```
Management API を使用してリソースサーバーまたは API の同意ポリシーを設定するには、[Update a resource server](https://auth0.com/docs/api/management/v2/resource-servers/patch-resource-servers-by-id) エンドポイントに `PATCH` リクエストを送信します。`PATCH` リクエストで `consent_policy` を `standard` に設定します。
```bash wrap lines theme={null}
curl --location --request PATCH 'https://$tenant/api/v2/resource-servers/$resource-server-id' \
--header 'Authorization: Bearer $management_access_token' \
--header 'Content-Type: application/json' \
--data-raw '{ "consent_policy": "standard" }'
```