> ## Documentation Index
> Fetch the complete documentation index at: https://translations.mintlify.site/llms.txt
> Use this file to discover all available pages before exploring further.
> アプリケーション向けに JWT で保護された認可リクエスト(JAR)を設定する方法を説明します。
# JWT で保護された認可リクエスト(JAR)の設定
export const AuthCodeBlock = ({filename, icon, language, highlight, children}) => {
const [displayText, setDisplayText] = useState(children);
const [copyText, setCopyText] = useState(children);
const wrapperRef = React.useRef(null);
useEffect(() => {
let unsubscribe = null;
function init() {
if (!window.autorun || !window.rootStore) {
return;
}
unsubscribe = window.autorun(() => {
let processedChildrenForDisplay = children;
let processedChildrenForCopy = children;
for (const [key, value] of window.rootStore.variableStore.values.entries()) {
const escapedKey = key.replaceAll(/[.*+?^${}()|[\]\\]/g, (String.raw)`\$&`);
let displayValue = value;
if (key === "{yourClientSecret}" && value !== "{yourClientSecret}") {
displayValue = value.substring(0, 3) + "*****マスク済み*****";
}
processedChildrenForDisplay = processedChildrenForDisplay.replaceAll(new RegExp(escapedKey, "g"), displayValue);
processedChildrenForCopy = processedChildrenForCopy.replaceAll(new RegExp(escapedKey, "g"), value);
}
setDisplayText(processedChildrenForDisplay);
setCopyText(processedChildrenForCopy);
});
}
if (window.rootStore) {
init();
} else {
window.addEventListener("adu:storeReady", init);
}
return () => {
window.removeEventListener("adu:storeReady", init);
unsubscribe?.();
};
}, [children]);
useEffect(() => {
if (!wrapperRef.current) return;
const originalWriteText = navigator.clipboard.writeText.bind(navigator.clipboard);
let isOverriding = false;
const handleClick = e => {
const button = e.target.closest('[data-testid="copy-code-button"]');
if (!button || !wrapperRef.current.contains(button)) return;
isOverriding = true;
navigator.clipboard.writeText = text => {
if (isOverriding) {
isOverriding = false;
navigator.clipboard.writeText = originalWriteText;
return originalWriteText(copyText);
}
return originalWriteText(text);
};
setTimeout(() => {
if (isOverriding) {
isOverriding = false;
navigator.clipboard.writeText = originalWriteText;
}
}, 100);
};
const wrapper = wrapperRef.current;
wrapper.addEventListener('click', handleClick, true);
return () => {
wrapper.removeEventListener('click', handleClick, true);
if (navigator.clipboard.writeText !== originalWriteText) {
navigator.clipboard.writeText = originalWriteText;
}
};
}, [copyText]);
return
{displayText}
;
};
export const codeExample1 = `POST https://{yourTenant}.auth0.com/api/v2/clients/{yourClientId}/credentials
Authorization: Bearer
Content-Type: application/json
{
"name": "JAR 向けの認証情報",
"credential_type": "public_key",
"pem": "[YOUR PEM FILE CONTENT]",
"alg": "RS256"
}`;
export const codeExample2 = `PATCH https://{yourTenant}.auth0.com/api/v2/clients/{yourClientId}
Authorization: Bearer
Content-Type: application/json
{
"signed_request_object": {
"credentials": [{"id": "[YOUR CREDENTIAL ID]"}]
}
}`;
Highly Regulated Identity 機能を使用するには、Highly Regulated Identity アドオンを含む Enterprise Plan が必要です。詳しくは、[Auth0 Pricing](https://auth0.com/pricing/) を参照してください。
JWT-Secured Authorization Requests (JAR) では、OAuth2 の認可リクエストパラメーターを単一の JWT リクエストパラメーターにまとめ、完全性を保護するために署名できます。
## 前提条件
アプリケーションで JAR を使用するように設定する前に、[RSA キーペアを生成](/ja/docs/secure/application-credentials/generate-rsa-key-pair)する必要があります。
認証情報の用途ごとに、個別のキーペアを生成してください。たとえば、JAR と Private Key JWT Authentication の両方に同じキーペアを再利用しないでください。
## アプリケーション用のJARを設定する
Auth0 Dashboard と Management API を使用して、アプリケーション用のJARを設定できます。
Auth0 Dashboard を使用して、事前に生成した RSA キーで JAR を使用するようアプリケーションを設定します。
1. [Auth0 Dashboard > Applications](https://manage.auth0.com/#/applications) に移動します。
2. JAR で使用するアプリケーションを選択します。
3. **Application Settings** タブを選択します。
4. **Authorization Requests** セクションで、**Require JWT-Secured Authorization Requests** を有効にします。
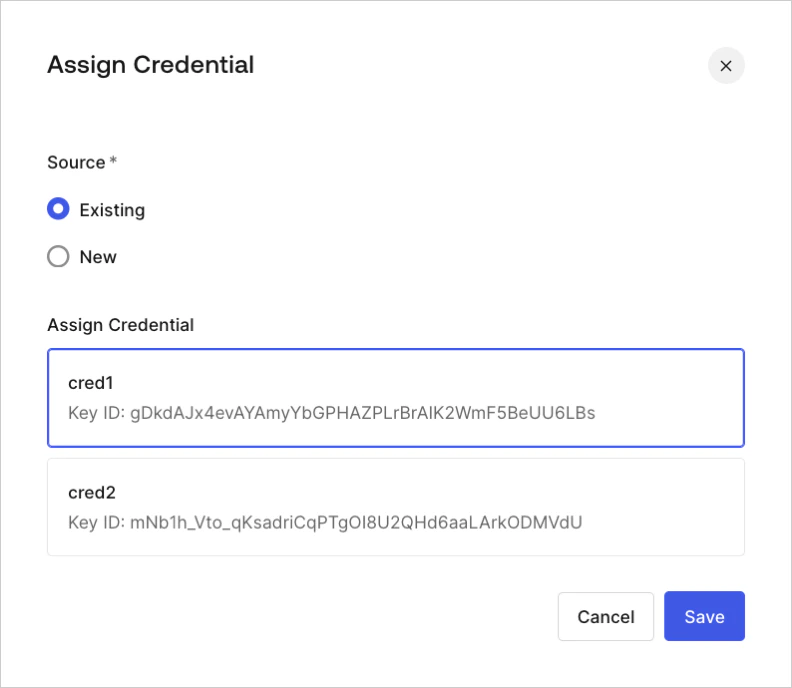
5. 認証情報が割り当てられておらず、利用可能な認証情報がある場合は、既存の認証情報を割り当てるよう求められます。
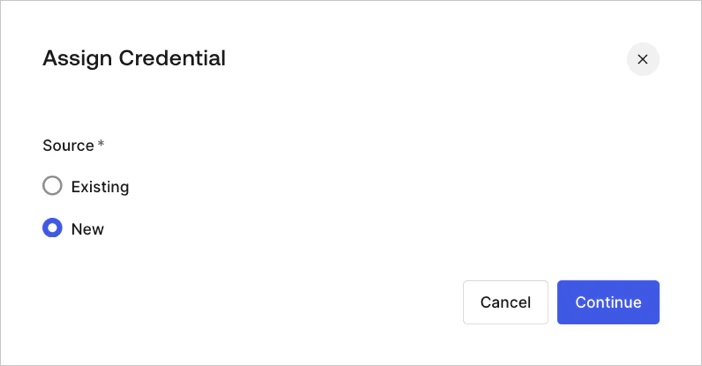
 6. 新しい認証情報を割り当てることもできます。
 7. 事前に生成した RSA キーペアをアップロードして、新しい認証情報を追加し、割り当てます。求められたら、次の内容を入力します。
* **Name**: 認証情報を識別するための名前
* **Public Key**: PEM 形式の X.509 証明書の公開鍵
* **Algorithm**: JAR の署名アルゴリズムを選択します
* **Expiration Date**: 認証情報の有効期限を設定します
[Management API](https://auth0.com/docs/api/management/v2) を使用して、`signed_request_object` クライアント設定プロパティでアプリケーションの JAR を設定します。このオブジェクトプロパティには、次のフィールドが含まれます。
* `required`: `/authorize` および `/oauth/par` へのすべての認可リクエストで JAR を必須にします。詳細は、[Authorization Code Flow with JWT-Secured Authorization Requests](/ja/docs/get-started/authentication-and-authorization-flow/authorization-code-flow/authorization-code-flow-with-jar) を参照してください。
* `credentials`: 署名の検証に使用する認証情報 ID の配列です。
credentials パラメーターは、Private Key JWT パラメーター `client_authentication_methods.private_key_jwt.credentials` と同様の動作をし、新しいアプリケーションの作成時に認証情報の作成をサポートします。詳細は、[Configure Private Key JWT](/ja/docs/get-started/applications/configure-private-key-jwt) を参照してください。
Management API を使用すると、新しいアプリケーションまたは既存のアプリケーションに対して JAR を設定できます。
#### 新しいアプリケーションの JAR を設定する
新しいアプリケーションを作成する際は、`signed_request_object` を含む POST リクエストを送信して JAR を設定します。この POST リクエストでは、対応するクライアント認証情報 (つまりキー PEM) も登録できます。
```json lines theme={null}
POST https://{yourTenant}.auth0.com/api/v2/clients
Authorization: Bearer
Content-Type: application/json
{
"name": "My App using JAR",
"signed_request_object": {
"required": true,
"credentials": [{
"name": "My credential for JAR",
"credential_type": "public_key",
"pem": "[YOUR PEM FILE CONTENT]",
"alg": "RS256"
}]
},
"jwt_configuration": {
"alg": "RS256"
}
}
```
#### 既存のアプリケーションの JAR を設定する
既存のアプリケーションを更新する場合は、まずクライアント認証情報を明示的に作成する必要があります。次の POST リクエストでは、PEM ファイルの内容を使用して JAR 用のクライアント認証情報を作成します。
改行が適切に JSON エンコードされ、追加の書式設定が含まれていないことを確認してください。
次に、クライアント認証情報を `signed_request_object` クライアント設定に割り当てます。次の PATCH リクエストでは、クライアント認証情報を `signed_request_object` に関連付けます。
7. 事前に生成した RSA キーペアをアップロードして、新しい認証情報を追加し、割り当てます。求められたら、次の内容を入力します。
* **Name**: 認証情報を識別するための名前
* **Public Key**: PEM 形式の X.509 証明書の公開鍵
* **Algorithm**: JAR の署名アルゴリズムを選択します
* **Expiration Date**: 認証情報の有効期限を設定します
[Management API](https://auth0.com/docs/api/management/v2) を使用して、`signed_request_object` クライアント設定プロパティでアプリケーションの JAR を設定します。このオブジェクトプロパティには、次のフィールドが含まれます。
* `required`: `/authorize` および `/oauth/par` へのすべての認可リクエストで JAR を必須にします。詳細は、[Authorization Code Flow with JWT-Secured Authorization Requests](/ja/docs/get-started/authentication-and-authorization-flow/authorization-code-flow/authorization-code-flow-with-jar) を参照してください。
* `credentials`: 署名の検証に使用する認証情報 ID の配列です。
credentials パラメーターは、Private Key JWT パラメーター `client_authentication_methods.private_key_jwt.credentials` と同様の動作をし、新しいアプリケーションの作成時に認証情報の作成をサポートします。詳細は、[Configure Private Key JWT](/ja/docs/get-started/applications/configure-private-key-jwt) を参照してください。
Management API を使用すると、新しいアプリケーションまたは既存のアプリケーションに対して JAR を設定できます。
#### 新しいアプリケーションの JAR を設定する
新しいアプリケーションを作成する際は、`signed_request_object` を含む POST リクエストを送信して JAR を設定します。この POST リクエストでは、対応するクライアント認証情報 (つまりキー PEM) も登録できます。
```json lines theme={null}
POST https://{yourTenant}.auth0.com/api/v2/clients
Authorization: Bearer
Content-Type: application/json
{
"name": "My App using JAR",
"signed_request_object": {
"required": true,
"credentials": [{
"name": "My credential for JAR",
"credential_type": "public_key",
"pem": "[YOUR PEM FILE CONTENT]",
"alg": "RS256"
}]
},
"jwt_configuration": {
"alg": "RS256"
}
}
```
#### 既存のアプリケーションの JAR を設定する
既存のアプリケーションを更新する場合は、まずクライアント認証情報を明示的に作成する必要があります。次の POST リクエストでは、PEM ファイルの内容を使用して JAR 用のクライアント認証情報を作成します。
改行が適切に JSON エンコードされ、追加の書式設定が含まれていないことを確認してください。
次に、クライアント認証情報を `signed_request_object` クライアント設定に割り当てます。次の PATCH リクエストでは、クライアント認証情報を `signed_request_object` に関連付けます。
## 詳しく見る
* [JWT で保護された認可リクエスト (JAR) を使用する Authorization Code Flow](/ja/docs/get-started/authentication-and-authorization-flow/authorization-code-flow/authorization-code-flow-with-jar)