カスタムフィールドを使用すると、フォームの外観や操作感を拡張し、JavaScript、HTML、CSS を使って高度なロジックを追加できます。
カスタムフィールドには、フォームへのデータの受け渡し、フロントエンドとバックエンドのバリデーションの追加、focus や blur などの一般的なイベントの処理を容易にする内部メソッドが用意されています。
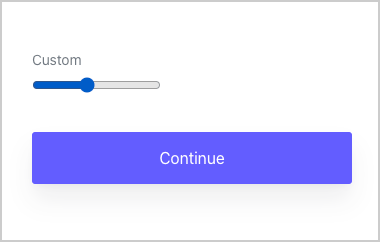
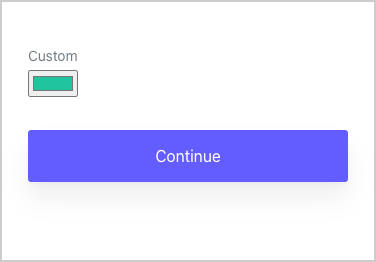
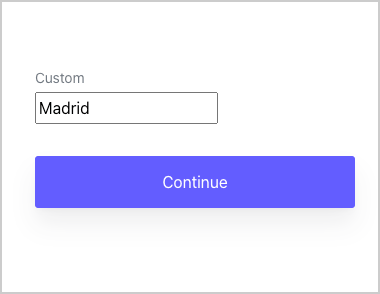
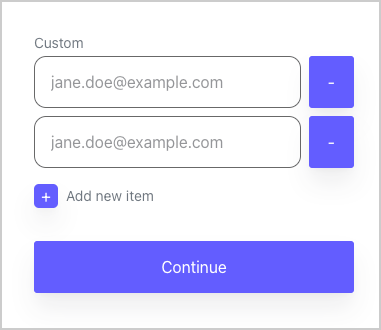
カスタムフィールドを使用すると、次のようなものを作成できます。
-
カスタムのデータ構造を持つフィールド。
-
サードパーティのウィジェットを使用するフィールド。
- 例: Google Address autocomplete
-
他のフィールドの表示/非表示を切り替えるロジックを持つフィールド。
-
値の取得に外部 API が必要なフィールド。
カスタムフィールドを使用するには、カスタムドメインを有効にする必要があります。カスタムドメイン外でカスタムフィールドを含むフォームをレンダリングすると、エラーが表示されます。
カスタムフィールド設定は次のとおりです。
カスタムフィールドのソースコードで参照するキーと値のペアを追加します。キーと値のペアには、フォームフィールドの変数を含めることができます。
Param の値は、フォームで init() メソッドが呼び出された後でのみ利用できます。
例:
以下の例では、カスタムフィールドの param 設定に、
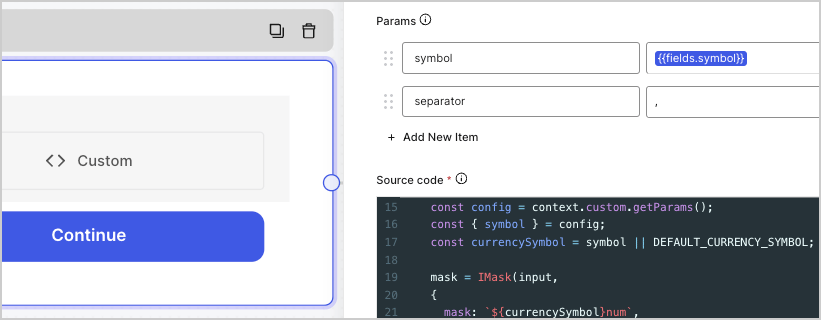
symbol={{fields.symbol}} と separator=, というキーと値のペアが設定されています。
function CustomComponent(context) {
const input = document.createElement('input');
let mask = null;
function mountComponent() {
/** getParams() メソッドは、入力フィールドに設定したパラメータを返します */
const config = context.custom.getParams();
const { symbol, separator } = config;
mask = IMask(input,
{
mask: `${symbol}num`,
blocks: {
num: {
mask: Number,
thousandsSeparator: separator,
}
}
});
}
return {
/** フィールドの作成時に一度だけ呼び出されます */
init() {
mountComponent();
return input;
},
...
};
}
カスタムフィールドにJavaScriptコードを追加します。
例:
function customInput() {
const input = document.createElement('input');
input.type = 'text';
return {
init() {
return input;
},
block() {
input.disabled = true;
},
unblock() {
input.disabled = false;
},
getValue() {
return input.value;
}
};
}
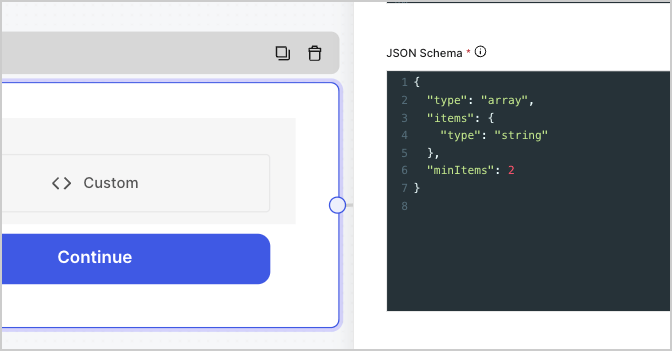
デフォルトでは、カスタムフィールドはどのような形式の値でも受け付けます。ただし、値をサーバー側で検証するために JSON Schema を使用できます。
例:
{
"type": "array",
"items": {
"type": "string"
},
"minItems": 2
}
複雑なバリデーション要件に対応するには、flowを使用できます。
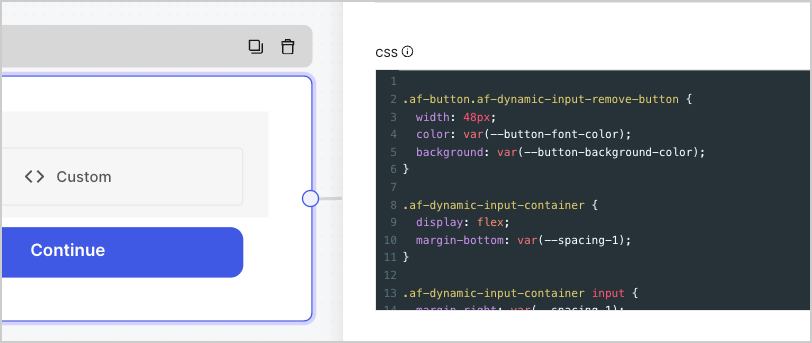
カスタムフィールドに CSS を追加します。
これらのハンドラーを使用すると、フィールドにカスタムの動作を追加できます。
フィールドの作成時に一度だけ呼び出され、Params 設定で構成した params の値が渡されます。
HTML 要素、文字列、または何も返しません。
例:
const input = document.createElement('input');
input.type = 'text';
init() {
return input;
}
ユーザーが同じフォームステップに再度アクセスしたときに呼び出されます。
このオプションは、UI ロジックを再レンダリングする必要がある場合や、変更されている可能性のある params の値を更新する必要がある場合に便利です。
フォーカスがカスタムフィールドのHTML要素に入ると呼び出されます。
カスタムフィールドの HTML 要素からフォーカスが外れたときに呼び出されます。
フォームがカスタムフィールドの値を1回以上取得する必要がある場合に呼び出されます。通常は、ユーザーがフォームステップを送信したときに実行されます。クライアント側のバリデーションを行う必要がある場合は、エラーをスローすることで、ユーザーにカスタムエラーメッセージを表示できます。
例:
function customTextInput() {
const input = document.createElement('input');
input.type = 'text';
return {
init() {
return input;
},
getValue() {
if (input.value !== 'Auth0') {
throw new Error('The value must be Auth0')
}
return input.value;
}
};
}
カスタムフィールドをブロックする必要がある場合に呼び出されます。通常は、ユーザーがフォームステップを送信し、そのデータがバックエンドで処理されている間に実行されます。
カスタムフィールドのブロックを解除する必要がある場合に呼び出されます。通常は、ユーザーがフォームステップを送信した後、または検証エラーによりバックエンド側でのデータ処理が停止した後に実行されます。
フォームが init() メソッドを呼び出す前に、読み込みが完了していることが保証される URL の一覧を返します。
例:
getScripts() {
return ['https://example.com/script_a.js', 'https://example.com/script_b.js'];
}
コンテキストオブジェクトを渡す場合は、これらのメソッドを使用してフォームやコンポーネント内のロジックを処理できます。
context.custom.getValue()
現在のカスタムフィールドの値を返します。
context.custom.setValue()
現在のカスタムフィールドに値をセットします。
例:
function customInput(context) {
const input = document.createElement('input');
input.type = 'text';
input.addEventListener('change', () => {
context.custom.setValue(input.value);
});
return {
init() {
return input;
},
};
}
context.custom.createUid()
現在のカスタムフィールドに対する一意の識別子を返します。
例:
function customInput(context) {
const input = document.createElement('input');
input.type = 'text';
input.id = context.custom.createUid();
return {
init() {
return input;
},
getValue() {
return input.value;
}
};
}
context.custom.getParams()
現在のカスタムフィールド設定のパラメータを取得します。
パラメータ値は、フォームで init() メソッドが呼び出された後でのみ利用できます。
例:
function customInput(context) {
// 関数のルートでパラメータにアクセスしても動作しません
// const { defaultValue } = context.custom.getParams();
// console.log(defaultValue); // undefined
function buildInput() {
const { defaultValue } = context.custom.getParams();
const input = document.createElement('input');
input.type = 'text';
input.value = defaultValue;
return input;
}
return {
init() {
return buildInput();
},
getValue() {
return input.value;
}
};
}
他のフィールドの値を取得したり、フォーム内の別のステップに移動したりするためにフォームを操作する必要がある場合は、次のフォームメソッドを使用できます。
現在のフォームの一意の識別子を返します。
現在のフォームのルートとなるHTML要素を返します。
フォームの次のステップに進みます。
context.form.goPrevious()
前のフォームステップに移動します。
フォームがすべてのクライアント側のバリデーションに合格しているかどうかを、ブール値で返します。
続行する前に、既存のフィールド値に対してクライアント側でバリデーションを実行します。フィールドがバリデーションを通過しない場合は、エラーメッセージが表示されます。
context.form.getAllHiddenFields()
すべての非表示フィールドの値を格納したオブジェクトを返します。
context.form.setHiddenField(id, value)
非表示フィールドの値を設定します。
| パラメータ | 説明 |
|---|
id | String。非表示フィールドの ID。 |
value | String。非表示フィールドの値。 |
すべてのフィールドと非表示フィールドの値を含むオブジェクトを返します。
context.form.getField(id)
指定したフィールドのインスタンスを返します。
getNode() | true フィールドのルート HTML 要素を返します。
getValue() フィールドの値を返します。
setRequired(boolean) フィールドを必須に設定または解除します。
| Parameter | Description |
|---|
id | *String *. フィールドの ID 値。 |
例:
const fullName = context.form.getField('full_name');
const fullNameValue = fullName.getValue();
console.log(fullNameValue); // 山田太郎
setRequired() は、クライアント側でフィールドを必須に設定または解除するだけです。たとえば、あるフィールドの必須設定を解除しても、フィールド設定でそのフィールドが必須としてマークされている場合、値が入力されていなければフォームはエラーを返します。
以下のセクションでは、フォームに追加できるカスタムフィールドの例を示します。
あらかじめ定義された範囲内の値を返すカスタムフィールドです。
ソースコード:
function rangeInput() {
const input = document.createElement('input');
input.type = 'range';
input.min= '0';
input.max= '100';
input.value = '0';
return {
init() {
return input;
},
getValue() {
return input.value;
}
};
}
色の16進数値を返すカスタムフィールドです。
ソースコード:
function colorInput() {
const input = document.createElement('input');
input.type = 'color';
input.value = '#20c5a0';
return {
init() {
return input;
},
getValue() {
return input.value;
},
};
}
サードパーティ API を使用してオートコンプリートの値を返すカスタムフィールドです。
ソースコード:
function textInputWithAutocomplete(context) {
const input = document.createElement('input');
input.type = 'text';
function populateInputValue(json) {
const { city } = json;
input.value = city;
}
function fetchIpInfo() {
const url = 'https://ipinfo.io/json';
fetch(url)
.then((res) => res.json())
.then((json) => populateInputValue(json));
}
return {
init() {
fetchIpInfo();
return input;
},
getValue() {
return input.value;
},
};
}
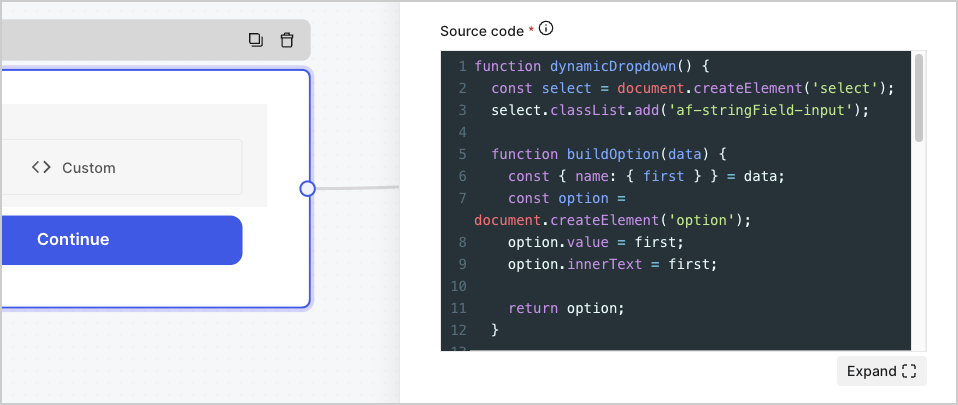
API の値を使用する動的なドロップダウン カスタムフィールド
サードパーティ API を使用して、動的なドロップダウン リストから値を返すカスタムフィールドです。
ソースコード:
function dynamicDropdown() {
const select = document.createElement('select');
select.classList.add('af-stringField-input');
function buildOption(data) {
const { name: { first } } = data;
const option = document.createElement('option');
option.value = first;
option.innerText = first;
return option;
}
function populateNames(json) {
const { results } = json;
results.forEach((o) => {
const option = buildOption(o);
select.appendChild(option);
});
}
function fetchNames() {
const url = 'https://randomuser.me/api/?results=10&inc=name';
fetch(url)
.then((res) => res.json())
.then((json) => populateNames(json));
}
return {
init() {
fetchNames();
return select;
},
getValue() {
return select.value;
},
};
}
ユーザーがフィールドをさらに追加できるカスタムフィールドです。
ソースコード:
function DynamicInputs(context) {
const DEFAULT_INITIAL_INPUTS = 2;
const DEFAULT_PLACEHOLDER = 'jane.doe@example.com';
const DEFAULT_ADD_BUTTON_TEXT = 'Add new item';
const DEFAULT_INPUT_TYPE = 'email';
const STATE_VALUE = {};
const FIELD_ID = context.custom.createUid();
let UUID_COUNTER = 0;
let INPUTS_COUNTER = 0;
const container = document.createElement('div');
const inputsContainer = document.createElement('div');
container.appendChild(inputsContainer);
function buildAddNewItem() {
const config = context.custom.getParams();
const { add_button_text } = config;
const ADD_BUTTON_TEXT = add_button_text || DEFAULT_ADD_BUTTON_TEXT;
const addInputButton = document.createElement('button');
addInputButton.type = 'button';
addInputButton.classList.add('af-dynamic-input-add-button');
addInputButton.id = `${FIELD_ID}_add-input-button`;
addInputButton.onclick = buildInputContainer.bind(this);
const addInputButtonIcon = document.createElement('span');
addInputButtonIcon.classList.add('af-button', 'af-dynamic-input-add-button-icon');
addInputButtonIcon.innerText = '+';
const addInputButtonText = document.createElement('span');
addInputButtonText.classList.add('af-dynamic-input-add-button-text');
addInputButtonText.innerText = ADD_BUTTON_TEXT;
addInputButton.appendChild(addInputButtonIcon);
addInputButton.appendChild(addInputButtonText);
container.appendChild(addInputButton);
}
function removeInput(container, input) {
delete STATE_VALUE[input.name];
container.remove();
}
function buildRemoveInputButton(container, input) {
const button = document.createElement('button');
button.type = 'button';
button.classList.add('af-button', 'af-dynamic-input-remove-button');
button.innerText = '-';
button.onclick = removeInput.bind(this, container, input);
INPUTS_COUNTER--;
return button;
}
function buildInput() {
const config = context.custom.getParams();
const { placeholder, input_type } = config;
const PLACEHOLDER = placeholder || DEFAULT_PLACEHOLDER;
const INPUT_TYPE = input_type || DEFAULT_INPUT_TYPE;
const input = document.createElement('input');
input.type = INPUT_TYPE;
input.placeholder = PLACEHOLDER;
input.classList.add('af-stringField-input');
input.name = `${FIELD_ID}_${UUID_COUNTER}`;
input.id = input.name;
input.addEventListener('change', () => {
STATE_VALUE[input.name] = input.value;
});
UUID_COUNTER++;
return input;
}
function buildInputContainer() {
const container = document.createElement('div');
container.classList.add('af-dynamic-input-container');
const input = buildInput();
container.appendChild(input);
const removeButton = buildRemoveInputButton(container, input);
container.appendChild(removeButton);
inputsContainer.appendChild(container);
INPUTS_COUNTER++;
}
function initComponent() {
const config = context.custom.getParams();
const { initial_inputs } = config;
const INITIAL_INPUTS = initial_inputs || DEFAULT_INITIAL_INPUTS;
INPUTS_COUNTER = INITIAL_INPUTS
for (let i = 0; i < INITIAL_INPUTS; i++) {
buildInputContainer();
}
}
function blockFields(value) {
const inputKeys = Object.keys(STATE_VALUE);
inputKeys.forEach((o) => {
const selector = document.getElementById(o);
selector.disabled = value;
});
}
return {
init() {
buildAddNewItem();
initComponent();
return container;
},
block() {
blockFields(true);
},
unblock() {
blockFields(false);
},
getValue() {
return Object.values(STATE_VALUE);
},
};
}
CSSコード:
.af-button.af-dynamic-input-remove-button {
width: 48px;
color: var(--button-font-color);
background: var(--button-background-color);
}
.af-dynamic-input-container {
display: flex;
margin-bottom: var(--spacing-1);
}
.af-dynamic-input-container input {
margin-right: var(--spacing-1);
}
button.af-dynamic-input-add-button {
background: none;
border: none;
padding: 0;
margin: 0;
margin-top: var(--spacing-1);
display: inline-flex;
cursor: pointer;
align-items: center;
}
.af-button.af-dynamic-input-add-button-icon {
background: var(--primary-color);
width: 24px;
padding: 0;
height: 24px;
border-radius: .3em;
display: flex;
justify-content: center;
align-items: center;
color: #fff;
margin-right: var(--spacing-1);
}
.af-dynamic-input-add-button-text {
color: var(--label-font-color);
font-size: var(--label-font-size);
}
.af-dynamic-input-add-button:focus {
outline: none;
}
.af-dynamic-input-add-button:hover .af-button {
transition: filter var(--transition-normal), box-shadow var(--transition-normal);
filter: brightness(1.1);
box-shadow: 0 0 0 var(--outline-width) var(--outline-color), 0px 4px 8px -4px var(--shadow-color), 0px 16px 24px var(--shadow-color);
}
.af-dynamic-input-add-button:focus .af-button {
box-shadow: 0 0 0 var(--outline-width) var(--outline-color), 0px 4px 8px -4px var(--shadow-color), 0px 16px 24px var(--shadow-color);
}