メインコンテンツへスキップ
Atlassian には、以下の 設定を使用します。
  1. Dashboard > Applications > Applications に移動し、新しいアプリケーションを作成するか、更新するアプリケーションの名前をクリックします。
  2. Addons タブに移動し、SAML2 Web App トグルを有効にします。
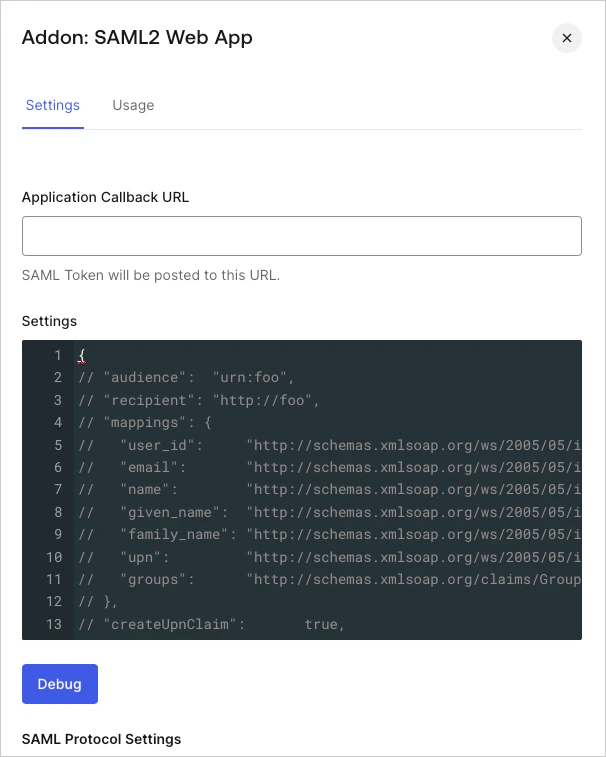
  3. Settings タブで、Atlassian Admin dashboardSP Assertion Consumer Service URLApplication Callback URL に設定します。
    Dashboard Applications Applications Addons Tab SAML2 Web App Settings Tab
  4. 次のコードを Settings テキストボックスに貼り付け、Debug をクリックします。
    {
      "mappings": {
        "user_id": "http://schemas.xmlsoap.org/ws/2005/05/identity/claims/nameidentifier",
        "given_name": "http://schemas.xmlsoap.org/ws/2005/05/identity/claims/givenname",
        "family_name": "http://schemas.xmlsoap.org/ws/2005/05/identity/claims/surname"
      },
      "nameIdentifierProbes": [
        "http://schemas.xmlsoap.org/ws/2005/05/identity/claims/emailaddress",
        "http://schemas.xmlsoap.org/ws/2005/05/identity/claims/nameidentifier",
        "http://schemas.xmlsoap.org/ws/2005/05/identity/claims/name"
      ],
      "nameIdentifierFormat": "urn:oasis:names:tc:SAML:2.0:nameid-format:email"
    }
    
  5. タブの一番下までスクロールし、Enable をクリックします。
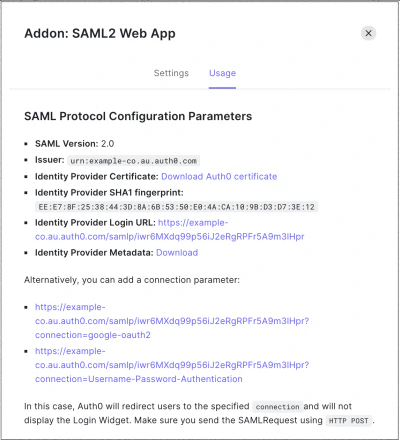
  6. Usage タブで Identity Provider Metadata を見つけて Download をクリックし、メタデータファイルをダウンロードします。このファイルは、Auth0 を IDプロバイダー (IdP) として設定するときに必要です。
    Dashboard Applications Applications Addons Tab SAML2 Web App Usage Tab